Project 3: Brochure
Styles

Did you want: Working with Words: Word 2007,2010,2013,2016 or español
Project 3: Brochure |
 Did you want: Working with Words: Word 2007,2010,2013,2016 or español | |||||
|
| ||||||
|
In the Word Basics lessons you learned how to apply paragraph and character styles. A style is a way to apply a whole set of formatting choices at once. You even formatted the Trip Planner using the styles from a template, in the AutoTools lesson AutoFormat Document. But you did not change an existing style or create a brand new style. Now you will! You can work with styles from the Formatting bar and from a set of dialogs. The bar buttons are faster, but not all your choices are on the Formatting bar. Why bother with styles?Consistency - When writing long documents or several documents you want to look alike, it is easy to forget how you formatted the various parts. Using styles makes it easy to be consistent. Saves time & effort - For
example, you could create a style that would format the company name just
right, like |
Project 3: Brochure Search Glossary | ||||||||
Types of StylesWord has several kinds of styles to help you out.
ToolsThere are several tools to use to work with styles in your document. These are explained in turn below.
Style Text BoxThe Style text box on the Formatting bar show the style of the text at the cursor location. The arrow at the right end opens a list of the styles available for you to use in the current document. Starting with Word 97, this list actually applies the style formatting to the style's name in the list .
| |||||||||
|
|
|
The illustration shows the default settings for a new Word document. The description section of the dialog will be chopped short if it is longer than will fit in this space.
![]()
![]() The Styles and
Formatting Task Pane, discussed below, replaces the Style dialog.
The Styles and
Formatting Task Pane, discussed below, replaces the Style dialog.
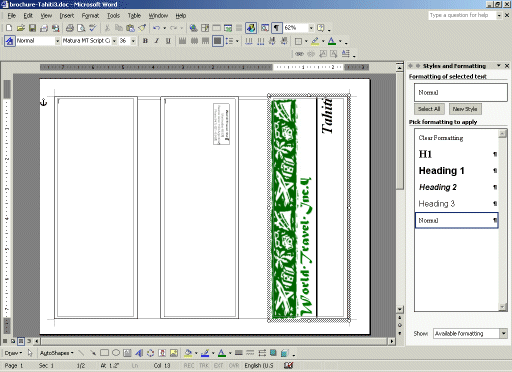
The Styles and Formatting button
![]() at the left
end of the Formatting toolbar opens the Task Pane to Styles and
Formatting. In this pane you can see the styles being used and the ones
that are in the document's template that you could use.
at the left
end of the Formatting toolbar opens the Task Pane to Styles and
Formatting. In this pane you can see the styles being used and the ones
that are in the document's template that you could use.
At the top of the pane in the box Formatting of selected text, you see an example of the formatting being used at the cursor location. Unfortunately, this feature does not work for text in a textbox.

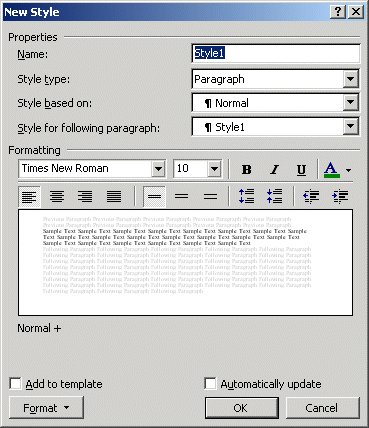
 New Style:
Clicking the
New Style button in the Task Pane opens a dialog where you can create your
own style from scratch or based on an existing style. Its initial settings
are based on the style where the cursor is.
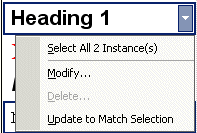
 Modify
Style:
To modify an existing style, right click on the style in
the task pane list. Choose the command from the popup menu to open up the Modify Style
dialog. (It's amazingly similar to the New Style dialog!)
Another choice on the popup menu is . That automatically changes the style to match the currently selected text. Fast and easy!
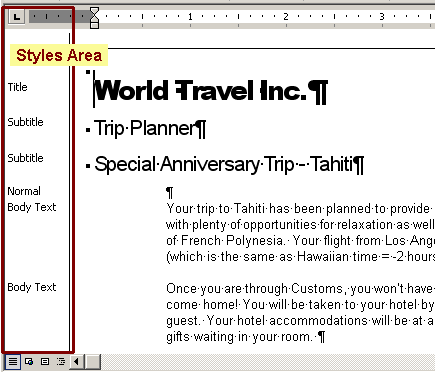
While these lessons use the Page Layout view primarily, many people like to use Normal view. In Normal view, the area to the left of the page shows what style has been applied to the text. Double-clicking the style name on the left will open the Style dialog where you can see exactly what formatting is being used. You can also modify the style from the Style dialog.

Because styles are so useful, you will first practice before applying styles to your brochure.
~~ 1 Cor. 10:31 ...whatever you do, do it all for the glory of God. ~~ |