
Jan's Working with Databases
Basics: Getting Started: Settings
Access offers a large number of settings that you can adjust. This is both wonderful and confusing. It can be hard to find a setting that you know exists!
There are two main dialogs that manage your choices for how Access itself behaves:
-
Options dialog - Main location for configuration settings.
- AutoCorrect dialog - Automatically corrects spelling or replaces short character string with a long string.
![]() If
Access does not do what the directions in these lessons say it will do, check for a
setting in the Options dialog.
If
Access does not do what the directions in these lessons say it will do, check for a
setting in the Options dialog.
Step-by-Step: Access Settings |
|
| What you will learn: | to configure with Options dialog
|
Start with: ![]() , Access
open but no database open.
, Access
open but no database open.
To look around inside Access you must first open a database or create a new one. Since the last lesson asked you to close Access, you will start by opening Access and creating a blank database.
Dialog: Options - Popular/General
The Options dialog has many choices that change the way Access behaves and there is no way to reset all of them back to the original defaults. You are, of course, free to change settings to values that suit the way you work. The illustrations and directions assume that Access is still using the default settings (or what look like the default settings on my computer!).
- Open Access with the method of your choice.
It does not matter whether you use an existing database or a new blank one. You are not going to need a database for this lesson. -
Open the Options dialog:
 Access 2007:
Office button > Access Options button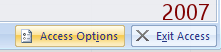


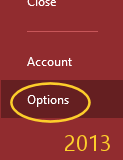
 Access 2010, 2013, 2016:
File tab > Options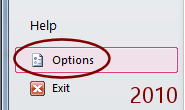
The Options dialog opens with its many pages. The dialog is very similar between Access 2007, 2010, 2013, and 2016, but not exactly the same. The first page of the dialog is called 'Popular' in Access 2007 but is called 'General' in the others.
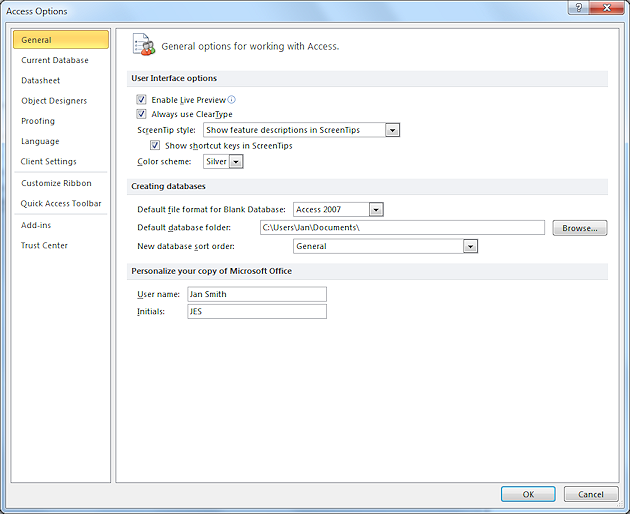
- If necessary, in the navigation list for the dialog, click on Popular or General to open that page of the dialog.
- Verify that your Options dialog matches the following:
- Enable Live Preview (Access 2010, 20, 2016) - checked
The feature lets Access show you how a formatting choice would look before you actually apply it. - Always use ClearType - checked (Access 2007, 2010)
- ScreenTip Style: Show feature descriptions in ScreenTips
- Show shortcut keys in ScreenTips - checked
- Colors or Personalize your copy of Microsoft Office:
Access 2007: Color scheme = blue
Access 2010: Color scheme = silver
Access 2013: Office Background = Clouds, Office Theme = Light Gray
Access 2016: Office Background = No background, Office theme = Colorful - Default file format for Blank Database: Access 2007 or Access 2007 - 2010 or Access 2007 - 2013 or Access 2007 - 2016. These are essentially the same file format.
- Default database folder: Will initially be the Documents folder for the current user. On your own computer, you might want to change this.
- New database sort order: General (Access 2007, 2010) or General - Legacy (default for Access 2013, 2016)
- User name = Will be the currently logged in user unless you change it here.
- Initial = Will be the currently logged in user unless you change it here
(Used when adding review comments)
- Enable Live Preview (Access 2010, 20, 2016) - checked
-
Click the Help button

 at the top right of the window.
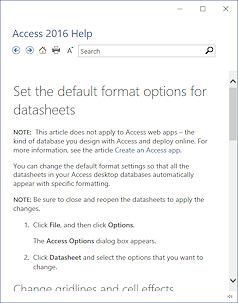
A new window appears with a page of explanations from Microsoft about the current page in the dialog.Some of the explanations raise more questions than they answer! They do not provide definitions of all the terms and they do not always explain when a certain change would be a good idea and when it's not.
The illustration shows the Help article from Office Online for Access 2010 and the same article for Access 2013. The look has certainly changed. Sometimes the contents is different, too.
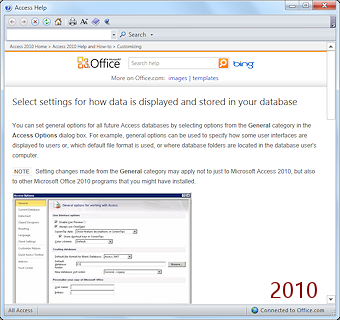
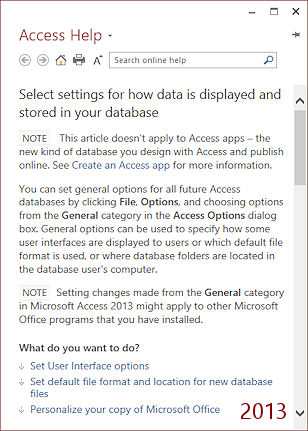
This article is also part of the installation of the program for Access 2007 and 2010. If your computer is not connected to the Internet, you will see the local copy and the window will look a bit different. But for Access 2013 and 2016 all Help articles are online only. We will look more at how Help works in various situations in the next lesson.
-
Read through the explanations about the Popular/General page.
 Changes affect other programs: Many settings on this page of the dialog will affect all other Office programs, not just Access. Be careful!
If a database is open, many changes will not take effect until you have closed and reopened the database.
Dialog: Options - Current Database
-
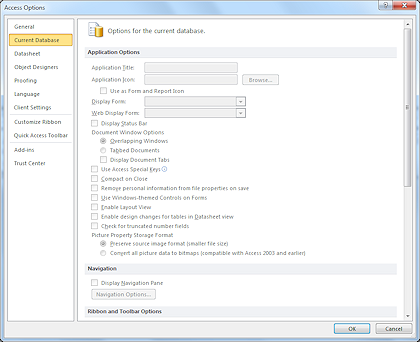 In the navigation list, click on Current Database.
If there is no database open, the choices are not available. They are in gray instead of black. -
Scroll through the list
-
Click on the Help button
to open the Help article on this page.Don't be surprised if the explanations in Help do not yet make much sense! The parts that are important to our lessons will be handled later.
The options are much the same for all four versions. Access 2007 is missing some options about SharePoint, which we will not be dealing with in this course anyway.
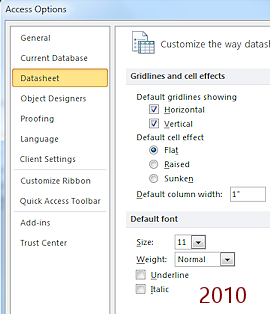
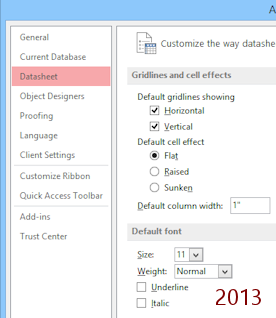
Dialog: Options - Datasheet
-
In the navigation list for the Options dialog, click on Datasheet.
There is a short list of options that affect how the rows and columns in a datasheet will look in ALL databases, unless you format a particular datasheet differently. It would be nice to have a preview on this page. Ah well. Maybe in the future. These lessons use the defaults on the Datasheet page.This time the choices are a bit different between versions. You can use the ribbon commands to make changes in a particular datasheet. Access 2013 and 2016 are the same for the Datasheet page.
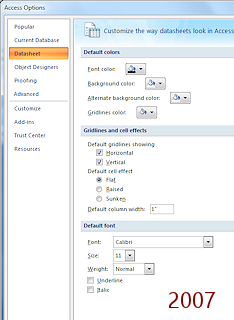
Dialog: Access Options: Datasheet
- Read the list of options.
-
 Click the Help button and read through the explanations of these options.
Changes to these settings will apply to all datasheets in all databases. That is why it is usually wiser to leave these settings alone.
Dialog: Options - Object Designers
-
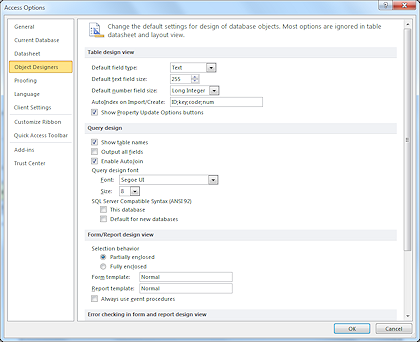 In the navigation list for the Help page, click on Object Designers.
Access 2007, 2010, 2013, and 2016 have the same choices for the Design view for tables, queries, forms, and reports.
-
Scroll and read the list of options.
-
Click the Help button
and read through the explanations of these options.
Dialog: Options: Proofing
Microsoft Office programs can automatically correct certain kinds of typing errors like two initial capitals in a word. AutoCorrect can also replace an abbreviation with longer text. In Access, AutoCorrect works in datasheet and form views only - not in Table view. This is an excellent reason to not enter data directly into a table!
In Access the AutoCorrect dialog has only 1 tab, unlike other Office programs which have several tabs for this dialog.
![]() Your
choices here will apply to all of your Office programs.
Your
choices here will apply to all of your Office programs.
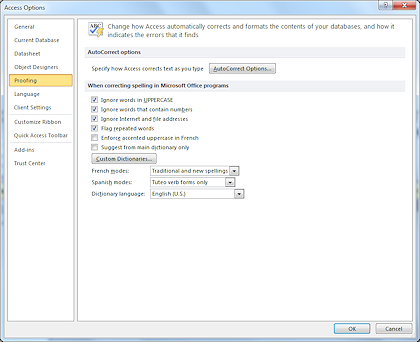 In the navigation list for the Help page, click on Proofing.
-
Verify that there is a check mark in the first four check boxes.
The installed dictionaries may be different for you. These lessons use US English.
-
Click the Help button
and read through the explanations of these options.
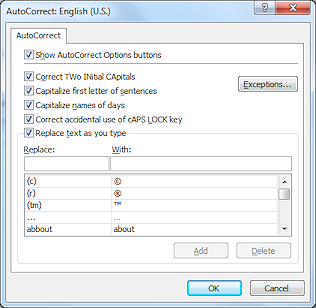
Click on the button AutoCorrect Options...
-
Verify that all check boxes are checked.
There is no Help article for this dialog in Access 2007 and 2010.
- Access 2013, 2016: Click the Help button and read through the explanations of these options.
-
Click on OK to accept and changes and close the AutoCorrect dialog.
Dialog: Options: Advanced/Client Settings
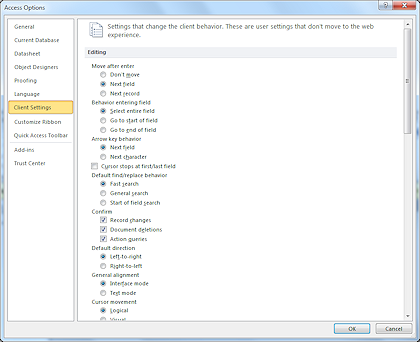 Access 2007 and 2010, 2013, 2016 have different names for this page of settings, but the almost the same content.
This is the section to look in when your database is behaving oddly.
- In the navigation list for the Help page, click on Advanced (2007) or Client Settings (2010, 2013, 2016).
- Scroll down through the long list of choices.
-
Click the Help button
and read through the explanations of these options.Differences:
Access 2007 can show a maximum of 9 Recent Files. Access 2010 can show up to 50. The default is 17. In Access 2013 aand 2016 the default is 25.
Access 2007 has a couple of choices about Macros that later versions do not have because they handle the design view for Macros in a different way.
Access 2007 has a button for Web Options which later versions do not have because they do not use data access pages at all. Instead Access 2010, 2013, and 2016 can create a 'web database'. We will not be dealing with those in these lessons.
Access 2007 does not have the choices for encryption and for setting a default theme.
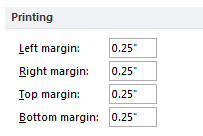 Scroll to the Printing section and verify that the margins are at the default values of 0.25" for all four margins.
-
Click on OK to close the Options dialog.
We do not need to look at the other pages at this time.
|
|
| © 1997-2017 Jan Smith All Rights Reserved |
Site Map What's New |
Privacy Policy Terms of Service Copyright Acknowledgements |
~~ 1 Cor. 10:31 ...whatever you do, do it all for the glory of God. ~~
Last updated: March 22, 2017