
Jan's Working with Databases
Forms & Reports: Forms: Form Images
The way images display is managed in the Property Sheet.
Picture Properties:
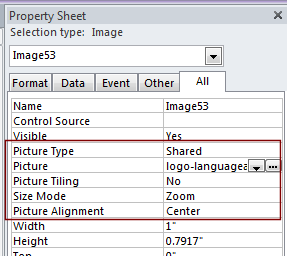 Picture Type: Embedded, Linked,


 Access 2010, 2013, 2016: Shared
- Picture: Path to the picture.
- Embedded image: (bitmap)
- Path to Linked image:
Examples:
C:\Photos\Staff\gardner.jpg
..\photos\staff\smith.jpg
http://jegsworks.com/jsmith.jpg -
Name of Shared image:
Example: logo-languagearts
- Picture Tiling: Yes or No
- Size Mode: Clip, Stretch, or Zoom (Examples below)
- Picture Alignment: Top Left, Top Right, Center, Bottom Left, Bottom Right, Form Center
The Property Sheet for the whole form or report has these properties for background image, like a texture or watermark.
Picture Size Mode
All image and attachment controls have a Size Mode property in the Property Sheet.
There
are 3 modes: Clip, Stretch, Zoom.
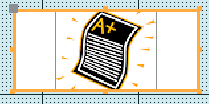
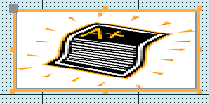
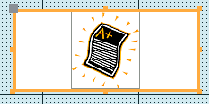
Examples, with Picture Alignment = Center:
 |
 |
 |
|
Clip Shows only what will fit in the control. |
Stretch Image is stretched or shrunk to fill the space, even if that deforms the image |
Zoom Image is enlarged or shrunk to fit into the space but the proportions remain the same. |
The control's Back Color shows when the image does not completely fill the control. If the Back Color is "Transparent", the form's background shows in the gaps. If the control's Border Style is Transparent, it is not obvious when the image does not fill the space. That is usually the best choice.
Recommendations:
- Decorations: Match the control's size to the exact size of the image.
If Access has to resize the image, its quality may become poor. - Images in records: Use Zoom. Create a control size that is large enough for the images that you expect. Will they come in different sizes and shapes? Be sure to resize large images before inserting into the record. The pixels needed for a good printed photo at 8" x 10" is far, far too large for most database purposes.
Pasting Image
Technically, you can copy and paste an image from another program to your form. BUT, the pasted image has two issues:
 File size: Access saves what you pasted as a bitmap file, BMP. That uses much more space in the database than other formats. A BMP image can take 3 times as much storage space as a JPG image, for example.
- Image quality: The image will likely be of lower quality than the original.
The example at the right shows two images. The first was part of a picture put onto a form with the Image tool and the picture was sized with Zoom. The second example shows part of an image that was down-sized in a graphics program, where it looked just as smooth as the first image. But then copy-and-paste was used to add it to the form. The result was converted by Access to a jagged bitmap image.
We will not be doing copy/paste for putting decorative images on a form.
| |
Step-by-Step: Form Images |
|
| What you will learn: | to backup database and compare size with original to create a new autoform to add a background image to view Help on a property to use Property Sheet to control image display to change an image with Property Sheet to format an Image control to edit Header table Access 2010, 2013, 2016: to remove layout table to add control to form header; format form header to compare file size after adding image and background |
Start with: ![]() , resource files, worldtravel-Lastname-Firstname.accdb from folder databases project4 as updated in the previous lesson
, resource files, worldtravel-Lastname-Firstname.accdb from folder databases project4 as updated in the previous lesson
You now have two forms ready for use, plus some versions of those forms as you went along. Those forms are already formatted, so you will create a new form that will have a custom background and a form image.
 Backup Database and Compare Size with Original
Before adding any images or new objects, you want to see what the smallest size is for the database. Backing up the database is the easiest way to get that. Besides, you should be making backups regularly anyway.
- If necessary, open worldtravel-Lastname-Firstname.accdb from your Class disk in the databases project4 folder.
-
Back up this database now so you will have a good copy to use if you need to start over. This works well while the database is small.
 Access 2007: Office button > Manage > Back Up Database
Access 2010: File tab > Save and Publish > Back Up Database > Save As button
Access 2013, 2016: File tab > Save As > Save Database As > Back Up Database > Save As button
-
If necessary, navigate to your databases project4 folder on your Class disk.
-
 Save with the name worldtravel-beforeimages-Lastname-Firstname.accdb instead of the default name with date..
The database closes. A copy is made with the name that you chose. The original database opens.
You will see security warnings again if you saw them the first time you opened the database.
-
 Open a File Explorer/My Computer window and navigate to your Class disk to the databases project4 folder.
You should see at least two versions of the World Travel database, plus any other backup copies that you made and kept.By the way, you may see a 1 KB file withe the extension .ldb. This is a temporary file that appears only while the database is open.
-
Write down the sizes of these two files.
Your sizes are almost certainly different from the illustration!As you work, the database size increases. Compacting it reduces the size somewhat, sometimes a LOT. Attached files will also be compressed unless they are already compressed, like images in JPG format.
When you do a backup, the file is automatically compacted as part of the process.
You can leave the File Explorer or My Computer window open.
Create New Form
Now you will create a new form and add a background and an image to it.
-
Switch back to Access.
The database worldtravel-Lastname-Firstname.accdb should still be open if you backed up the database. Problem: The database worldtravel-beforeimages-Lastname-Firstname.accdb is open.
You did not do a backup of the database but something else, perhaps Save Database As.
Solution: Compact the database. Check the new file size. Then open the correct database, worldtravel-Lastname-Firstname.accdb. - Select the linked Projects table in the Navigation Pane.
-
Click the Form button
 on the Create ribbon tab to create an AutoForm for the table Projects.
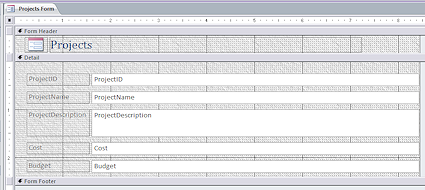
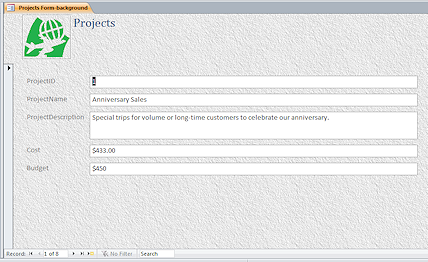
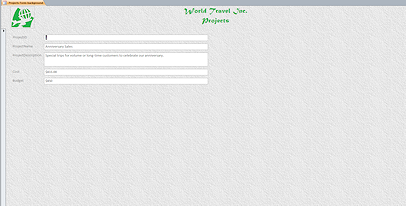
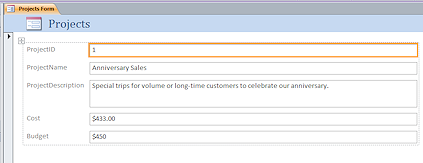 The form opens in Layout View.
An AutoForm is a good start for a table with just a few fields like this one.
Remember that an autoform puts the controls in a table layout. This turns out to be important to know when you edit the Form Header.
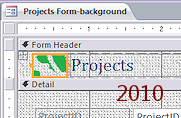
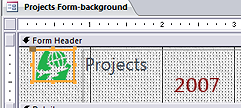
The icon in the upper left corner is somewhat different in the versions of Access and the height of the Form Header is taller in Access 2007.
-
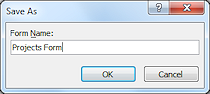 Save the form as Projects Form.
Add Background Image
The new form has a default image and background color for the Form Header and a white background for the Detail section. You will add a background image. What do you think would make a good background image?
-
 Switch to Form Design View.
 - If necessary, open the Property Sheet for the form.
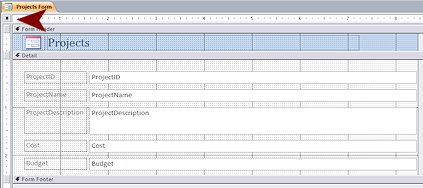
- If necessary, click the box at the far left of the horizontal ruler to select the whole form.
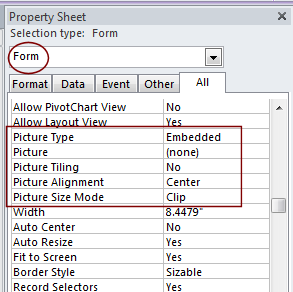 Scroll, if necessary, and inspect the Picture properties.
These 5 properties affect the background of the form.
-
 Finding
Help about properties:
Finding
Help about properties:
-
Click in the box for the Picture property.
It has the value (none).
-
Press the F1 key.
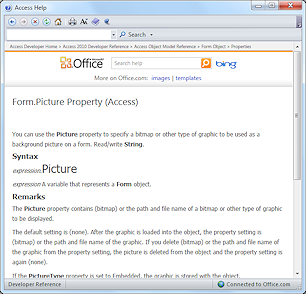
A Help window opens with an article, Form.Picture Property (Access). Problem: No article, just an error page in the browser
You did not click in the property's box but on the arrow or somewhere else.
Solution: Click in the property's box and try again.
-
Read this article, which explains what the property is all about and what kind of objects have the property. Parts are very technical but the first paragraph and the Remarks section of these Help articles usually have helpful information.
- Similarly, open and read Help articles for the other "Picture" properties: Picture Type, Picture Size Mode, and Picture Alignment, Picture Tiling.
- Close the Help window.
-
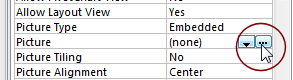 Click in the Picture property's box, where it
says (none).
Click in the Picture property's box, where it
says (none).
Two buttons appear at the right.- Click the ellipsis button
 that appeared.
The Insert Picture dialog appears.
- Navigate to where you saved the databases resource
files.
-
 Open the backgrounds folder, select the image wall.bmp and click on OK.
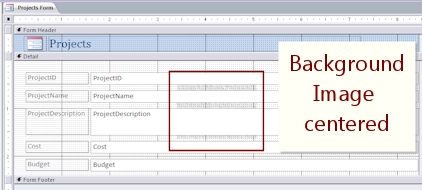
The image appears in the center of the form, under all of the other controls. It may be hard to see in Design View.
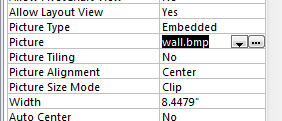 The Property Sheet now shows the name of the image in the Picture
box and uses the default settings for the other Picture properties
- Embedded, Clip mode, Center alignment, and no tiling.
The Property Sheet now shows the name of the image in the Picture
box and uses the default settings for the other Picture properties
- Embedded, Clip mode, Center alignment, and no tiling.
-
 Change the Picture Tiling property to Yes and click in another property to
accept the change.
Change the Picture Tiling property to Yes and click in another property to
accept the change.The background for the whole form changed to show the pattern, including the Form Header and Footer (if you could see the footer).
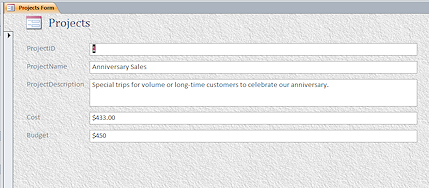
 Switch to Form View.
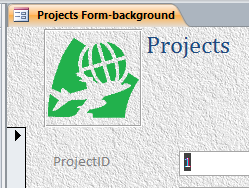
The tiled background now looks like a textured wall, and quite different from Design View.
The grid lines and dots really interfere with backgrounds, especially the more subtle textures.- Save the form as Projects Form-background.
-
 Experiment: Backgrounds
- Change to Layout View.
- In the Property Sheet, change the drop box to show Form.
- Try out other backgrounds in the resource files. Try them tiled and not tiled.
- Evaluate: What kind of image makes a good background? Do you like a solid color background better?
When you are ready to continue...
- Close the form without saving changes.
Your new form will still use the wall.bmp image.
Change Image with Property Sheet
The default image in the Form Header is just an icon for a form. Boring! A more appropriate image would be a company logo. You do want to think carefully, however, about how much space on the form and how much storage space in the database you want to spend on decorations.
-
Open the form Projects Form-background in Design View.
-
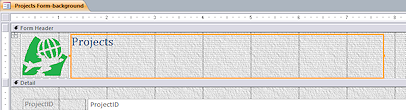
Click at the upper left of the header area on the form icon image.
The Property Sheet changes to show properties for this image control.
The Picture property shows (image) because this image is one of the icons included in Access in some versions.
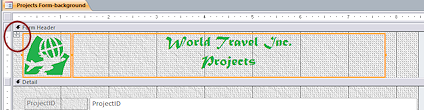
Table in Header: The image and the title are in a table. The biggest clue is the icon at the top left of the image,
 . The second clue is the cell borders that show up when you click something in the table.
-
In the Picture property click the ellipsis button
. -
Navigate to your databases resource files and select the image worldtravel-logo.png.
Alternate method: If you are connected to the Internet, you can type in the URL for the image online:
http://www.jegsworks.com/Lessons/resources/databases%20resources/worldtravel-logo.png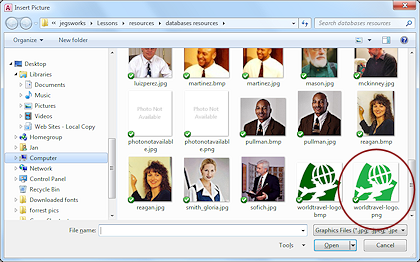
 Click Open.
The image replaces the default image for a form, but in Access 2010, 2013, and 2016 you really cannot tell what's there. Several properties need to change for the image to show clearly.
-
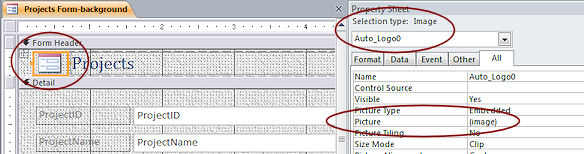
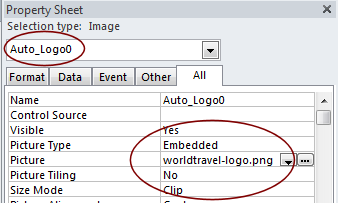 Inspect the Property Sheet.
- Name = Auto_Logo0
That's not the normal default name for an image! - Picture Type = Embedded
- Picture = the name of the image file but not the complete path to it.
- Size Mode =
Access 2007: Zoom
Access 2010, 2013, 2016: Clip
- Name = Auto_Logo0
Format Image Control
You need to make some changes so that the image will show completely and at a reasonable size.
- Resize
image with Properties: With
the image selected, in the Property Sheet, change both the Width and Height to 1".
-
Click in another property or press the TAB key to accept the change.
 Access 2007: Whoops! After resizing, the image is running underneath the Projects control.
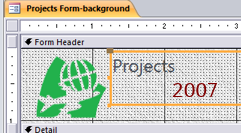 Drag the handle in the middle of the left edge of the Projects control to the right, clear of the image.
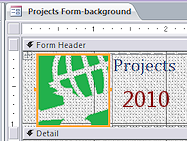 Access 2010, 2013, 2016: Whoops! The current Size Mode is Clip and the Picture Alignment
value is Center. These property values force the image control to show
just the middle part of the image.
Access 2010, 2013, 2016: Whoops! The current Size Mode is Clip and the Picture Alignment
value is Center. These property values force the image control to show
just the middle part of the image.
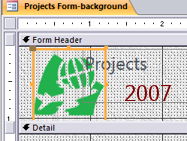
 Change the Size Mode to Zoom.
Now the whole image shows in the smaller Image control.
It is clear that the image has transparent parts that let the background show through. Is that good?
The header automatically got taller when you resized the image.
-
 Switch to Form Layout View.
The Property Sheet is still available and most properties can be edited in this view. - If necessary, select the logo.
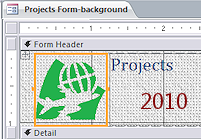
- Change the Special Effect property to Etched.
The effect applied to the image as a whole, not to the content of the image.
This effect adds an engraved border around the image.
-
 Switch to Form View to see how this is working out.
Your form may have a different font for the title, Projects.
Edit Header Table
The Form Header needs more work. Headers normally have helpful info, like a company name as well as the name of the form. Those little tabs are not easy to read at a glance. The special controls in the form header do not behave quite like normal controls. They are in a table for positioning.
 Switch to Form Design View.
- Click on the text Projects to
the right of the image.
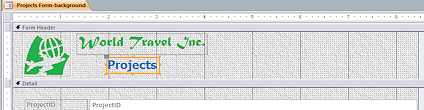
The whole table cell is selected. - Click at the left of the word Projects and type World Travel Inc.
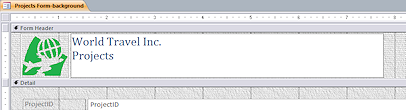 Use the key combo SHIFT + ENTER to create a line break.
Both lines of text are in the same cell.
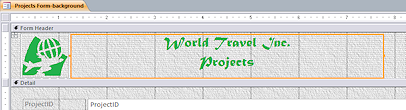 Select the text you just typed and format with:
Matura MT Script Capitals
22 pts.
Green
Center
All of the text in the cell is formatted, not just the selected text. Did you expect that?
-
 Switch to Form View.
The table expands to the width of the window. Did you expect that?There are two issues. The centering does not look right since the form data controls did not move. The text formatting should not be applied to the form title, Projects.
To fix these issues, the stacked layout table must be removed and replaced with two ordinary label controls.
Access 2010, 2013, 2016: Remove Layout Table
 Switch to Form Design View.
- If necessary, click on the Select Table button
 at the top left of the form header.
The whole header table is selected. - On the ribbon tab Form Design Tools: Arrange, click on the button Remove Layout.

The controls for the logo and the titles remain but are no longer in a table. - Switch to Form View.
The control still centers on the form. So that feature was not just part of the table. It's part of the control.
Add Control to Form Header; Format Form Header
- Switch to Form Design View.
- Click on the background of the form to deselect the controls.
- Click on the control with the titles to select it.
The Property Sheet shows the name of this control is Auto_Header0. Ah. There must be some code attached to this special name that is controling the centering. You need a normal control. - Press the Delete key.
The control is removed from the form. 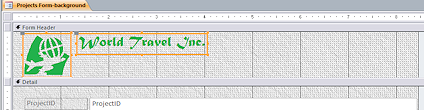 Use the Label tool to add a new label to the form header.
- Type the company name and the format it:
Text = World Travel Inc.
Matura MT Script Capitals
22 pts.
Green - Resize the control to Best Fit.
- Align the control with the top of the logo image.
Leave 3 or 4 columns of grid dots between the two controls.
 Add another label below the company name and format it:
Text = Projects
Tahoma
18 pts.
Bold
Blue, Accent 5
- Resize the control to Best Fit and center it under the company name.
- Use the Line tool to add a horizontal line at the bottom of the Form Header below the logo.
You may need to resize the header area so that the line is clear of the bottom border of the image. - Format the line in the Property Sheet:
Blue (Pick from the standard color palette)
Width = 8.4" (Just short of the form's own width)
Border Width = 2 pts.
-
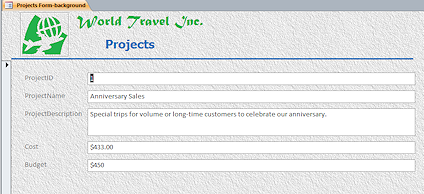 Switch to Form View to see the results.
The dividing line adds a nice touch to separate the header from the Details section. - Save the form.
[Projects Form-background]
- Close the form.
Compare File Size
Now that you have added a background and an image, will there be any difference in the file size?
- Close all open database objects.
That guarantees that they are saved.
- Switch to the File Explorer/My Computer window.
(If necessary open one and navigate to your Class disk to the databases project4 folder. )
You should see both worldtravel-Lastname-Firstname.accdb and worldtravel-beforeimages-Lastname-Firstname.accdb .
-
Compare the current sizes of these two files.
There should be a significant difference, but probably not the same values as in the illustration. Your work increased the file size.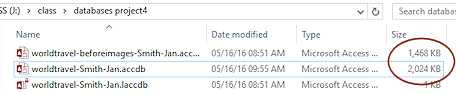
- Switch to the Access window for worldtravel-Lastname-Firstname.accdb.
- Compact the database:
Access 2007:  Office button > Manage > Compact and Repair Database
Access 2010, 2013, 2016: File Info > Compact and Repair DatabaseThe database closes, compacts, and reopens.
 Switch to the File Explorer or My Computer window.
 -
Press the F5 key to make sure that the display refreshes.
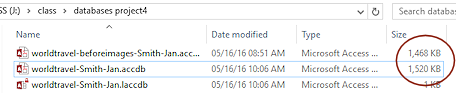
Check the time stamp on the file to be sure the window is showing the current file size.Your sizes are likely different from the illustrations. The current version might even be smaller than the 'before images' version!
-
Write down the file sizes again.
You will need to compare the numbers at the end of the next lesson.Did the World Travel database change sizes much after compacting? Probably.
How does its size now compare to the size before adding the form images? (Your file sizes are likely to be different from the illustrations!)
|
|
| © 1997-2017 Jan Smith All Rights Reserved |
Site Map What's New |
Privacy Policy Terms of Service Copyright Acknowledgements |
~~ 1 Cor. 10:31 ...whatever you do, do it all for the glory of God. ~~
Last updated: March 22, 2017