
Jan's Working with Numbers
Format: Cells
Adding formatting to your spreadsheet not only makes it more attractive, it can also make it easier to read and use. The right font, the right font size, the right color, and the right background can combine to make the most important information pop right off the sheet.
Handling the blank areas is also important. Without enough "white space" (blank areas), your data can be hard to read. Columns and rows need to have some breathing space so your eye will see a break between them.
Excel's sheets behave in many ways like Word's tables. There are some important differences, as you will see in this project.
Word tables and Excel sheets look similar
but do not behave quite the same.
In this project you will apply formatting in several different ways. You will probably find that you prefer one approach, but you can not choose your favorite until you have seen them all! Below is a brief introduction to the formatting methods you will use in the Step-by-Step pages.
Format Cells Dialog
The Format Cells dialog has six tabs, each with several characteristics that you can set.
|
 |
|
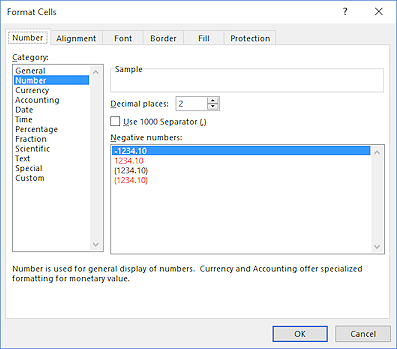
Number tab: Pick a number format and set its options, or create a custom format. |
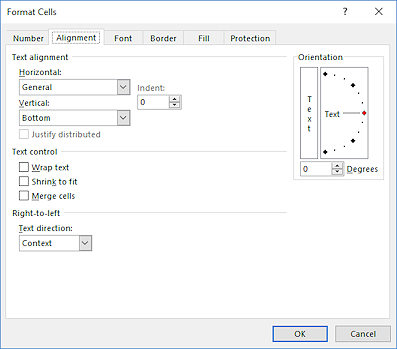
Alignment tab: Controls horizontal and vertical alignment. Text control choices: Wrap text, Shrink to fit (the cell), Merge cells, plus Orientation, which rotates text. |
 |
 |
|
Font tab: Pick a font, font style, font size, font color, underline style, a few effects. |
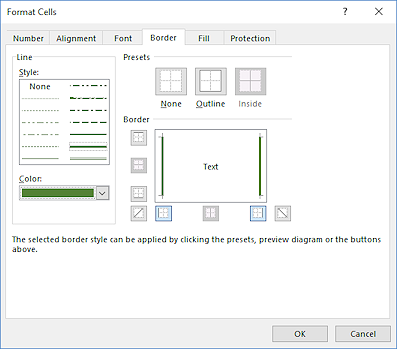
Border tab: Set a border for any combination of edges of your selected cells plus diagonals. |
 |
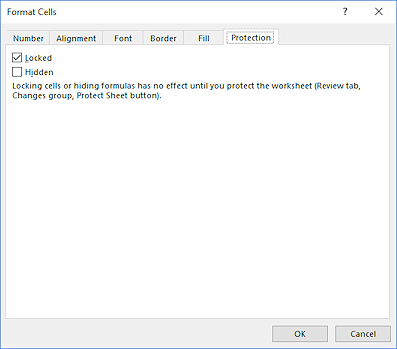 |
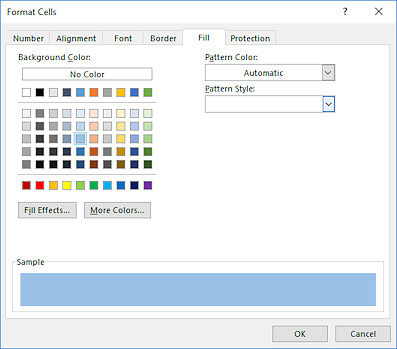
| Fill tab: Background colors and patterns and special effects with gradients. | Protection tab: Keep certain cells from being changed by someone using your sheet or even hide parts of the sheet. |
![]() Dialog choices apply to selection: Your choices
in this dialog apply to the selected cell(s) unless you have selected only part of
the contents of a cell. Some formats, like Borders and Alignment, will apply only to
the whole cell.
Dialog choices apply to selection: Your choices
in this dialog apply to the selected cell(s) unless you have selected only part of
the contents of a cell. Some formats, like Borders and Alignment, will apply only to
the whole cell.
Copy Formatting
To copy formatting you can use one of the Paste Options, the Format Painter, AutoFill, or the Paste Special dialog.
 Paste
Options:
Paste
Options:
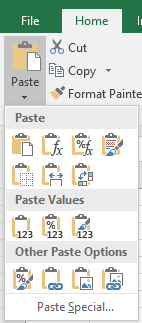
When you click the Paste button's arrow (on the ribbon), a list of
options appears.
![]()
![]()
![]() Excel 2010, 2013, 2016: The choices are icons, not text. Hover over an icon and a screen tip
will tell you what it will do. Most icons make sense once you know what they are for.
Excel 2010, 2013, 2016: The choices are icons, not text. Hover over an icon and a screen tip
will tell you what it will do. Most icons make sense once you know what they are for.
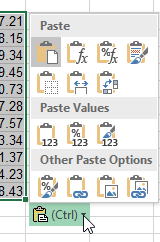
 Paste Options button:
If
you just click the Paste button itself or use the key combo CTRL + V to
paste, the Paste Options button appears near what you pasted. Hover over it and click the down arrow to see the options.
So you can choose before you paste or afterwards. Hurrah for flexibility!
Format Painter:
The Format Painter button ![]()
![]() works much as it does in Word. The biggest difference is that Excel's Format
Painter works only on the cell as a whole. You cannot use it on just
part of the text in a cell. In fact, it is grayed out when you are in Edit mode.
works much as it does in Word. The biggest difference is that Excel's Format
Painter works only on the cell as a whole. You cannot use it on just
part of the text in a cell. In fact, it is grayed out when you are in Edit mode.
When you click the button, the pointer changes to ![]() its Format Painter shape. Click on a cell or drag across several cells to
apply the copied formatting. The pointer then returns to
its Format Painter shape. Click on a cell or drag across several cells to
apply the copied formatting. The pointer then returns to ![]() its Select shape.
its Select shape.
To use Format Painter to format several cells that are
not next to each other, double-click the Format Painter button. The pointer
will remain in ![]() its Format Painter shape until you click the button again or press the ESC
key.
its Format Painter shape until you click the button again or press the ESC
key.
![]() Excel picks from Multiple Formats: If
a cell contains more than one format for text, such as different font
sizes or colors, Format Painter will copy only the first formatting that it finds. This can be very surprising and disappointing!
Excel picks from Multiple Formats: If
a cell contains more than one format for text, such as different font
sizes or colors, Format Painter will copy only the first formatting that it finds. This can be very surprising and disappointing!
AutoFill:
 You
can use Excel's AutoFill feature to copy formatting into multiple cells,
while leaving the data in the cells alone.
You
can use Excel's AutoFill feature to copy formatting into multiple cells,
while leaving the data in the cells alone.
AutoFill Options: After you drag the Fill handle to copy
cells, the AutoFill Options button ![]() appears near the bottom right of the cells. Click its arrow to open the list
of choices. You will see various choices depending on what you were copying,
but you should always see Fill Formatting Only and Fill Without Formatting.
appears near the bottom right of the cells. Click its arrow to open the list
of choices. You will see various choices depending on what you were copying,
but you should always see Fill Formatting Only and Fill Without Formatting.
Right Drag Menu: If you drag the AutoFill handle with the right mouse button, a menu automatically appears with the same choices, including Fill Formats.
Paste Special:
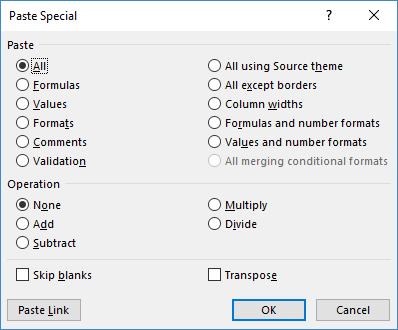 The Paste Special dialog (Home tab > Paste >Paste Special… ) allows you to choose how much about a copied cell you wish to paste. You can choose All and paste the entire cell with all of its formatting.
Or choose one of the Paste options and paste just that characteristic.
Of special interest for this project is the choice to paste just the Formats. You can even paste everything except the borders. This is very useful when some rows have borders and some don't.
If you choose one of the Operations, the operation is performed on the pasted contents when you paste.
Pasting multiple cells with Skip blanks checked leaves the data you are pasting over in place if what you are pasting has a blank cell in that position.
Transpose will paste columns as rows and rows as
columns, which can be quite useful and certainly saves a lot of time.
Clear Formats
After all this formatting, what do you do if you want to just start over? How can you get rid of all these formats, called clearing formats?
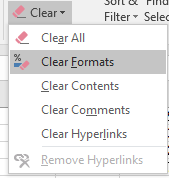 Ribbon: On the Home tab, the Clear button
 ![]()
![]() opens a list of choices, including Clear Formats,
which returns all the fonts to the default Normal font, removes fills and
borders, and splits merged cells. It does not change row and column sizes.
Data that was lost in a merge is not restored.
opens a list of choices, including Clear Formats,
which returns all the fonts to the default Normal font, removes fills and
borders, and splits merged cells. It does not change row and column sizes.
Data that was lost in a merge is not restored.
|
|
| © 1997-2017 Jan Smith All Rights Reserved |
Site Map What's New |
Privacy Policy Terms of Service Copyright Acknowledgements |
~~ 1 Cor. 10:31 ...whatever you do, do it all for the glory of God. ~~
Last updated: March 22, 2017