
Jan's Working with Numbers
Formulas: Images: Image
There is no reason to settle for boring worksheets! An image or two can certainly perk them up. Clip art and photos can both be added to Excel sheets.


Example images: Clip art
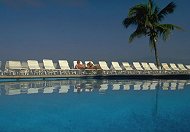
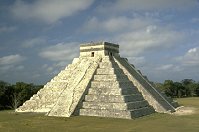
Example images: Photos
Improvements you will make to the trip sheets:
- Remove data in the Trips column since all trips on each sheet are the same.
- Add images to the 4 trip sheets.
Your images will be larger than a single cell.
- Add a title naming the trip covered on each sheet.
| |
Step-by-Step: Add Image |
|
| What you will learn: | to delete a sheet to delete data from a column to insert an image from a file to move and resize image to search for and insert an online image to select cells underneath an image to modify grouped sheets |
Start with: ![]() trips24-Lastname-Firstname.xlsx -sheets for trips (saved in previous lesson), images from the resource files
trips24-Lastname-Firstname.xlsx -sheets for trips (saved in previous lesson), images from the resource files
Delete a Sheet
You currently have two sheets with data about the Tahiti trips, one with linked cells and one without. The other trip sheets have linked cells except for the titles and column labels. You need to make all trip sheets work the same way.
-
 Open trips24-Lastname-Firstname.xlsx to
the Agent Totals sheet.
Open trips24-Lastname-Firstname.xlsx to
the Agent Totals sheet.
- Save
As trips25-Lastname-Firstname.xlsx in the excel project4 folder of your Class
disk.
- Switch to the New Zealand sheet and copy A1:F4 which is the titles and column
labels.
- Switch to the sheet Tahiti-linked, click in A1 and Paste.
- Right click the tab for the sheet Tahiti and select Delete.
A warning message appears. Click on OK. The sheet is deleted.
- Rename the sheet Tahiti-linked to just Tahiti.
- Save.
[trips25-Lastname-Firstname.xlsx]
Remove Trip Column Data
You are going to remove the data in the Trip column from each of the trips sheets. Each sheet is about only one trip. You will leave the cells blank instead of deleting them so there will be some room for an image.
-
 Group the sheets Tahiti, New Zealand, World, and Other.
- Select cells A4:A11 (this includes all the cells in
column A with data on all 4 sheets).
- Press DELETE.
The Trip column is now blank. The formatting is still there. - Ungroup the sheets.
- Check each sheet to be sure you have deleted the values in column
A and that the formatting remains.
- Save.
[trips25-Lastname-Firstname.xlsx]
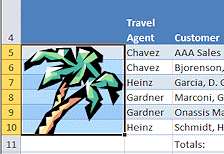
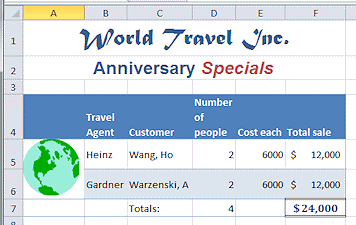
Insert Image: Palm Tree
Now you have some space for an image.
- Select sheet Tahiti.
The cells in column A are still selected.
-
 From the ribbon tab Insert in
the Illustrations tab group, click the
button Picture.
From the ribbon tab Insert in
the Illustrations tab group, click the
button Picture. -
In the Picture dialog, navigate to your local copy of the resource files.
Where is the file:
If you downloaded the zipped copy of all resource files the default path is - c:\My Documents\complit101\numbers\
If you are working with a local copy of the whole site, look in the folder inside those, with a path similar to:
c:\Program Files \Jans CompLit 101\Lessons\resources\numbers resources\
If you do not have a local copy at all of the resource files, you can copy the following link and paste it into the File name box to download a copy:
http://www.jegsworks.com/Lessons/resources/numbers resources/palmtree.wmf
-
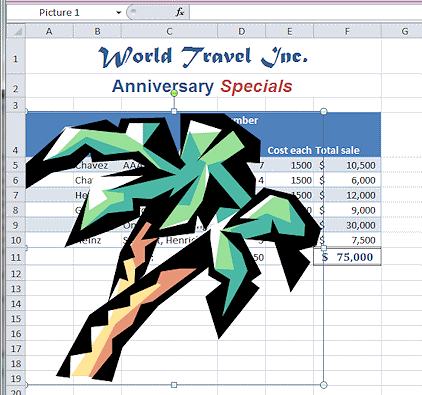 Click on Palmtree.wmf and then on Insert.
There may be a short pause and then the palm tree image appears on the sheet at its original size, which is much larger than you need.
- Save.
[trips25-Lastname-Firstname.xlsx]
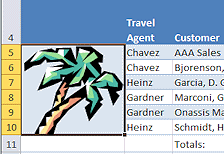
Resize and Position Image
-
 Reduce the size of the image by dragging a corner handle
of the image until it is about 6 rows tall, which is the number of trips
on this sheet.
Reduce the size of the image by dragging a corner handle
of the image until it is about 6 rows tall, which is the number of trips
on this sheet.
- Drag the image to rows 5 - 10 in column A.
- Widen column A to hold the whole tree.
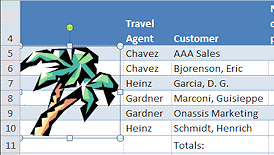
(AutoFit will not see the tree so that won't work.)The grid lines and background fill behind the palm tree show because part of the image is transparent. You can get rid of the background clutter by merging the cells under the image.
The trick is how to get the cells selected while the image is on top of them. You could move the image while you select, but sometimes it is hard to get an image back just exactly right.
- Try to drag to select A5:A10.
If your palm tree is the correct size, it covers those cells. Whenever you try to drag, all you can get is the image. -
 Select cell A3. Use the arrow key to move down to cell A5, underneath
the image.
Select cell A3. Use the arrow key to move down to cell A5, underneath
the image.
-
Hold the SHIFT key down and use the down arrow to move to A10.
Now the range A5:A10 is selected.Alternate Method: Enter the range A5:A10 in the Name Box and press ENTER.
-
 Click on
  the Merge and Center button on the Home tab.
Grid lines are gone but the background fill is the fill that was in the top left cell, A5. So it is Accent 1, Lighter 80%.
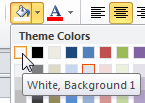 Open the Fill button's palette of colors
on the Home tab and click on White, Background 1.
Open the Fill button's palette of colors
on the Home tab and click on White, Background 1.
 Now you have a solid white background
showing through where the image is transparent instead of the grid lines. Better!
Now you have a solid white background
showing through where the image is transparent instead of the grid lines. Better!- Save.
[trips25-Lastname-Firstname.xlsx]
Insert Image: New Zealand and World Sheets
-
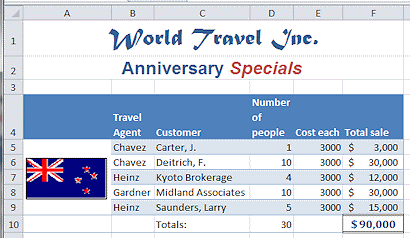 Repeat the
procedure for the sheet New Zealand
to insert the image NZflag.wmf
Repeat the
procedure for the sheet New Zealand
to insert the image NZflag.wmf - Resize the image to about 3 rows tall, and position image, centering it vertically in cells A5:A9.
- Widen column A and merge cells A5:A9.
- Change the background fill of the merged cell to White.
- Save.
[trips25-Lastname-Firstname.xlsx] -
 Similarly,
on the sheet World, insert image Globe.wmf
Similarly,
on the sheet World, insert image Globe.wmf
-
Resize image to about 4 rows high.
-
Before positioning the globe image, resize Rows 5 and 6 to 30.00 (40 pixels) high.
The globe would be too small if you make it fit over two rows at the default height.(Hint: select the rows and drag a bottom edge of a row heading. Look at the screen tip for the size.)
- Select rows 5 and 6 and on the Home tab in the
Alignment tab group, click the button Align Middle.
This makes the text in these two rows align vertically to the vertical middle of the cell. - Position the globe image in column A.
- Widen column A and merge cells A5 and A6.
The background is already White this time because on this sheet A5 had a White fill.
- Save.
[trips25-Lastname-Firstname.xlsx]
Format Sheet: Other
The sheet Other lists trips that were booked because of people checking into a special trip offer who decided to do something different.
- Select sheet Other.
You will have to use an image about general 'travel' since we don't know what these various trips are.
- Search for clip art:


 Excel 2007, 2010:
- On the ribbon tab Insert in
the Illustrations tab group, click on the button Clip Art
The Clip Art pane opens at the side of your Excel window. - In the Search box, type travel and click the Go button.
The search results show up as thumbnails.
The first image found should be of a globe and suitcase. That image is installed on your computer with Office 2007 and 2010. If not, check the media types in the drop box in the pane and be sure that Illustrations is checked. - Click on the image shown in the illustration (a globe and suitcase) to insert it into your worksheet.

 Excel 2013, 2016:
-
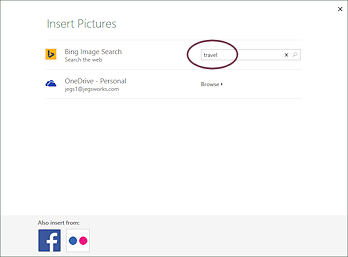 On the ribbon tab Insert in
the Illustrations tab group, click on the button Online Pictures.
On the ribbon tab Insert in
the Illustrations tab group, click on the button Online Pictures.
The Insert Pictures dialog opens and offers to search Bing Image Search or your OneDrive storage.No clip art is installed on your computer by Office 2013. So sad.
If you are not able to go online, you must use an image from your own computer with the Insert Pictures button.
-
In the Search box for Bing Image Search, type travel and click the magnifying glass or press the ENTER key.
After a brief wait, the results windows opens with thumbnails of the results.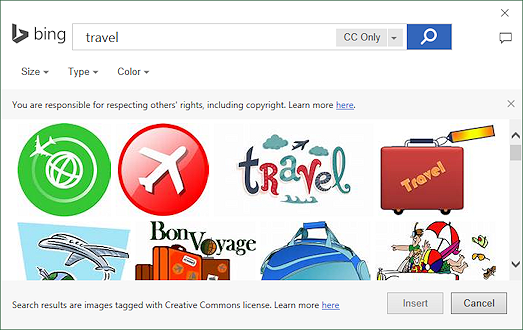
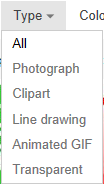 [New Feb. 2016] Between the search bar and the results are three filter lists: Size, Type, and Color. Open each list to see what you can pick!
 - Click on Clipart in the Type filter.
- Scroll the results to see the variety of images that match 'travel'.
- Click on an image that you think will go well with the sheet Other. Images you see today may not have been there last week and may not be there next week!
- On the ribbon tab Insert in
the Illustrations tab group, click on the button Clip Art
- Resize the image to be about 6 rows high.
- Position the image over rows 5 through 10.
-
Resize column A to be wider than the image.
- Select cells A5:A10 and click the Merge and Center button.
The area behind the image is now white, because the top left cell of the selection was white when you merged.
- Save.
[trips25-Lastname-Firstname.xlsx]
Modify Grouped Sheets: Add Subtitle
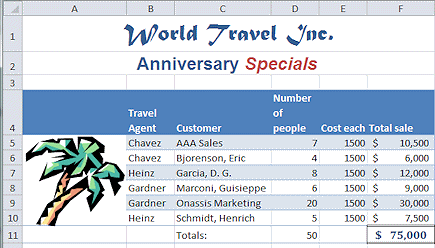
The images give you a big clue and the sheet tab's name tells you what each sheet is about. Still, when printed or glanced at quickly, the sheet needs to say plainly which trip is covered on that sheet.
You will add and format another subtitle.
- Group sheets Tahiti, New Zealand, Worlds, and Other.
All actions will apply to all grouped sheets. You must be VERY careful that the cells you have selected are the same on all sheets. - Select cells A3:F3, which are between the subtitle Anniversary Specials and the column labels.
- Click on the Center and Merge button.
- Click on cell A2 and then on
 the Format
Painter button to pick up the formatting of
the subtitle.
the Format
Painter button to pick up the formatting of
the subtitle. - Click on cell A3 to apply the formatting to the new
merged cell.
There is no text there yet. -
 Ungroup the sheets.
VERY important! -
On each of the 4 trip sheets, in cell A3 type the trip for that sheet: Tahiti, New Zealand, World, or Other.
Note: On the World sheet Excel will show an AutoComplete suggestion, World Travel Inc. because that is above the cell on the sheet and starts with the same letters. Unfortunately you must delete the tail end of that suggestion. If you press ENTER or TAB to get out of the cell, the AutoCompetion will be accepted.
-
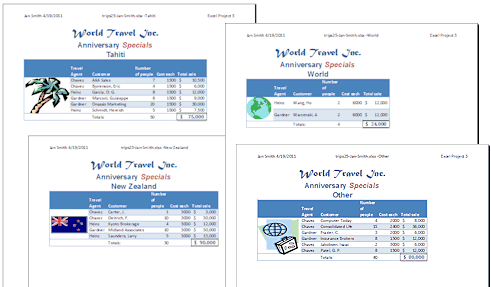 Check Print Preview for all four trips sheets.
Orientation should be Portrait.Make any corrections needed for the position or size of the image if the image hides the table border.
(If you group the sheets, the preview will show all of them. But don't forget to ungroup! Forgetting can result in disaster!!)The Total row should be directly below the data. No blank row.
You are not printing just yet.
- Save.
[trips25-Lastname-Firstname.xlsx]
|
|
| © 1997-2017 Jan Smith All Rights Reserved |
Site Map What's New |
Privacy Policy Terms of Service Copyright Acknowledgements |
~~ 1 Cor. 10:31 ...whatever you do, do it all for the glory of God. ~~
Last updated: March 22, 2017
Update January, 2015: Microsoft has shut down its online images through Office.com! The Online Pictures dialog in Office 2013 programs now only shows options to search Bing and your OneDrive.
The Bing seach dialog now returns only images that are released under Creative Commons license or are in public domain. You must check the license for each image to see what permissions are granted.