 |
The default settings do not always
give you the result you want. Happily you have many ways to adjust what will
print and on how many pages. You can choose what cells to print,
to repeat the title rows on all pages, to print gridlines, to print row
and column headings, to squeeze all onto a particular number of pages, to
break pages at particular spots. Choice, choices, choices!
|
 |

Where you are:
JegsWorks >
Lessons >
Numbers
Before
you start...
Project 1: Excel Intro Project 2: Excel Basics
Getting Started
Arrange
AutoFill
Finish

 Chart Chart
 Print-Defaults Print-Defaults

 Print-Options Print-Options
Summary
Quiz
Exercises
Project 3: Format & Arrange
Project 4: Groups & Formulas
Project 5: Design
Search
Glossary
Appendix
|
|
 |
Step-by-Step: Print Options |
 |
What you will learn: |
to print gridlines and headings
to center sheet on page
to change page breaks
to print titles
to print selection
|
Start with:
 ,
trips9.xls (saved in
previous lesson) ,
trips9.xls (saved in
previous lesson)
Print: Gridlines, Headings, Centered
- Make Sheet1 active, if necessary, by clicking on its tab.
- Open Page Setup (File | Page Setup....) and make some choices.
-
 On the
Sheet tab, in the Print section, check Gridlines and Row and column headings. On the
Sheet tab, in the Print section, check Gridlines and Row and column headings.
-
 On the Margins tab, in the Center on page section check both Horizontally and Vertically. On the Margins tab, in the Center on page section check both Horizontally and Vertically.
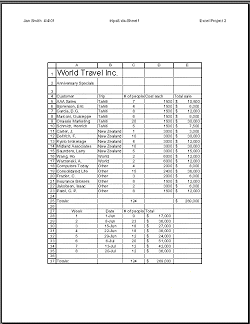
- Click on OK to close Page Setup.
- Click on
 the Print Preview button to check layout. the Print Preview button to check layout.
 Print. Print.
Print: Break Pages, Print Titles
- From the menu choose | .
-
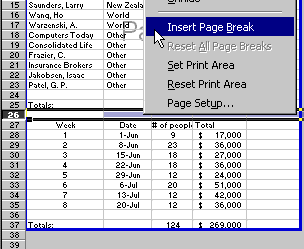 Right click on the row heading for Row 26, the blank row between the two tables. Right click on the row heading for Row 26, the blank row between the two tables.
- From the popup menu select .
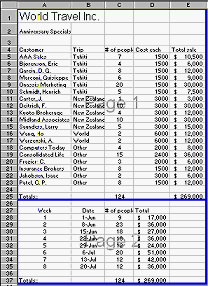 A new blue line appears at the top edge of Row 26. The sheet is now divided into two parts, which will print separately. Note the gray Page
1 and Page 2 in the center of each part. A new blue line appears at the top edge of Row 26. The sheet is now divided into two parts, which will print separately. Note the gray Page
1 and Page 2 in the center of each part.
- Open Page Setup again to the Sheet tab. ( | ).
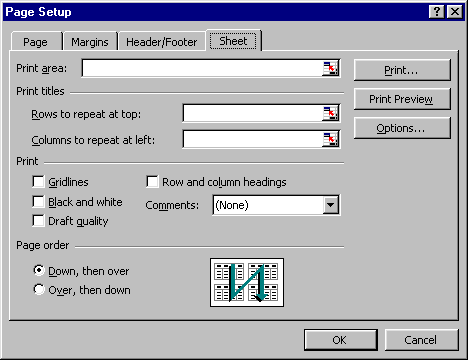 - In the Print Titles box, type in $1:$2 so that the first two rows will print on all pages. (You can also click in the box and then drag on the spreadsheet to select these rows.)
- Click on
 the Print Preview button in this dialog.
The Print Preview window shows that there are two pages to print by:
- There is a Next button at the top.
- The Status bar shows 1 of 2.
- The scrollbar length shows there must be another page.
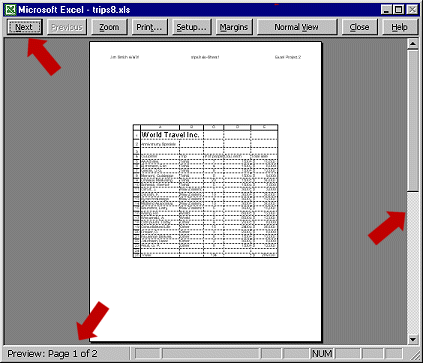
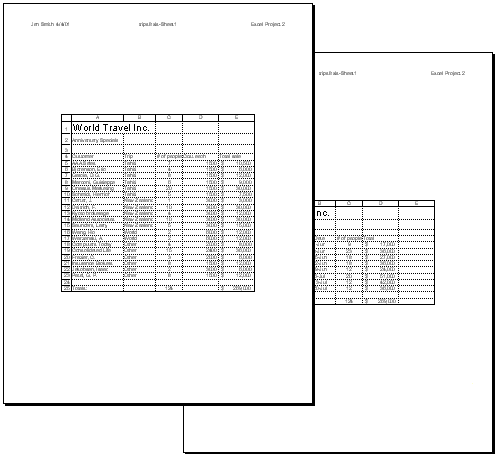
- Click on the Next button to see the second page. Rows 1 and 2 (the titles)
print above what was after the page break. Neat!
 Print. Print.
Print: Selection
- In Normal view select cells A1:E10. (This is the information on just the Tahiti trips.)
- Open Page Setup to the Margins tab. Uncheck the two boxes for Center on page.
- Click on the Sheet tab. Uncheck the two boxes for Gridlines and Row and column headings.
- Click on OK to close Page Setup.
- From the menu select | to open the Print
dialog.
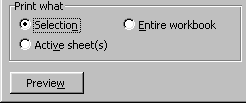
- Check Selection.
- Click on the Preview button on the dialog box to open Print Preview.
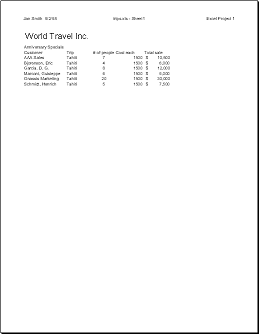
 Print and close the workbook. Print and close the workbook.
You do not need to save again unless you want to save the Page Setup settings.
|
![]()

![]()