
Jan's Working with Presentations
Advanced: Outline: Custom Template
Most of the formatting for your slides should be controlled by the Slide Master. That makes it easy to be consistent throughout the presentation and will make new slides match the old automatically.
Saving your formatting as a custom template makes it easy for you to reuse your lovely design and its effects in other presentations.
What is in a Custom Template?
- Slide background
- Slide Layout- which placeholders appear and their positions
- Colors
- Formatting of placeholders
- Formatting of text and bullets in placeholders
- Slide transition
- Placeholder animations
You have already worked on editing an existing Master and saving it as a template. This time you will create the template from scratch.
| |
Step-by-Step: Custom Template |
|
| What you will learn: | to format text on Slide Master to format bullets on Slide Master to remove text formatting not on the Slide Master to format background on Slide Master to apply a transition to Slide Master to apply animation to Slide Master to use the Effects Options dialog to change bullet levels - ribbon, menu, keyboard to change animation option settings to save as a custom template |
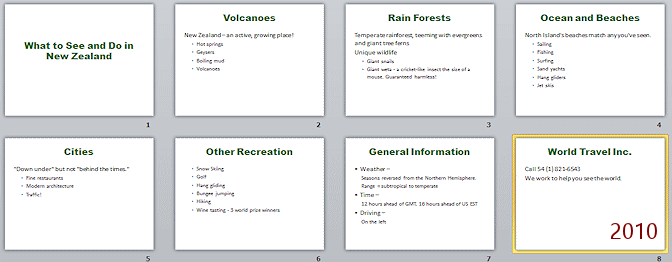
Start with: ![]() , nz-word-Lastname-Firstname.pptx
, nz-word-Lastname-Firstname.pptx
You will edit the Slide Master, remove the formatting inherited from the Word document, and then save your presentation as a template.
Slide Master: Format Text
-
 If necessary, open nz-word-Lastname-Firstname.pptx,
which you created in the last lesson.
If necessary, open nz-word-Lastname-Firstname.pptx,
which you created in the last lesson. - Inspect the formatting of the slides. What fonts are used for titles and what fonts are used in the content placeholder.
-
Switch to Slide Master View and select the thumbnail at the top of the Navigation pane.
Hmmm. The formatting here is not what is actually showing on the slides. The slides are using some formatting that has been inherited from the original document, just as if you had manually applied the formatting.
Let's fix up the Slide Master to pick formatting that works better.
-
 On the Slide Master, select the Title placeholder.
-
Select the text in the placeholder and right click the selection to show the Mini-Toolbar and context menu.
The context menu and Mini-Toolbar close after you click on something. You will have to show the Mini-Toolbar again for each step below. -
From the Mini-Toolbar, set the Font to Arial Black and Font Size to 44 pt.
-

 PowerPoint 2013, 2016: From the Mini-Toolbar, click the Center button.
 -
 Click in the Mini-Toolbar on the arrow beside the Font Color button and then click on More Colors...
The Colors dialog opens.
(Don't get confused. There are 3 different color palettes in PowerPoint 2007 and 2010 on the Mini-Toolbar: Fill, Outline, and Font. In PowerPoint 2013 and 2016 only the Font color button shows on this context menu.) -
If necessary, click on the Standard tab.
-
 Click the 1st green hexagon on the 6th row from the top to select it.
Dark Green is the color that World Travel Inc. uses for its name and logo materials. The font for the name is usually Matura MT Script Capitals, but that font might not be on the computer running the slide show. It is a good idea to use common fonts in presentations.
-
 Drag across all text in the Text placeholder to select it.
-
Change the font to Tahoma.
 .
.
Leave the font size alone.
-
 Use Save As to save the presentation with the name nz-Lastname-Firstname.pptx to your Class disk
in the powerpoint project3 folder.
Use Save As to save the presentation with the name nz-Lastname-Firstname.pptx to your Class disk
in the powerpoint project3 folder.
Slide Master: Format Bullets
The standard bullets are usually OK but it is easy to change them.
 In the Slide Master view, click on the first outline level to select it
-
Right click on the selected line and select Bullets from the context menu.
A palette of default bullets appears, but you cannot make any changes in the palette. -
Click on Bullets and Numbering.
The dialog opens.You can change the size of the bullet symbol here without changing the font size for the paragraph's text. This is a real help with some bullets. You can also change the color or pick a symbol from a font or pick a picture to use as the bullet.
-
Click on the square bullet style.
The bullet for the first line changes. -
Click on the arrow at the right of the Color box at the bottom of the dialog to open the palette of colors that are in the default color scheme.
-
Click on the color Accent 2, Darker 50% in the bottom row of Theme colors.
In PowerPoint 2007 and 2010 this is red but in PowerPoint 2013 and 2016 it is orange.
-
 Click on OK to close the Bullets and Numbering dialog.
The first outline level now has a bullet that is square and colored. Not too hard to do!
-
 Select the Second outline level and change its bullet to:
Shape = solid disk
Color = Text 2, Lighter 40%
Size = 120%In PowerPoint 2007 and 2010 this is dark blue but in PowerPoint 2013 it is a blue-gray.
 In the Slide Master, the second level now shows a round, colored bullet.
-
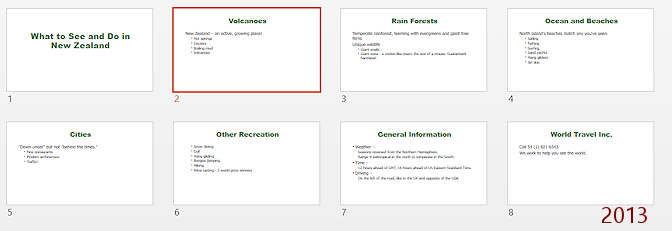
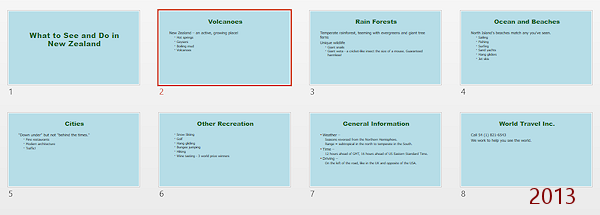
 Close the Slide Master view and look at Slide #2:
Volcanoes.
Close the Slide Master view and look at Slide #2:
Volcanoes. Something is wrong! The colors and bullets are right but the text is not using the fonts, Arial Black and Tahoma, which you just set in the Slide Master. The cure is in the next set of steps - Remove formatting that was applied directly to the text.
-
Save.
[nz-Lastname-Firstname.pptx]
Slides: Remove Manual Text Formatting
The slides are still using the fonts from the original outline. You must make the slides use the formatting from the Masters. The easiest way uses the Outline.
-
 In
the Slide Pane, click on Slide #2: Volcanoes in an area outside of the two
placeholders.
In
the Slide Pane, click on Slide #2: Volcanoes in an area outside of the two
placeholders.
-
 Use the key combo CTRL + A.
OR
On the Home ribbon, click the button Select at the right end and then click on Select All.Both placeholders are selected.
-
 Use the key combo CTRL + SHIFT + Z.
All of the formatting that is not on the Slide Master is removed. Super cool trick!
Even better, by using the Navigation pane, you can remove all the manual formatting from all the slides at once. Let's try that out.
-
If necessary, show the Outline pane again.
-
Click in the Outline pane and repeat the key combos above:
CTRL + A to select all the outline text
CTRL + SHIFT + Z to remove formatting that is not on the Slide Master
The manual formatting is removed for all of the slides and the Slide Master rules again. -
Switch to Slide Sorter view to see all of the slides at once.
 PowerPoint 2007: Switch to Normal View for Slide #3: Rain Forests
The paragraphs that wrap to another line have a hanging indent, so they do not line up at the left with the start of the paragraph. Unexpected difference!
- Click in the first paragraph.
- On the Home ribbon tab in the Paragraph tab group, click the dialog box launcher
 to open the Paragraph dialog.
 - Change the Indention settings to Before text: 0" and Special: (none).
- Click on OK.
- Repeat for the first paragraphs for Slide 4 and 5.
(We won't worry yet about the wrapping on Slide 7. It's more complicated and may not be a problem later at all!)
- Save
[nz-Lastname-Firstname.pptx]
Slide Master: Format Background
You can set a background color, pattern, or image on the Slide Master. On-screen presentations usually have dark backgrounds with light text. White backgrounds can be too harsh and bright to the eyes, but a soft, light color can work well, too. Printed presentations work better with light background and dark text. (Saves a lot of ink!)
Since this presentation will usually be viewed on a monitor, you will change the background color.
For PowerPoint 2013 and 2016 you will first change the color theme. It simplifies the directions!
-
 PowerPoint 2013, 2016:
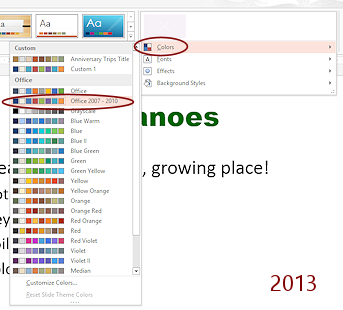
- In Normal view, on the Design ribbon tab, click the More button at the right end of the Variants section.
- Hover over Colors to expand the list of Color Themes.
- Click on the theme Office 2007-2010.
-
 Open the Slide Master again and select the top thumbnail.
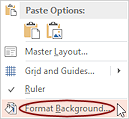
- Right click in an area that is not in a placeholder.
-
From the context menu select Format Background...
The Format Background dialog (2007, 2010) or pane (2013, 2016) opens.Alternate method: On the Slide Master ribbon tab, click on Background Styles and then on Format Background.
-
 Experiment: Format Background
-
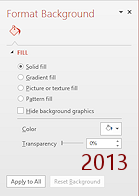
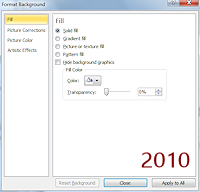 Try out various choices and options on the Fill page, including solid fill, gradient fill, picture
or texture fill, pattern fill and various colors.
Try out various choices and options on the Fill page, including solid fill, gradient fill, picture
or texture fill, pattern fill and various colors.Live Preview will update the main Slide Pane to show the effect of your choices.
- When you are ready to continue, click the Reset Background button at the bottom to return to the original settings.
-
-
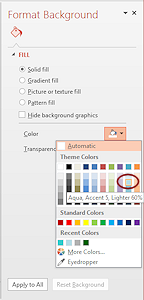
On the Fill page, select Solid fill and then click the down arrow at the right of the Color button, to open the palette of colors.
-
Select Aqua, Accent 5, Lighter 60%.

-
 Click on Apply to All to apply this
background color.
Click on Apply to All to apply this
background color.
- Click on OK to close the dialog or click on the X button to close the Format Background pane.
All of the layouts use the new background color. - Close the Master View.
-
Switch to Slide Sorter view to see all of the slides at once.
All of the slides now have a sky blue background and green title text.
- Save
[nz-Lastname-Firstname.pptx]
Slide Master: Apply Transition
A transition applied to the Slide Master will be used by all slides unless you apply a different transition to a layout or to selected slides. That would over-ride the default transition. It's very flexible!
- Open the Slide Master view
again.
- Select the top thumbnail, Slide Master.
Apply transition:
PowerPoint
2007: On the Animations ribbon tab, select the transition Cover
Left. PowerPoint
2010, 2013, 2016: On the Transitions ribbon tab, select the
transition Cover.
PowerPoint
2010, 2013, 2016: On the Transitions ribbon tab, select the
transition Cover.
The default direction is From Right. This is the same transition as Cover Left in PowerPoint 2007, but it behaves a bit differently.- Save
[nz-Lastname-Firstname.pptx]
Slide Master: Apply Animation
Advantage: By applying an animation scheme to the Master, all slides that use that Master, including any slides you add later, will use the same animation scheme. That's usually a good thing!
Disadvantage: It takes a special command to set things up to use a different animation on specific slides - Copy Effects to Slide.
-
 In
Slide Master view, with the first thumbnail still selected, click in the Title placeholder in the
Slide Pane to select it.
In
Slide Master view, with the first thumbnail still selected, click in the Title placeholder in the
Slide Pane to select it. -
Apply animation Fade by:
PowerPoint 2007
- On the Animations ribbon tab, click the Custom Animations button to open the animations pane.
- Click the Add Effects button and hover over Entrance to expand the list.
- Select the animation Fade.
PowerPoint
2010, 2013, 2016:
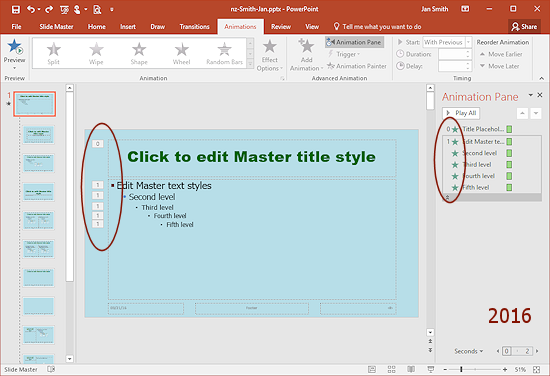
On the Animations ribbon tab, select the animation Fade.]The Slide Pane automatically plays the effect once for you.
The Title fades into view. You cannot tell in this preview, but in the actual slide show you must click to make the title show up. That get's annoying quickly! -
Change the Start for this animation to With Previous.
Now the title will come into view right after the transition finishes.
- Click in the bullet list to select that placeholder.
- Apply animation Wipe - From Left
PowerPoint 2007
- In the Custom Animation pane, click the Add Effects button.
- Hover over Entrance to expand the list.
- Select the animation Wipe.
- Change the Direction box in the pane to From Left.
PowerPoint
2010, 2013, 2016:
- On the Animations ribbon tab, select the animation Wipe.
- Click the Effect Options button and select From Left.
The Slide Pane automatically plays the effect once for you.
The bullet list wipes into view.All paragraphs have the same animation number, 1, because they all appear at the same time.
-
On the Animations ribbon tab, click the Preview button

The whole sequence of animations plays in the Slide Pane.Are you sure how your bullet points are going to show up? All together or one at a time? Better check the Slide Show.
-
Close the Master view.
-
Click the first slide and then on


 the Slide Show button in the Views bar.
You must click to advance to the next slide or next animation.
-
Play through the entire presentation until you get a black screen.
-
Press ESC to return to Normal view.
 Why do some slides reveal all of the
text at the same time and others don't?
Why do some slides reveal all of the
text at the same time and others don't?
It's the bullet levels involved.The current settings reveal first level bullets - By Paragraph.
Second and third level bullets etc. are revealed together with the first level above them (even if there is no bullet showing for that first level paragraph!). Your presentation uses 3 bullet levels.
This pattern is not obvious from the ribbon or the animations pane!
To make the bullet points appear one after the other:
-
Edit the slides to make all of the bullet points first level, with the first lines on some slides not actually showing the bullet.
OR -
Edit the Slide Master to change the animation settings to show paragraphs one at a time up to 3rd level.
Oddly, this setting is buried in the Effects Options dialog.
You will do a bit of both in the steps that follow.
-
-
Save
[nz-Lastname-Firstname.pptx]
Dialog: Effect Options
To make a bullet list appear one paragraph at a time for all list levels, you must make a change in the Effects Options dialog.
-
 Display Slide Master View.
- Select the top level thumbnail and click in the bullet list in
the Slide Pane.
- Click the animations pane button on the ribbon to open the pane.
- Click the #1 effect and then on its arrow to open the menu.
- Click on Effects
Options...
The Effects Options dialog opens.
-
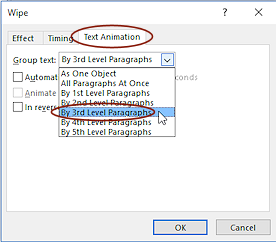 Click on the tab Text Animation.
- Change 'Group text' to By
3rd Level Paragraphs.
Click on OK.
The animations are re-numbered. First, second, and third levels appear separately when the animation runs. 4th and 5th levels animate with the 3rd level paragraph that they are under.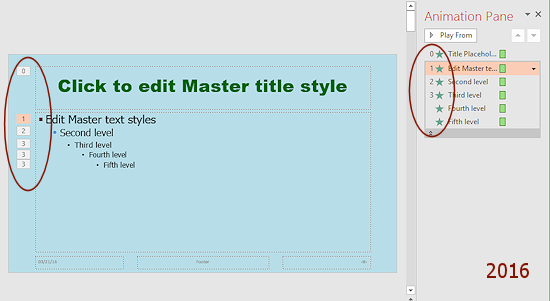
-
Close the Slide Master View and play the slide show again.
Does this work better?
Slide: Change Bullet Levels
Five slides have second level bullet paragraphs that are showing blue circles: Rain Forests, Oceans & Beaches, Cities. Only the General Information slide is actually showing the symbol for the first level bullet - red square.
There are three different methods - ribbon button, outline menu, keyboard.
You will be promoting paragraphs (decrease list level), but similar methods work to demote paragraphs (or Increase List Level) to lower bullet levels.
Method 1: Button on ribbon
-
 Open the slide Rain Forests, Slide #3.
-
Drag on the slide or on the outline to select the two bullet points.
(You can select just part of each bullet point.)
-
 On
the Home ribbon tab, click
On
the Home ribbon tab, click  the Decrease List Level button.
The selected bullet points are moved to the left.
The list level decreases from 2 to 1, which is the same as saying that the paragraph was promoted to level 1
The paragraph now shows the red square bullet and text formatting that indicates a first level bullet point.Remember that the lines above these had bullet symbols that you removed. They are still level 1 paragraphs.
Method 2: Menu in Outline
-
 Open the slide Oceans & Beaches,
Slide #4.
Open the slide Oceans & Beaches,
Slide #4.
-
If necessary, show the Outline in the Navigation Pane.
-
Drag on the outline to select the bullet points.
-
 Right click on the selected bullet points.
-
In the context menu, click Promote.
All selected paragraphs are promoted to the next level.
Method 3: Keyboard Shortcut
-
 Open the slide Cities, Slide #5.
-
In the Slide Pane, select the bullet points, which have blue circles as bullets.
-
On the keyboard, hold down the SHIFT key and press the TAB key once, then left go of both keys.
The bullet points have first level formatting and first level bullets. Excellent!
-
Play these three slides in a slide show again and verify that the bullet points are now appearing one after the other and show the red square bullet symbol.
- Save
[nz-Lastname-Firstname.pptx]
Save As a Custom Template
Now that you have created a look and chosen an animation sequence, it would be nice to be able to apply it again later to a different presentation. That means you have to save your design as a custom template.
![]() After you save your
presentation as a template, the active document in PowerPoint will be the template that
you just saved, not the original presentation!
After you save your
presentation as a template, the active document in PowerPoint will be the template that
you just saved, not the original presentation!
- Save the presentation before saving as a template or your recent changes will be lost!!
- Close the template and re-open the presentation before doing any more editing!!!
-
Open a Save As dialog.
PowerPoint 2013, 2016:
File > Save As > Browse button -
 Change the file type to PowerPoint Template
(*.potx).
Change the file type to PowerPoint Template
(*.potx).
The dialog changes to show the custom templates folder.
(Yours may show a different path and different files than the illustration.)Templates saved to this folder will show in the list of template choices inside PowerPoint in the New dialog/pane. Of course, you can save to any folder you wish. For this lesson, you will not save to the Templates folder.
The file name is now nz-Lastname-Firstname.potx. -
Navigate to your Class disk.
The dialog won't show any files! The file type is currently set to .potx and there are not any files of that type on your Class disk yet.
-
Click the Save button in the dialog.
- Close the current document in PowerPoint, which is the template.
Be SURE to close the current document!!
|
|
| © 1997-2017 Jan Smith All Rights Reserved |
Site Map What's New |
Privacy Policy Terms of Service Copyright Acknowledgements |
~~ 1 Cor. 10:31 ...whatever you do, do it all for the glory of God. ~~
Last updated: March 22, 2017
Outline levels start at 1 for your most important topics. Level 2 is for subtopics under a level 1. Level 3 is for points that go under a Level 2 subtopic, and so forth. So the most important levels have smaller numbers. When you think of it this way, it can feel backwards!
How to say: Change a paragraph from level 1 to level 2
Demote the paragraph (to a less important level)
Increase List Level, change level to a higher number, 2
Increase indention
 The Increase List Level button also increases the
indention of the paragraph, normally.
The Increase List Level button also increases the
indention of the paragraph, normally.
How to say: Change a paragraph from level 2 to level 1
Promote the paragraph (to a more important level)
Decrease List Level, change level to a lower number
Decrease indention
 The Decrease List Level button also decreases the
indention of the paragraph, normally.
The Decrease List Level button also decreases the
indention of the paragraph, normally.