
Jan's Working with Presentations
Using PowerPoint 2007, 2010, 2013, & 2016
When you have information or ideas to share with an audience, you must do some kind of presentation. You could just talk and wave your hands around a lot. But, most of us find it helpful to to see your points up on a screen. We like to have printed handout sheets to take home and to make notes on during your presentation, too. All of these supplements to your words can be created using presentation software (also called presentation graphics).
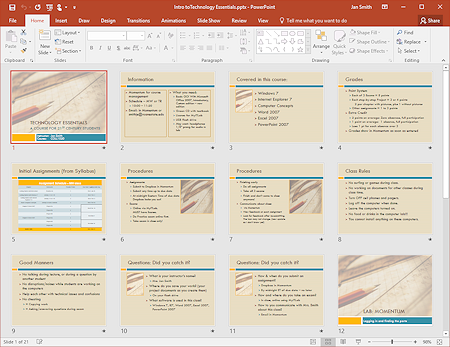
Slide sorter view of a 21-slide presentation (PowerPoint 2016)
Advantages: Slides
-
Your audience can follow along, even if they dozed off (for just a minute, of course!).
-
Pictures and charts explain some things much better than words.
-
Sounds, music, and video can make a strong impact and show what even still pictures cannot.
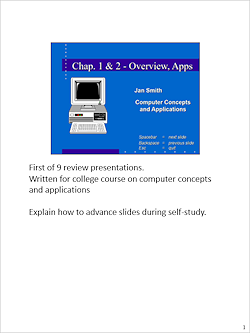
First slide of a presentation
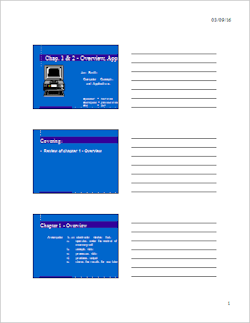
Advantages: Print-outs
-
 Your audience can review your points later from the
print-out.
Your audience can review your points later from the
print-out. -
Your audience can take notes along side your points.
-
Your audience can share what they learned with others who missed your excellent presentation.
 You can use the Notes Page print-out to include all the
other stuff you would like to say to expand on the slide points. They can act as
your cue cards.
You can use the Notes Page print-out to include all the
other stuff you would like to say to expand on the slide points. They can act as
your cue cards.
Fortunately, you do not have to choose between these different kinds of "presentations". You can do them all from the same software!!
In this set of lessons you will learn how to create, edit, and run a presentation. You will also learn how to put your presentation into hard copy and into a self-running format.
What you need
- Basic Windows skills: The skills covered in Working with Windows
 - using a mouse to click, double-click, drag, and right click;
parts of a window; moving, resizing, maximizing, and minimizing a window;
scrolling; using the folder tree; creating and managing folders; naming
files; opening a program; opening and saving files; using dialog boxes;
using Help; printing.
- using a mouse to click, double-click, drag, and right click;
parts of a window; moving, resizing, maximizing, and minimizing a window;
scrolling; using the folder tree; creating and managing folders; naming
files; opening a program; opening and saving files; using dialog boxes;
using Help; printing.
- Typing skills and word processing: You need to be familiar with the
computer keyboard and basic word processing like selecting text, deleting
text, moving text.
- Resource files: Files that you need to
create the documents in the projects are provided for download in a
zip file and are also available online separately . Your instructor may have put
these files on your computer already.
To get these resource files,
 click on the following link to download a zipped set of files:
A download dialog will appear. Choose "Save this program to a disk" if you want to unzip later. Choose Open to let Windows or your own zipping software unzip the files. Choose a folder on your hard drive for the extracted files.
To extract later, find the zipped file in an Explorer window and double-click it. Windows or your own zipping software will then unzip it.
Duplicate files: Some of the resource files have duplicates in different Office file formats. Be careful to choose the file that the directions tells you to use.
- Removable File Storage: USB drive
You need removable storage for a working copy and a backup copy of your documents.
If you have a computer of your own, keep an up-to-date copy of your work on your home computer, too. Another good location is at an online storage site like Dropbox, Google Drive, or OneDrive. Most such services have a free account with a significant amount of storage.
Start good backup habits early and you won't kick yourself later when your files are lost or corrupted.
USB drive: Recommended
Called by many different names: flash drive, flash pen, thumb drive, key drive, jump drive, and mini-USB drive, a USB drive is an excellent choice for storing your class work. Recent drives can hold a large number of documents, if you don't fill it up with music files!Before you buy:
Check the following for both the classroom computer AND your home computer-
- Computer does have USB ports.
- You are allowed to use one of the USB ports.
- You can physically get to the USB port.
Some are on the the back of the computer case. - Operating system will recognize a USB drive.
All versions of Windows since Win98 will automatically recognize your drive and set up the drivers needed to use the USB drive. - Physical arrangement of USB ports - Are they side by
side? one above the other?
Some USB drives are wider or thicker than others and may not fit all port arrangements, especially if a neighboring USB port has something plugged into it. Many drives come with a short extension cable. Or you can plug in USB hub, which will have several USB ports on it.
If you do not have a computer at home, consider buying two USB drives so that you can use one to keep a backup copy of your work. Don't lose them both at the same time!
More on caring for data
in Computer Basics. -
Software: You must have presentation software to create a presentation! This tutorial was written for Microsoft PowerPoint 2007, 2010, 2013, and 2016. The illustrations are taken from any of the versions, depending on whethere there is an important difference or not. Corrections and additions are usually illustrated with the most recent version I had at the time.
Lesson using earlier versions of PowerPoint, are in the site Archives: Working with Presentations: PowerPoint 97-2003
Other presentation programs probably offer a similar set of features. Of course the Step-by-Step directions are not likely to work for something besides PowerPoint.
You will need Microsoft Word or a similar word processing program for the step-by-step about using outlines
in Project 3.You will need Microsoft Excel or a similar spreadsheet program for the step-by-step about using external data
in Project 3.
- Templates: PowerPoint comes with a few templates
but more are available online.
Different versions of PowerPoint come with different templates. Each version may have animations and transitions that will not work in earlier versions.
- Optional:
 Writable CD or DVD for Package for CD lesson and a CD/DVD drive that will burn
files to a disc.
Writable CD or DVD for Package for CD lesson and a CD/DVD drive that will burn
files to a disc.
Icons
![]() Hands-on topic, (symbol in the menu) where you will have
Step-by-Step directions.
Hands-on topic, (symbol in the menu) where you will have
Step-by-Step directions.
![]() Tip - something you might find useful to know.
Tip - something you might find useful to know.
![]() Warning about possible problems.
Warning about possible problems.
![]() Problem and Solution, for what to do in case of trouble
Problem and Solution, for what to do in case of trouble
![]() Save or retrieve a file (Icon is a USB flash device. You may be using something else)
Save or retrieve a file (Icon is a USB flash device. You may be using something else)
![]() backup
copy of your Class documents
backup
copy of your Class documents
![]() your
storage device is too full to save new documents
your
storage device is too full to save new documents
![]() Print something.
Print something.
![]() Keyboard shortcut or method to do something
Keyboard shortcut or method to do something
![]() Link to a page or file that is part of this site
Link to a page or file that is part of this site
![]() Link to a page or file that is NOT part of this site. You must be connected to the Internet to view.
Link to a page or file that is NOT part of this site. You must be connected to the Internet to view.
Versions: Sections that apply to a certain version of Excel will be labeled and will have background color.
Multiple Versions: Sections that apply to multiple versions but not all will show nested background color with the most recent version showing the most color.
Disclaimer: All names, addresses, and phone numbers
used in the lessons and exercises are fiction! Any similarity to a real
person, business, or place is a coincidence.
The author cannot be held responsible for any damage to hardware,
software, or data resulting from your attempts to follow the directions.
|
|
| © 1997-2017 Jan Smith All Rights Reserved |
Site Map What's New |
Privacy Policy Terms of Service Copyright Acknowledgements |
~~ 1 Cor. 10:31 ...whatever you do, do it all for the glory of God. ~~
Last updated: March 27, 2017