|
When you have information or
ideas to share with an audience, you must do some kind of
presentation. You could just talk and wave your hands around a lot.
But, most of us find it helpful to to see your points up on a screen from
slides or transparencies. Printed handout sheets to take home and to make
notes on during your presentation are also very helpful. All of these
supplements to your words can be created using
presentation software (also called presentation
graphics).
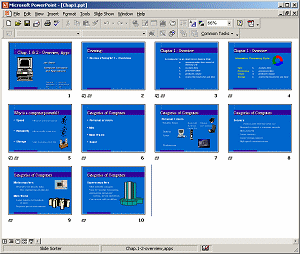
Slide sorter view of a short presentation |
|
Where you are:
JegsWorks> Lessons >
Presentations
Before
you start...
Project 1: PowerPoint Basics
Getting Started
Interface
Create
Printing
Summary
Quiz
Exercises
Project 2: PowerPoint Formatting
Design Issues
Templates
Transitions & Animations
Summary
Quiz
Exercises
Project 3: Advanced PowerPoint
Outline
Images
Tables & Charts
Finishing
Summary
Quiz
Exercises
Search
Glossary
Appendix
  Buy
Download/CD Buy
Download/CD
(no ads) |
|
Advantages: Slides/Transparencies:
-
Your audience can follow along, even if they dozed off
(for just a minute, of course!).
-
Pictures and charts explain some things much better
than words.
-
Sounds, music, and video can make a strong impact and
show what even still pictures cannot.
Advantages: Print-outs
-
Your audience can review your points later from the
print-out.
-
Your audience can take notes along side your points.
-
Your audience can share what they learned with others
who missed your excellent presentation.
-
You can use the Notes Page print-out to include all the
other stuff you would like to say to expand on the slide points. They can act as
your cue cards.
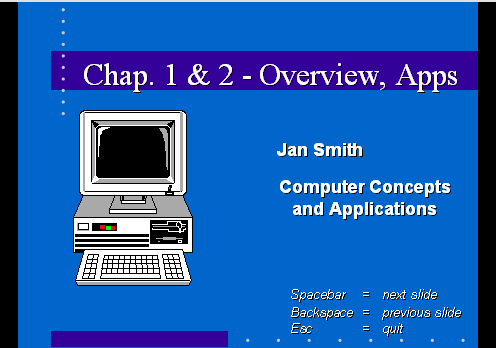
First slide of the example
Fortunately, you do not have to choose between these
different kinds of "presentations". You can do them all from the same
software!!
In this set of lessons you will learn how to create,
edit, and run a presentation. You will also learn how to put your
presentation into hard copy and into a self-running format.
What you need
- Basic Windows skills: The skills covered in the
Windows unit - using a mouse to click, double-click, drag, & right click;
parts of a window; moving, resizing, maximizing, & minimizing a window;
scrolling; using the folder tree; creating and managing folders; naming
files; opening a program; opening and saving files; using dialog boxes;
using Help; printing.
- Typing skills and word processing: You need to be familiar with the
computer keyboard and basic word processing like selecting text, deleting
text, moving text.
- Resource files: Files that you need to
create the documents in the projects are provided for download in a
zip file and are also available online separately. Your instructor may have put
these files on your computer already.
To get these resource files,  click on the following link to download a zipped set of files: click on the following link to download a zipped set of files:
resources-presentations.zip
A download dialog will appear. Choose "Save this program
to a disk" if you want to unzip later. Choose Open to let Windows or your own zipping software unzip the files. Choose a folder on your hard drive for the extracted files.
To extract later, find the zipped file in an Explorer window and double-click it. Windows or your own zipping software will then unzip it.
Duplicate files: Some of the resource files have duplicates in different Office file formats. Be careful to choose the file that the directions tells you to use.
- Removable File Storage: USB drive or several floppy disks
You
need removable storage for a working copy and a backup copy of your
documents.
If you have a computer of your own, keep an up-to-date
copy of your work on your home computer, too. Start good backup habits
early and you won't kick yourself later when your files are lost or
corrupted.
USB drive: Recommended
Called by many different names: flash drive, flash pen, thumb
drive, key drive, jump drive, and mini-USB drive. A USB drive is an excellent choice
for storing your class work. Your data is much safer on a USB drive than
on a floppy disk.
Before you buy:
Check the following for both the classroom computer AND your home
computer-
- Computer does have USB ports.
- You are allowed to use one of the USB ports.
- You can physically get to the USB port.
Some are on the the back of the computer case.
- Operating system will recognize a USB drive.
Windows 2000, XP, and Me will automatically recognize your USB drive.
For Win95 and Win98, you must install drivers.
- Physical arrangement of USB ports - Are they side by
side? one above the other?
Some USB drives are wider or thicker than others and may not fit all
port arrangements, especially if a neighboring USB port has something plugged into it.
Many drives come with a short extension cable.
If you do not have a computer at home, consider buying 2 USB
drives so that you can use one to keep a backup copy of your work. Don't
lose them both at the same time!
Floppy disks: Cheaper; Not as reliable
You will need
at least
 two blank 3½"
floppy disks at a time to store the documents you create. One you
will use to save your documents as you work and on the other you will make
a backup copy of the first disk. Keep a third blank floppy on hand
as a spare in case of floppy disasters.
two blank 3½"
floppy disks at a time to store the documents you create. One you
will use to save your documents as you work and on the other you will make
a backup copy of the first disk. Keep a third blank floppy on hand
as a spare in case of floppy disasters.
You'll need more than 2 floppy disks if you don't delete any
of the documents you create. After you have put more than one
document on the floppy, keep that spare blank floppy disk handy. It is no
fun at all to do a lot of work and then find that the changed file won't fit on
the disk!
 Presentations can quickly
get too big to fit on a floppy disk, especially if images are included on
the slides. Presentations can quickly
get too big to fit on a floppy disk, especially if images are included on
the slides.
Floppy disks are cheap and handy but it is easy to lose
the data on them from magnetic damage and physical damage when you are
carrying them around all day. Be careful and have several backup copies.
More on caring for
floppy disks and caring for data
 How to
handle a full disk How to
handle a full disk
- Software: You must have presentation software to
create a presentation! This tutorial was written primarily using
 Microsoft PowerPoint 2002 (which is part of the Office XP
suite).
Microsoft PowerPoint 2002 (which is part of the Office XP
suite). Comments and directions are marked with icons for the
version, when there are differences:
PowerPoint 2002 (primary illustrations)
 PowerPoint 2003 PowerPoint 2003
Other presentation programs
probably offer a similar set of features. Of course the Step-by-Step
directions are not likely to work for something besides PowerPoint.
You will need Microsoft Word or a similar word processing program for the step-by-step about using outlines.
You will need Microsoft Excel or a similar spreadsheet program for the
step-by-step about importing data.
- Design Templates:
Your PowerPoint may not have installed the design templates originally. When you
try to apply a template, PowerPoint will offer to install them, but you
will need your installation CD.
Different versions of PowerPoint come
with different templates. Some types of animations and transitions will
not work in the earlier versions of PowerPoint.
Microsoft has 3 zipped files for download that
contain most of the templates that came with PowerPoint 4.0, 97, and
2000.
Download details: PowerPoint Templates Pack 1 - A - EL - 1268 KB
Download details: PowerPoint Templates Pack 3 - EM - P - 1357 KB
Download details: PowerPoint Templates Pack 2 - Q - Z - 1554 KB
Self-extraction: You must be using Windows 2000 Service Pack
3, Windows Server 2003, or Windows XP to take advantage of the
self-extracting feature of the zipped files. Otherwise use the manual
method below.
Manual extraction: You can extract
the templates manually if your operating system is not in the list above.
After downloading, open the .exe file with WinZip or similar program. From
the list of files in the compressed .exe file, open
Office1.cab with WinZip. You will see a list that includes the
actual template files (.ppt). Select the
.ppt files and extract them to an
appropriate directory, preferably the folder where PowerPoint will look
for templates (which varies with the version of PowerPoint). For recent
versions the path is
c:\Program Files\Microsoft
Office\Templates\Presentation Designs
Icons
 A
footprint marks the hands-on topics, where you are to follow Step-by-Step
directions. A
footprint marks the hands-on topics, where you are to follow Step-by-Step
directions.
 marks a tip -
something you might find useful to know. marks a tip -
something you might find useful to know.
marks a
warning about possible problems.
 marks directions
for what to do in case of trouble marks directions
for what to do in case of trouble
PowerPoint 2002
PowerPoint 2003
Disclaimer: All names, addresses, and phone numbers
used in the lessons and exercises are fiction! Any similarity to a real
person, business, or place is a coincidence.
The author cannot be held responsible for any damage to hardware,
software, or data resulting from your attempts to follow the directions.


~~ 1 Cor. 10:31 ...whatever you do, do it all for the
glory of God. ~~
Last updated:
30 Apr 2012 |