|
Exercise PowerPoint 3-1: Outline, Images, Table
|
What you will do: |
Create a presentation from an existing outline.
Change a slide layout.
Edit slides.
Use the Pre-Print Checklist.
Print an outline with header.
Apply an animation scheme.
Apply a design template.
Edit Slide and Title Masters.
 Ungroup a group of images and delete an image Ungroup a group of images and delete an image
Save As template.
Insert images from file and from clip art.
Create a table.
 Change background fill for
cells. Change background fill for
cells.
Manage animation of images. |
Start with: theater seats.rtf from
resource files.
The City Theater wants you to create a training presentation for
volunteers who will handle ticket sales. The volunteers need to
understand the different types of tickets, the ticket prices, what
discounts are available and who qualifies for a discount. The theater's
manager has written a Rich Text Format document in outline form for you
to use to create the presentation. You will need to make a few
corrections and add formatting, images, transitions, and animations.
 In PowerPoint 2003, you will have to add animation to your images at the
end of the exercise.
- From PowerPoint, open the Rich Text File theater seats.rtf
from the
resource files. (The default location on your hard disk
for the downloaded file is:
c:\My
Documents\complit101\presentations\theater seats.rtf
 Don't see the file
theater seats.rtf: In the Open dialog,
change the file types to All Files. Don't see the file
theater seats.rtf: In the Open dialog,
change the file types to All Files.
- Title slide: Apply the Title slide layout to the first slide.
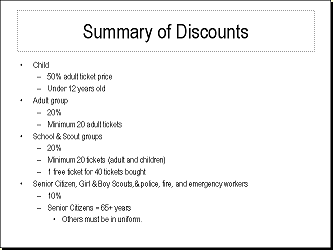
- Slide: Summary of Discounts: There is too much text to fit on this
slide!
Click in the list and then
using the key combo CTRL + A to select all of the list items. (You cannot select by dragging
because you cannot even see all of the text. Some of it is way off the slide
at the bottom.)
With the text still selected, change font size of
bullet text to 18.Use the Increase Indent button to change the lines in
the bullet list where necessary to look like the illustration below:
- Animation Scheme: Apply the Float animation scheme to all
slides.
- Use the Pre-Print Check list,
especially Spell Check.
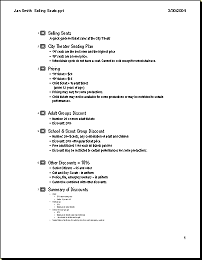
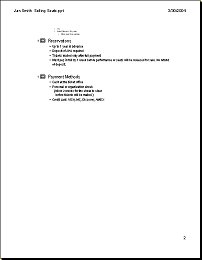
- Header: In the header of the outline, include your name and the filename on
the left. Put the date on the right and update it automatically.
-
 Save
as Selling seats.ppt to your Class disk. Save
as Selling seats.ppt to your Class disk.
-
 Print the outline.
-
 Design
Template: Apply the template LaVerne. Design
Template: Apply the template LaVerne.
 If you
cannot find this template, you can download the pack that contains it
Download details: PowerPoint Templates Pack 3 - EM - P - 1357 KB If you
cannot find this template, you can download the pack that contains it
Download details: PowerPoint Templates Pack 3 - EM - P - 1357 KB
Or choose a different template, one that has an image on the master.
You will replace that image in the next section.
- Masters: Replacing template image
 Click on the boomerang on the Title master. It is a part of a
group of images. Click on the boomerang on the Title master. It is a part of a
group of images.  From the Drawing bar, click on Draw and select Ungroup. From the Drawing bar, click on Draw and select Ungroup. - Click off to deselect the ungrouped images and then click on the boomerang to
select just it.
- Delete.
- Select the shadow that was under the boomerang and delete it.
-
 Insert the image ticket.gif from
your resource files at 120% of
original size and position it to replace the boomerang. Insert the image ticket.gif from
your resource files at 120% of
original size and position it to replace the boomerang.
- Repeat for the Slide Master, at 75% of original size.
- Change the bullet image to a right arrow
 . .
-
 Save
as a design template on your Class disk with the name
seatingplan.pot. Save
as a design template on your Class disk with the name
seatingplan.pot.
- Slide 2: Seating Plan
-
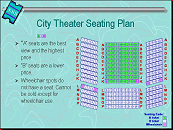 Insert
the image theaterseatingplan.gif from your
resource files at 120% of
original size. Insert
the image theaterseatingplan.gif from your
resource files at 120% of
original size.
- Change the font size for the bullet lines to 24.
- Resize the text placeholder narrow enough to not be under the
seating plan image.
- Insert the image seatcodes.gif and
position it above the bullet list.

 Select both images and right click the selection. Choose Grouping
and then Group from the popup menu. Select both images and right click the selection. Choose Grouping
and then Group from the popup menu. - Apply the Fade custom animation to the grouped images.
- Slide 3: Pricing
- Remove bullets for last two items.
- Change the font size to 24 starting with (under12 years of age)
and continuing to the end of the slide.
- Slide 4: Adult Groups
-
 Insert
a clip art image of a bus with adults or of a group of adults. Use
keyword "bus" for your search. (The little globe in the corner of the thumbnail means
that it is from the online collection). Position it toward the bottom
right of the slide. Insert
a clip art image of a bus with adults or of a group of adults. Use
keyword "bus" for your search. (The little globe in the corner of the thumbnail means
that it is from the online collection). Position it toward the bottom
right of the slide.
- Slide 5: School & Scout Groups Discount
-
 Insert a clip
art image of a school bus. (Use keywords "school bus".) Insert a clip
art image of a school bus. (Use keywords "school bus".)
- Resize and position at the right middle of the slide.
- Resize the text placeholder to get all of the text on the slide,
without running underneath the bus.
- Change the font size of the text to 24.
- Slide 6: Other Discounts
-
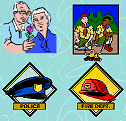 Insert
the image seniorcitizens.gif from your
resource files . Insert
the image seniorcitizens.gif from your
resource files .
- Insert clip art for scouts, police, and fire. (Use keywords
"scouts", "police", and "emergency services".)
Choose similar images if you do not find these particular images.
 Apply Draw | Align or
Distribute commands to selected images so that they form neat rows and
columns. Apply Draw | Align or
Distribute commands to selected images so that they form neat rows and
columns.- Select all 4 images and group them so that they will animate
together.
- Slide 7: Summary of Discounts
-
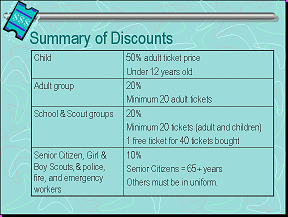 Replace
the bulleted list with a table Replace
the bulleted list with a table
-
 Use the Drawing bar's Use the Drawing bar's
 Fill button to
color the background of selected cells to match the slide's
background color. Fill button to
color the background of selected cells to match the slide's
background color.
- Slide 9: Payment Methods
-
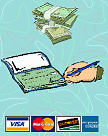 Insert
clip art images of cash and a check book and position at the right. Insert
clip art images of cash and a check book and position at the right.
- Insert the image creditcards.gif from
your resource files and
position at the right.
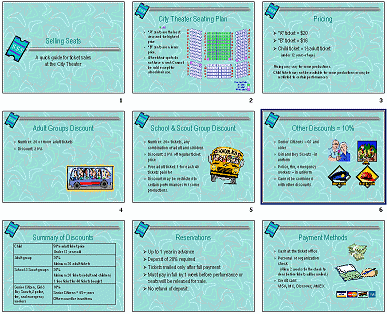
- Edit on your own: Edit text and resize text placeholders to improve the slides.
- Animations: If necessary, add the animations of your
choice to the images so that they move onto the slide after the text.
 PowerPoint 2002 will apply the animations from the Master slide to your
images if AutoLayout was turned on when you inserted the images.
 PowerPoint 2003 does not use AutoLayout for images, so the animations on
the Master do not apply.
-
 Save. [Selling
seats.ppt] (Not in .pot format!) Save. [Selling
seats.ppt] (Not in .pot format!)
-
 Print a handout with 9 slides per page. Include your name, the file
name, and the date in the header of the handout.
-
 Use
Pack and Go or Package for CD to save your presentation along with the PowerPoint
viewer. (This will take over 4 MB of space.) Use
Pack and Go or Package for CD to save your presentation along with the PowerPoint
viewer. (This will take over 4 MB of space.)
|

