|
PowerPoint can open many Word
documents and create slides from the text. You will get better results if
you create a copy to edit and then assign outline levels to all of the
text that you want in the presentation.
The
more complex the Word doc, the more you will need to make changes before
letting PowerPoint create slides from it.
Images in your Word doc will not be put on the slides automatically. You
will have to insert them into the presentation yourself. |
|
Where you are:
JegsWorks > Lessons > Presentations
Before you start...
Project 1: PowerPoint Basics
Project 2: PowerPoint Formatting
Project 3:
Advanced PowerPoint
Outline

 Text
Outline Text
Outline
Word
Outline
Custom
Template
Images
Tables & Charts
Finishing
Summary
Quiz
Exercises
Search
Glossary
Appendix
|
|
 |
Step-by-Step:Word Outline |
|
What you will learn: |
to create an outline in Word
to create a presentation from a Word outline
to edit the text
to change slide layout |
Start with:  , ,
 (Word), NZinfo.doc from the
resource files
(Word), NZinfo.doc from the
resource files
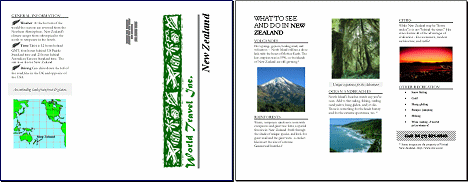
The original brochure about New Zealand was a tri-fold, as shown below. Since all
of the text in the brochure is in text boxes, PowerPoint cannot see the
text at all! You will work with a version of this brochure that has
already taken the text out of the text boxes.
Open Word Document
You will need to simplify the text and add some heading
styles.
-
Open Word (not PowerPoint!) and open the file NZinfo.doc from
the resource files.
The default location on your computer is:
c:\My Documents\complit101\presentations\NZinfo.doc
There are 3 pages with pictures and decorative bullets. Some paragraphs
have heading styles already. But you need to make a lot of changes to
turn this information into good slides. You will put the images back in
later.
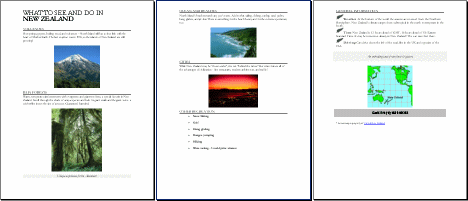
Edit Word Document into an Outline
Your slides don't need all the lovely sentences in this document. It's
time to simplify!
-
Edit the text so that the document reads as shown below. The
titles and text must be MUCH shorter than the original to make good
slides.
The font and styling of the text will not actually matter at this point. You will be
changing those in PowerPoint later.
PowerPoint will not import the images, so you might as well delete them
as you edit.
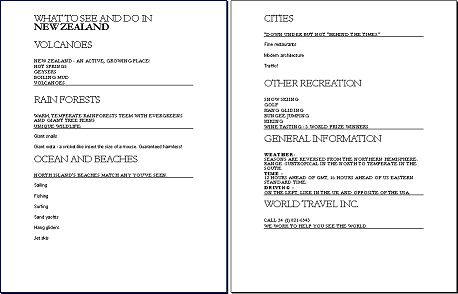
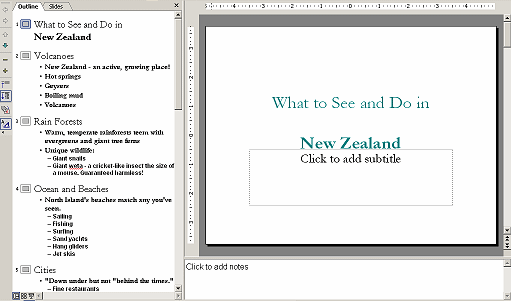
What to See and Do in New Zealand
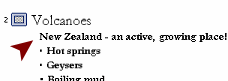
Volcanoes
New Zealand - an active, growing place!
Hot springs
Geysers
Boiling mud
Volcanoes
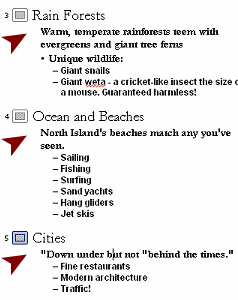
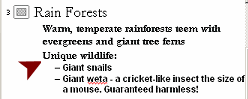
Rain Forests
Temperate rainforest, teeming with evergreens and giant tree ferns
Unique wildlife:
Giant snails
Giant weta - a cricket-like insect the size of a mouse. Guaranteed
harmless!
Ocean and Beaches
North Island's beaches match any you've seen.
Sailing
Fishing
Surfing
Sand yachts
Hang gliders
Jet skis
Cities
"Down under” but not "behind the times."
Fine restaurants
Modern architecture
Traffic!
Other Recreation
Snow Skiing
Golf
Hang gliding
Bungee jumping
Hiking
Wine tasting - 3 world prize winners
General Information
Weather -
Seasons reversed from the Northern Hemisphere.
Range = subtropical in the north to temperate in the South.
Time -
12 hours ahead of GMT, 16 hours ahead of US Eastern Standard Time
Driving -
On the left, like in the UK and opposite of the
USA.
World Travel Inc.
Call 54 (1) 821-6543
We work to help you see the world.
Apply Headings
-
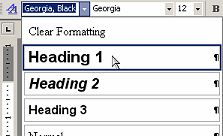 Put your cursor in the first line, What to See and Do in
New Zealand, without selecting any characters. The Style box shows that
this paragraph is already styled with Heading 1 Put your cursor in the first line, What to See and Do in
New Zealand, without selecting any characters. The Style box shows that
this paragraph is already styled with Heading 1
-
Continue by verifying or applying Heading 1 to the lines listed
below,
which will become slide titles:
  You can
apply a style to multiple lines at a time if you select the lines first.
To select lines that are not next to each other, hold CTRL down while
selecting. You can
apply a style to multiple lines at a time if you select the lines first.
To select lines that are not next to each other, hold CTRL down while
selecting.
CTRL + ALT + 1 is the key combo to apply Heading 1. Volcanoes
Rain Forests
Ocean and Beaches
Cities
Other Recreation
General Information
World Travel Inc.
- Apply Heading 2 to the lines below. These will become first
level bullets in PowerPoint. You will take the bullet off of most of
them, but Heading 2 tells PowerPoint to put the text on a slide.
CTRL + ALT + 2 is the key combo to apply Heading 2.New Zealand
- an active, growing place!
Warm, temperate rainforests, teeming with
evergreens and giant tree ferns
Unique wildlife:
North Island's beaches match any you've seen.
"Down under” but not "behind the times."
Weather -
Seasons reversed from the Northern Hemisphere.
Range = subtropical in the north to temperate in the South
Time -
12 hours ahead of GMT, 16 hours ahead of US Eastern Standard Time
Driving-
On the left, like in the UK and opposite of the
USA.
Call 54 (1) 821-6543
We work to help you see the world.
- Apply Heading 3 to the lines which will
become second level bullets:
CTRL + ALT + 3 is the key combo to apply Heading 3.
Hot springs
Geysers
Boiling mud
Volcanoes
Giant snails
Giant weta - a cricket-like insect the size of
a mouse. Guaranteed harmless!
Sailing
Fishing
Surfing
Sand yachts
Hang gliders
Jet skis
Fine restaurants
Modern architecture
Traffic!
Snow Skiing
Golf
Hang gliding
Bungee jumping
Hiking
Wine tasting - 3 world prize winners
-
From the View menu select Header and Footer.
-
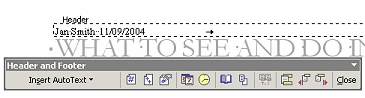 Type your
name and the date at the left of the Header. Type your
name and the date at the left of the Header.
-
Click on the Close button on the Header and Footer
toolbar.
-
Save to your Class disk with the file name NZinfo-edited.doc
.
 How to handle a full Class disk
-
 Print. Print.
- Close Word.
Open a Word Outline in PowerPoint
PowerPoint automatically creates a presentation when you
open a word processing document with PowerPoint. How helpful that is
depends on the quality of the outline of the original document.
-
If necessary, open PowerPoint.
-
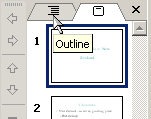
From the menu
select |. The Open dialog
appears.
-
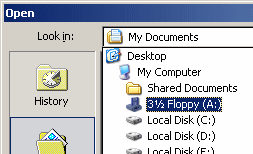 Navigate
to your Class disk using the
Look in: list. Navigate
to your Class disk using the
Look in: list.
-
Select NZinfo-edited.doc.
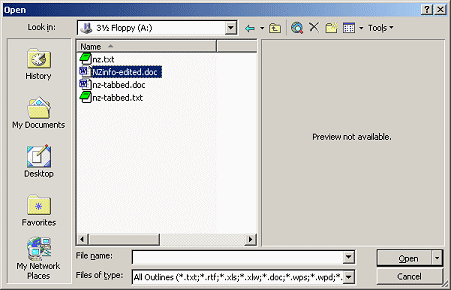
 No Word documents are
showing: No Word documents are
showing:
Change the Files of type: box to All Outlines.
-
Click on Open. The outline opens in PowerPoint
and is automatically turned into a set of slides. This is easy!! Well, if
your outline is set up right, it is.
Blank
slides:
Extra blank lines in the Word document can create blank slides. Just
delete them.
Can't open
outline in PowerPoint:
If the outline is still open in its original program and you try to open
it with PowerPoint, you will get an error message that says PowerPoint
cannot open this type of file. Not a helpful message!
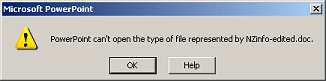
Solution: Switch to the program that has the outline open,
close the outline, and try again from PowerPoint.
How to tell that a file is being used: Sometimes it's hard!
-
Task Bar button: The button shows the name of the Word document
that is open, but the button is often too short to show enough of the
name. Hover over the button to show a popup with the whole file name.
-
File list in the Open dialog:
-
If the file is on your hard disk, look at the file list. Word
creates a
temporary copy when the file is open. Word replaces the
first two characters in the file's name with ~$ .
This puts the temporary copy at the top of the file list alphabetically
with a faded icon, like:

-
If the file is on a removable disk, the temporary copy is
not on the removable disk, so you cannot easily tell that the file is
already open this way.
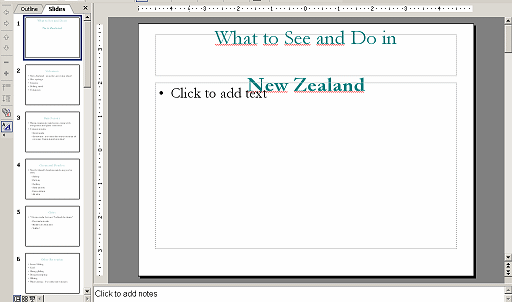
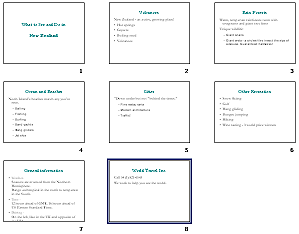
- Click on each of the slide thumbnails to see what PowerPoint
put on the slides. Not too bad at first glance.
The formatting is quite different from the original and not at all what
you will want for your presentation.
- Check the slides and make any corrections necessary to
the words or capitalization. Delete any blank slides.
Some of the paragraph styles in the Word document were formatted as
small caps.
PowerPoint threw out that formatting. You will definitely need to capitalize some list items.
If Style Check is still on and the
Office Assistant is also on, you may see some
 light bulbs with style suggestions, including capitalizations.
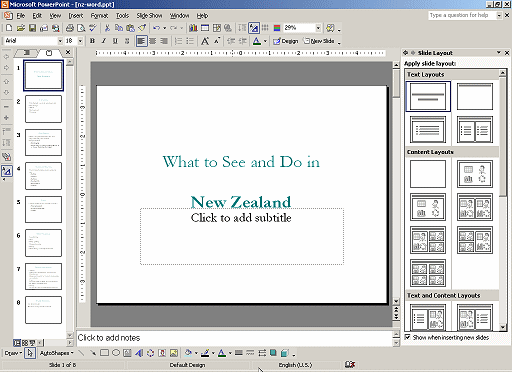
Change Slide Layout
The first slide is a Title slide but it uses the normal slide layout. All it takes is a simple click to change a slide layout.
-
Select Slide #1 to display it in the
Slide pane.
-
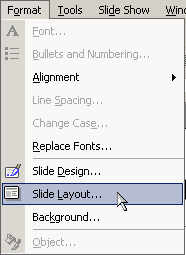 From
the menu select |. The Slide Layout pane appears in the Task Pane at
the right. From
the menu select |. The Slide Layout pane appears in the Task Pane at
the right.
-
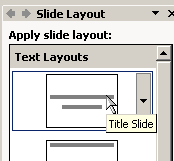 Click
the thumbnail for Title Slide, which has two placeholders in the middle
of the slide. Your title and subtitle placeholders are moved. Sweet! Click
the thumbnail for Title Slide, which has two placeholders in the middle
of the slide. Your title and subtitle placeholders are moved. Sweet!
Remove Extra Bullets
In order to get your text onto the slide from the existing
Word document, you had to assign Heading styles to all of the
paragraphs. PowerPoint put a bullet on every paragraph with Heading 2 or 3.
Some of those bullets need to go!
-
 In
the Navigation pane, click on the Outline tab. In
the Navigation pane, click on the Outline tab.
The Outline opens and the pane expands to give you more room to read the
text.
-
In the outline, click
on the first text line, New Zealand - an active..., of Slide #2: Volcanoes.
This line should not be a member of the list.
It is the introduction to the list. You need to remove that
bullet.
-
 Click Click
 the Bullets button on the toolbar. The bullet vanishes and the
paragraph moves back to the left. Easy as can be!
the Bullets button on the toolbar. The bullet vanishes and the
paragraph moves back to the left. Easy as can be!
-
 Similarly,
in outline of Slides 3, 4, and 5, remove the bullet from the first text
line. Similarly,
in outline of Slides 3, 4, and 5, remove the bullet from the first text
line.
-
 On
Slide #3, remove the bullet beside "Unique wildlife:". On
Slide #3, remove the bullet beside "Unique wildlife:".
-
 On
Slide #8, remove both of the bullets. On
Slide #8, remove both of the bullets.
Save
-
Click
the Save button
 .
The Save As dialog appears since this presentation has not been saved
before. Use the name nz-word.ppt . .
The Save As dialog appears since this presentation has not been saved
before. Use the name nz-word.ppt .
How to handle a full Class disk
-
Switch to Slide Sorter view. The formatting needs some
work. The text on Slide #7 is about to run off the slide.
nz-word.ppt in Slide Sorter view
   
~~ 1 Cor. 10:31 ...whatever you do, do it all for the
glory of God. ~~
Last updated:
30 Apr 2012 |