Jan's Working with Presentations
Advanced: Outline: Text
PowerPoint is perfectly willing to
create slides from a plain text outline. But, each normal paragraph will
be turned into a slide title. Not usually what you want!
 If you indent
your outline levels using tabs, PowerPoint will follow along and treat
those items as bullet points. Better!
If you indent
your outline levels using tabs, PowerPoint will follow along and treat
those items as bullet points. Better!
Creating a plain text outline for your presentation first can help you organize your thoughts
and the flow of ideas on the slides. In a text editor or word processor,
you can more easily see the whole outline than in PowerPoint.
 |
Step-by-Step: Text Outline
|
|
| What you will learn: |
to create a text outline
to create a presentation from a text outline
to demote text in outline
to remove a bullet
to create a tabbed text outline
to create a presentation from a tabbed text outline
|
Start with:  ,
,  (PowerPoint open to a
blank document), resource files
(PowerPoint open to a
blank document), resource files
The Story behind this presentation:
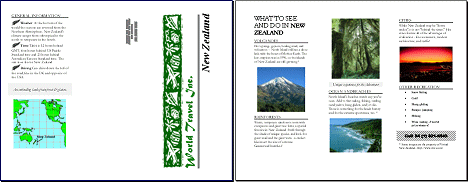
World Travel Inc. has a set a brochures about vacation destinations. They
want to transform these into PowerPoint presentations to run unattended on a
monitor at their booth at a Travel Fair.
What you will create:
An on-screen presentation based on an outline of a brochure about New
Zealand. This brochure is also used in Working with the
Web: HTML.
Create a Plain Text Outline
-
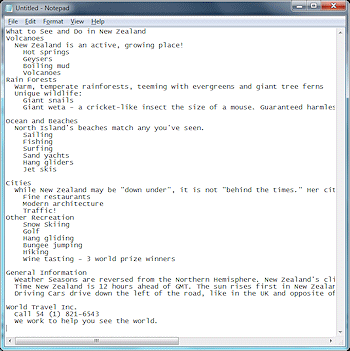
Select and copy the text below.
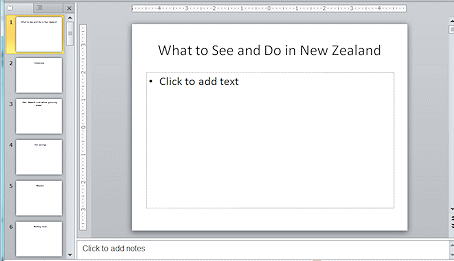
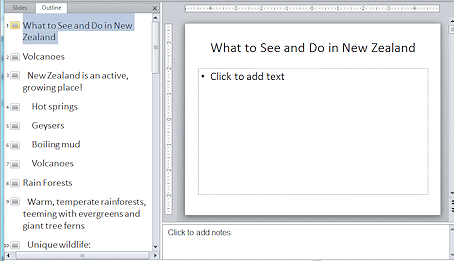
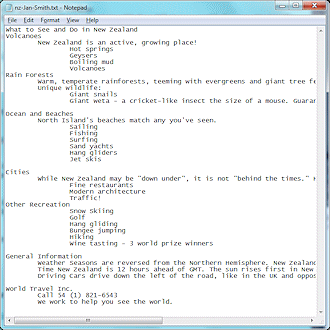
What to See and Do in New Zealand
Volcanoes
New Zealand is an active, growing place!
Hot springs
Geysers
Boiling mud
Volcanoes
Rain Forests
Warm, temperate rainforests, teeming with
evergreens and giant tree ferns
Unique wildlife:
Giant snails
Giant weta - a cricket-like insect the
size of a mouse. Guaranteed harmless!
Ocean and Beaches
North Island's beaches match any you've seen.
Sailing
Fishing
Surfing
Sand yachts
Hang gliders
Jet skis
Cities
While New Zealand may be "down under", it is not
"behind the times." Her cities feature all of the advantages of
civilization –
Fine restaurants
Modern architecture
Traffic!
Other Recreation
Snow Skiing
Golf
Hang gliding
Bungee jumping
Hiking
Wine tasting - 3 world prize winners
General Information
Weather Seasons are reversed from the Northern
Hemisphere. New Zealand's climate ranges from subtropical in the north to
temperate in the South.
Time New Zealand is 12 hours ahead of GMT. The sun
rises first in New Zealand.
Driving Cars drive down the left of the road, like
in the UK and opposite of the USA.
World Travel Inc.
Call 54 (1) 821-6543
We work to help you see the world.
This text is formatted with leading spaces to create the indentions in the outline. The levels are not numbered because we don't want to see
outline
numbers and letters on the slides!
-
 Open Notepad or another plain text editor.
(Start button > type notepad in the Search box > Press the ENTER key when Notepad shows up in the search
results list and is selected.)
-
Paste into the blank Notepad document.
The
outline levels are shown by the indentions.
 Different fonts created different spacing: The indentions are deeper in
Notepad than in the text you copied. The default font for Notepad is a fixed-width font, also called monospaced. All characters have the same width.
The text that you copied used a proportional font, where blank
spaces and narrow characters like i and l are allowed less space than
wide characters like w.
Different fonts created different spacing: The indentions are deeper in
Notepad than in the text you copied. The default font for Notepad is a fixed-width font, also called monospaced. All characters have the same width.
The text that you copied used a proportional font, where blank
spaces and narrow characters like i and l are allowed less space than
wide characters like w.
-
From Notepad's menu select > .
-
In the Header text box, delete the code &f (which adds the file name to the header.)
 Add your name and the code &d, which prints the day and date, like 'Tuesday,
August 23, 2011'.
Add your name and the code &d, which prints the day and date, like 'Tuesday,
August 23, 2011'.- Click on OK to close the Page Setup dialog.
-
Save to your Class disk in the folder powerpoint
project3 with the file name nz-Lastname-Firstname.txt.
(Create the folder if you do not have one yet.)
-
 Print.
There is no print preview in Notepad.
-
Close Notepad.
Open a Plain Text Outline in PowerPoint
Let's see what PowerPoint does with a plain text outline
and then how to fix what it does.
-
Open PowerPoint.
-
Open the Open dialog:
 PowerPoint 2007: Select
 the Office button

and then
Open.
The Open dialog appears.
-
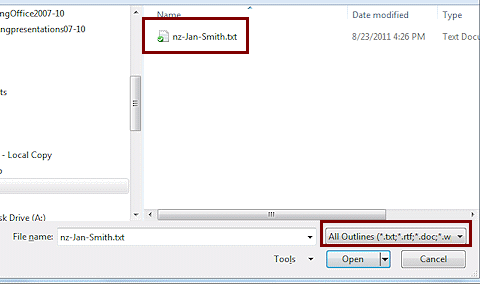 Browse to your Class disk to the text file you just saved.
- If necessary, change the file type box to All Outlines.
The file nz-Lastname-Firstname.txt should be
the only file showing.
 Problem: No text file shows
The Files
of type: box still shows Presentations, which is the default or
you are in the wrong location.
Solution 1: Change the file type box to All Outlines.
Solution 2: Navigate to the folder where you saved the file.
Solution 3: If you do not know where you saved the file, type the start of
the file name in the Start button Search box (Win8, 8.1) while on the Start screen or in the Search box on the Taskbar (Win10). It should eventually show up
in the results... if you named it correctly
Solution 4: If it seems like you mis-typed the file name, use a Windows Explorer
search for files saved Today.
Solution 5: If all else
fails or you just don't want to hunt around, create the document again and
save with the correct name to the correct folder.
-
 Select nz-Lastname-Firstname.txt and click on
the Open button.
Select nz-Lastname-Firstname.txt and click on
the Open button.
PowerPoint is happy to open the file and create slides, but look at the
thumbnails! Each paragraph is now a slide title. Whoops. This is not what
you want at all. Happily, it is easy to fix - without having to move any
text!
-
Click the Save button 

 on
the Quick Access Toolbar.
on
the Quick Access Toolbar.
The
Save As dialog appears since this presentation has not been saved
before. What you saved before was the text file.
-
Save with the name nz-text-Lastname-Firstname.pptx .
Use Increase/Decrease Indent to Promote/Demote
The Home ribbon tab has two buttons 
 that make it easy to
manage the outline levels. These look like the Decrease Indent and
Increase Indent buttons you may be familiar with from Word. In PowerPoint
the indention is a side-effect of changing the outline list level. You will use these buttons to Decrease List Level or Increase List Level for the lines that should be bullet points.
that make it easy to
manage the outline levels. These look like the Decrease Indent and
Increase Indent buttons you may be familiar with from Word. In PowerPoint
the indention is a side-effect of changing the outline list level. You will use these buttons to Decrease List Level or Increase List Level for the lines that should be bullet points.
-
 Show the outline in the Navigation pane.
[Click the Outline tab in the Navigation pane or click the Outline View button on the View ribbon tab, depending on your version of PowerPoint.]
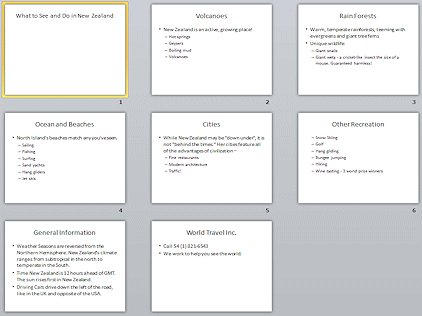
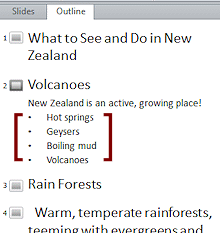
Each paragraph from the text outline has a slide icon - 39 slides! You must fix
this mess!
-
Switch to the Home ribbon tab, if necessary.
-
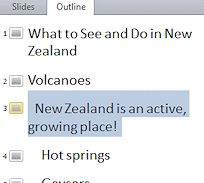 Click on the slide icon for Slide #3: New Zealand is.... The whole line is selected.
-
 On
the Home ribbon tab, click Increase List Level button .
On
the Home ribbon tab, click Increase List Level button .
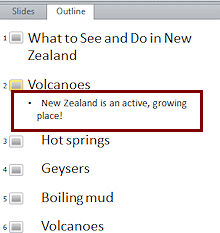
The title text from Slide 3 is now a bullet item on Slide 2
and the slides are renumbered. Better!
-
 Continue by selecting slides 3, 4, 5, and 6 together and then increasing the
list level.
Continue by selecting slides 3, 4, 5, and 6 together and then increasing the
list level.
Hmmm. That first bullet on Slide 2 is not really a member of the list. It
is a comment. You need to remove the bullet.
-
In the outline, click in the first text line,
New Zealand is..., of Slide 2 .
-
On the Home ribbon tab, click the Bullets button  .
.
The bullet is
toggled off. Simple enough.
These steps could be repeated for the remaining slides to gather the text
onto the slides with the titles. Instead we will stop here and look an
another variety of plain text outline, the tabbed text outline.
-
Save.
[nz-text-Lastname-Firstname.pptx]
-
Close the presentation.
Create a Tabbed Text Outline
PowerPoint recognizes tabbed text when it creates slides. If
the outline uses tabs instead of spaces to indent the outline parts, the slides
will turn out better!
-
 Open Notepad again and open nz-Lastname-Firstname.txt from your Class disk.
-
For lines that have 2 spaces to the left, replace the spaces with one tab.
(Select the spaces and press
the TAB key.)
The indention will be larger than before.
-
For lines that have 4 spaces to the left, replace the spaces with 2 tabs.
(Select the spaces and press the TAB key twice.)
-
Open Page Setup from the File menu and verify that your name and the date are still in the
Header box.
-
Click on OK to close the dialog.
-
From
Notepad's File menu select Save As.
Use the name nz-tabbed-Lastname-Firstname.txt to save your revised outline to your Class disk in the powerpoint project3 folder.
-
Print.
-
Close Notepad.
Open Tabbed Text Outline in PowerPoint
- Switch to PowerPoint.
- Open nz-tabbed-Lastname-Firstname.txt on your Class disk.
- Switch to Slide Sorter View by clicking


 the Slide Sorter button in the View bar on the Status bar.
Ah! These slides are in much better form that the ones from the first text
outline. It pays to TAB!
-
Click the Save button on
the Quick Access Toolbar.
The
Save As dialog appears since this presentation has not been saved
before.
Use the name nz-tabbed-Lastname-Firstname.pptx .
There are still formatting and layout issues with this presentation. Rather than
fight it out manually, let's move on to see how PowerPoint works with a Word
outline.
