
Jan's Working with the Web
Images: Align & Space
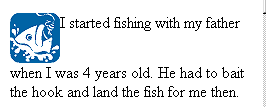
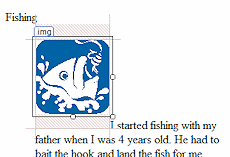
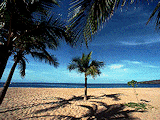 You probably expect
text to wrap around an image, the same way this text wraps to the left of
the beach photo at the right. That does
not happen automatically. You must set an
attribute for the IMG tag to make that happen.
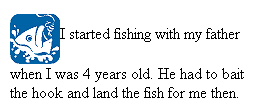
You probably expect
text to wrap around an image, the same way this text wraps to the left of
the beach photo at the right. That does
not happen automatically. You must set an
attribute for the IMG tag to make that happen.
Make Text Wrap:
- Old HTML way: Include an ALIGN attribute in the IMG tag,
which can be set equal to LEFT or RIGHT.
<img src="palm.gif" align="right" width="160" height="120">
- New CSS way: Include a STYLE attribute with property:value of float:left or float:right
<img src="palm.gif" style="float:right" width="160" height="120">
Why the Change?
The old HTML standard had grown to include some tags and attributes that were not what HTML was originally intended to be.
-
Logical parts: HTML tags are supposed to mark the logical parts of a document - heading, paragraph, list, form, table, footer, etc. Each browser has defaults for how to display these parts.
-
Display: CSS styles handle changes to how those parts look - font, font size, color, background, alignment, white space, indentions, etc.
Why Bother with CSS?
For now, current browsers support both the old and the new methods - at least most of the methods. The browsers are trying to stay backwards compatible with the old tags and attributes and yet still support the newest standards. It's tricky!
This makes trouble for those of us trying to write web pages! But, it is all part of being in an evolving technology.
So, why do we need to learn a whole new approach to formatting? Because it saves work in the long run!
CSS styles can be grouped into one CSS document, like mystyles.css, that can be linked to your web pages. There are serious advantages!
Reason 1: Define formatting style in one place (CSS document); use it in many places (multiple web pages).
Reason 2: Change the formatting style in one place (CSS document); formatting automatically updates on all places that use that style (web pages).
Reason 3: At some time in the future, new browsers or browser versions may not understand or obey the old tags and attributes at all.
These lessons only cover the basics. Old ways of formatting will be discussed a bit, but the step-by-step parts will be done with CSS. There will be lots of HTML and CSS features that we won't cover.
![]() Deprecated Tags and Attributes: An tag or attribute that has
been deprecated is not part of the new standard at
all.
For example, in HTML5 the IMG tag no longer has the attributes ALIGN, HSPACE, and VSPACE.
Deprecated Tags and Attributes: An tag or attribute that has
been deprecated is not part of the new standard at
all.
For example, in HTML5 the IMG tag no longer has the attributes ALIGN, HSPACE, and VSPACE.
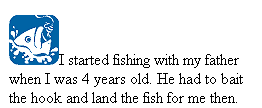
Align an Image
Let's look at how we can make the text flow around an image.
The table below shows the values that you will use the most for images. There are some other values, but in most situations the results are the same as with one of values listed.
![]() Confusion - Old
Method - Attribute: The values
allowed for the old ALIGN attribute for an image are top, bottom,
middle, left, and right. But ALIGN for a paragraph could have values left,
right, center, and justify. So close and yet so different!
Confusion - Old
Method - Attribute: The values
allowed for the old ALIGN attribute for an image are top, bottom,
middle, left, and right. But ALIGN for a paragraph could have values left,
right, center, and justify. So close and yet so different!
![]() Confusion - New Method CSS: The examples on this page use an inline style by adding an attribute to the tag. That is not the best way to use CSS! It saves effort overall to create a style that you can use in many different places. A little later we will learn how to put such styles in a CSS document.
Confusion - New Method CSS: The examples on this page use an inline style by adding an attribute to the tag. That is not the best way to use CSS! It saves effort overall to create a style that you can use in many different places. A little later we will learn how to put such styles in a CSS document.
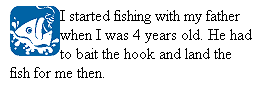
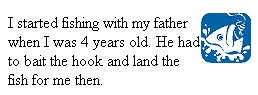
| Old HTML Method | CSS: STYLE Attribute | Effect: | How it looks in browser: |
|---|---|---|---|
|
align="left" |
style= |
Places the image on the left margin and wraps text around it on the right |
|
|
align="right" |
style= |
Places the image on the right margin and wraps text around it on the left |
|
|
align="center" [Attribute of P tag that surrounds IMG] |
style= [For P tag that surrounds IMG] |
Centers the paragraph that contains the image. Centers with respect to whatever contains the P tag. |
|
|
align="top" |
style= |
Aligns top of image with the top of the tallest thing on the line. Text does not wrap. |
|
|
align="middle" |
style= |
Aligns the bottom of the text line with the middle of the image. Text does not wrap. |
|
|
align="bottom" |
style= |
Aligns the bottom of the image with the line that the text is on, which is called the baseline. Text does not wrap. Default value. |
|
Spacing
In the examples in the table above, the image bumps right into the text. A little white space around the image would keep it from feeling so crowded. A typed space can help on one side, but that does not add space at the top or bottom edge.
Old HTML method:
Add HSPACE and/or VSPACE attributes to the <IMG> tag. The space is measured in pixels.
-
HSPACE sets horizontal space = to the left and right of the image. Will be the same on each side.
-
VSPACE sets vertical space = above and below the image. Will be the same above and below.
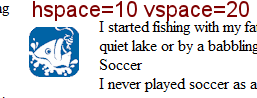 Example: HTML method, setting both HSPACE and VSPACE:
New CSS method:
With CSS you can add margin or padding (or both) around an image or any other object. You can set each side separately. You have much more control than with the old way!
-
MARGIN = White space around the outside the object. Each side can be set separately. This margin is transparent.
-
PADDING = White space between the edge of the object and its contents. Each side can be set separately. The padding area will use the same background as the object.
Example: CSS method, setting all four sides to different values:
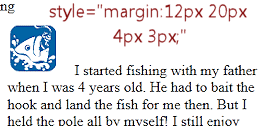 <img src="fish.gif"
style="margin-top:12px;margin-bottom:4px;margin-left:3px;margin-right:20px;" width="50" height="50">
<img src="fish.gif"
style="margin-top:12px;margin-bottom:4px;margin-left:3px;margin-right:20px;" width="50" height="50">
OR
<img src="fish.gif" style="margin:12px 20px 4px 3px;" width="50" height="50">
which is a shorthand version of the same settings. The order is top,
right, bottom, left.
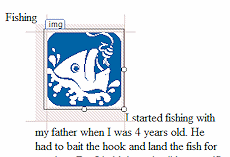
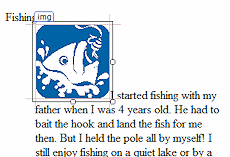
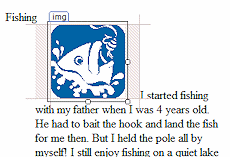
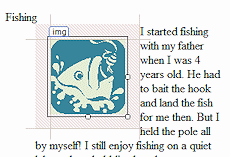
Adding space around an image:
The table below shows how you can use these attributes to create white space around an image. In the screenshots in the last column, the picture of the fish is selected inside the Design view of Microsoft Expression Web 4 (now obsolete). This editor clearly shows the margin areas, which are shaded with diagonal lines.
![]() Spaces
and Units of Measure: In a CSS style, do not leave a space between
the number and the unit of measure, like 10 px. IE
will render the style but Chrome and Firefox will not.
Spaces
and Units of Measure: In a CSS style, do not leave a space between
the number and the unit of measure, like 10 px. IE
will render the style but Chrome and Firefox will not.
| Old HTML Method | CSS: STYLE Attribute | Effect: | How it looks in an editor: |
|---|---|---|---|
|
hspace="0" are not set |
Not set |
No extra space beside image. Normal line spacing. |
|
|
hspace="20" |
style="margin: 0px 20px 0px 20px;" OR style="margin: 0px 20px;" OR style="margin-left: 20px;margin-right:20px;" |
20 pixels of white space on the left and right of the image only. Normal line spacing. |
|
|
vspace="20" |
style="margin: 20px 0px 20px 0px;" OR style="margin: 20px 0px;" OR style="margin-top: 20px;margin-bottom:20px;" |
20 pixels of white space above and below image only. |
|
| [Cannot set left and right separately or top and bottom separately.] |
style="margin: 10px 5px 20px 15px;" OR style="margin-top: 10px; margin-right:5px; margin-bottom:20px; margin-left:15px;" |
Different values for all four sides. |
 |
|
hspace="20" and align="left" |
style="margin: 20px; float:left;" |
20 pixels of white space on all sides of image AND text wraps around the image with its white space. |
|
|
|
| © 1997-2017 Jan Smith All Rights Reserved |
Site Map What's New |
Privacy Policy Terms of Service Copyright Acknowledgements |
~~ 1 Cor. 10:31 ...whatever you do, do it all for the glory of God. ~~
Last updated: March 22, 2017
My Apologies: I started these lessons in 1997. I hand coded some parts but a lot of the HTML code was generated automatically by whatever HTML editor I was using at the time. I have updated a lot of the code. But, there may still be spots that do not use the recent standards and current best practices. <sigh>
I can either spend time cleaning up ugly code that still works or spend time updating information in the lessons that is stale and writing about new things. For the most part, I picked the new stuff!
So, do as I say, not as I did!