
Jan's Working with Windows 10:
File Explorer: Views
To work with files and folders you will want to use different panes or folder styles, depending on what you are trying to do.
For example, the Preview pane and the Large Icons view with its large thumbnails help you spot the right image or document. Other views like Small Icons and Details views let you select a large number of files easily. When you need to see properties of a file, Details view or the Details pane can help.
In this lesson you will practice changing the folder view style.
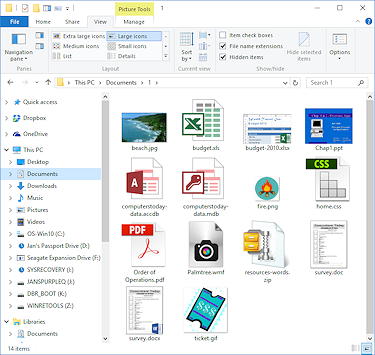
Example: Large Icons style (Win10)
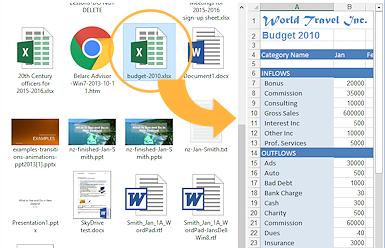
Thumbnails for most images and some documents.
Some files show a preview in the Preview pane when the thumbnail does not.
The illustration shows an old format (.xls) Excel file.
| |
Step-by-Step: Manage Views |
|
| What you will learn: | to change the folder view with: ribbon context menu Status bar buttons to show and hide the Preview and Details panes |
Start with
Folder View Styles - from Ribbon
You have several choices for how to display the files and folders in the Contents pane of a File Explorer window. The ribbon is a very easy way to choose a view style. The ribbon is minimized by default for File Explorer. That means only the tabs show.
 To switch tabs: Click on the tab you want to see or use a keyboard shortcut. Press the ALT key to see labels for what key to press. Once you learn the key combo, just hold the ALT key down while pressing the key you need. For example, ALT + F switches to the File tab.
In all views, items in the Content pane are normally sorted alphabetically. Folders are listed first, then files. There are other ways to sort, which you will work with in the next lesson.
-
If the ribbon is not showing,
 click the View tab or use the key combo ALT + V.
The ribbon appears and will stay until you do something on the ribbon or in the window or leave the window. Then it will minimize again.
 To keep the ribbon in view all of the time: Right click a tab or the blank area to the right of the tabs. In the short menu that appears, click on 'Minimize the ribbon' to toggle it off. If you change your mind, repeat the process and the ribbon will show only the tabs.
 -
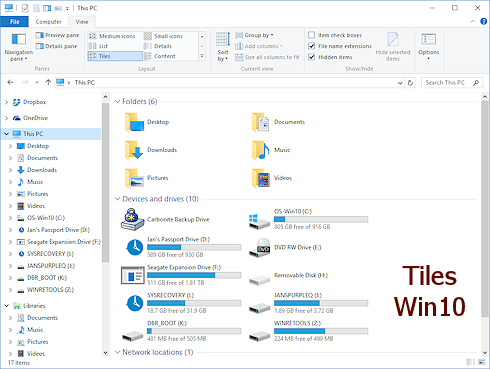 Click on This PC in the Navigation pane again.
The default view is Tiles.Your drives will be different from the ones in the illustration. The screen shot is of my own computer which at the time had two external hard drives (Passport and Seagate drives), some removable USB flash drives (H:, I:, J:, K:, Z:), and a virtual backup drive (Carbonite).
-
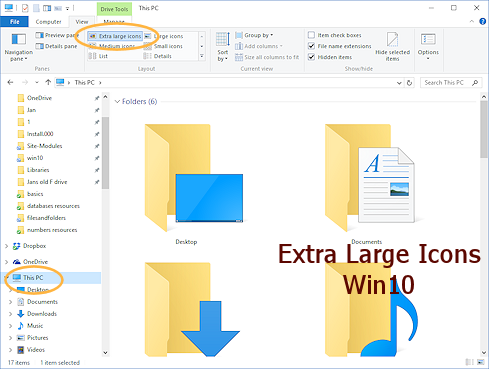 In the View tab, click on Extra Large Icons.
These are entirely too large. Why would anyone want icons so large? The next step will show you.
 Problem: Do not see Extra large icons in the palette
Scroll up the palette. There are 8 views but only 6 show at a time at smaller window widths.
-
Change the Address:
Click in the Address bar in a blank part to the right of the address.
The whole address changes from the drop list style to a path. Press the BACKSPACE key.
The old address is deleted. Type the following path C:\Windows\Web\Wallpaper\Windows 10 in to the Address bar of your File Explorer window or copy and paste it. Then press the ENTER key.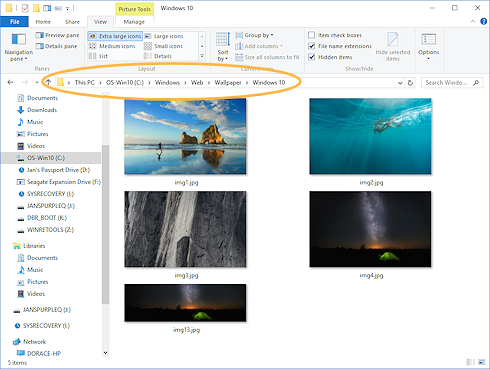
The path is automatically revised to a set of names separated by arrows.
- If necessary,
click the View tab again and choose Extra Large Icons.
The large thumbnails are good for photos!
This folder holds the images that come with Windows to use as wallpaper on the Desktop.
Other View Styles and Other Methods
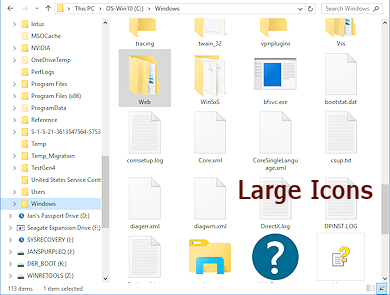
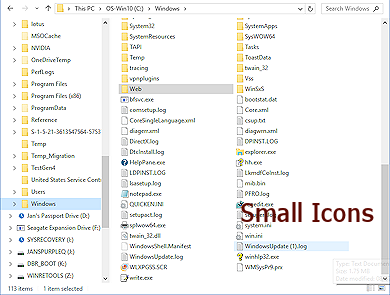
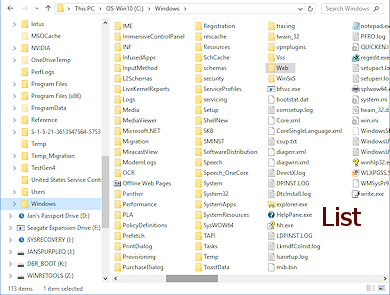
The features of some views are easier to see when there are a large number of items to work with. So you will change the folder to the Windows folder, which does have a large number of both folders and files.
-
In the Address bar,
click on the Windows name to select it.
The Contents pane changes to show the many folders and files in the Windows folder.The view style will be the last one that Windows remembers for this folder.
- Scroll and resize the window as needed to show both folders and files.
-
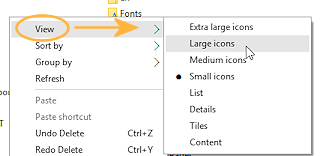
In the ribbon,
 hover over each of the different folder view styles in the Layout palette.
Live Preview changes the Contents pane to show you how that style would look.Whoops. When Live Preview changes the style, the view scrolls to the top of the folder list, so you cannot see if there is a difference for files.
- Click a view to apply the style and then scroll the Contents pane to see how folders and files look. Repeat for the other styles.
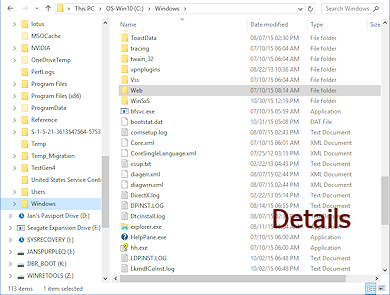
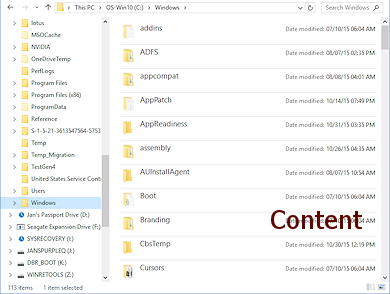
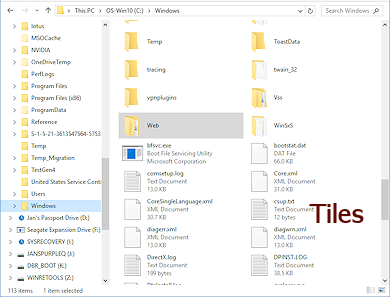
 What is useful about each style?
How does each view style alphabetize? Some are alphabetical across columns and other go down the column.
Examples:

-
 Experiment: Other Methods to Apply a Style
There are other ways to select a folder view style.
-
 Right Click Menu:
 Right click in a Contents pane in a blank area.
A context menu appears.
Hover over View and a submenu slides into view. Click the view you want.
Select various other folders and drives and use the right click menu to change the folder view style.
-
 Status Bar Buttons:
At the bottom right of the Status bar there are buttons for Details view and Large Icons. Those are the most used views.Select various other folders and drives and
click the Status bar button to change the folder view style. What folder view style was used automatically for the folders and drives you selected? Was it the same one for all of them?
Your computer may not apply the default view if a different one was applied previously. Windows remembers a large number of configurations for File Explorer windows, but there is a limit. Once that limit is reached, old folder choices are lost. Which view would be best for what kind of action?
Think about finding a specific file by name or a picture when you do not know its name. How about when you want to select several files that are not close together alphabetically? Which method of applying a folder style do you like best - ribbon palette, context menu, Status bar button?
-
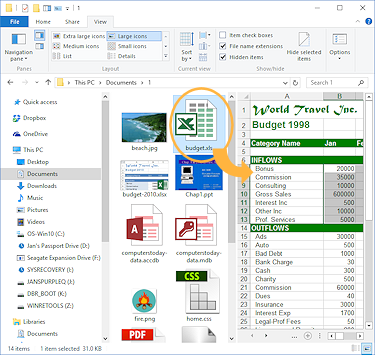
Preview and Details Panes
 The Preview pane is more powerful than a thumbnail preview. The whole document can be scrolled. You can actually advance slides of a presentation in the Preview pane.
The Preview pane may show a preview when there was no thumbnail in the Contents pane.
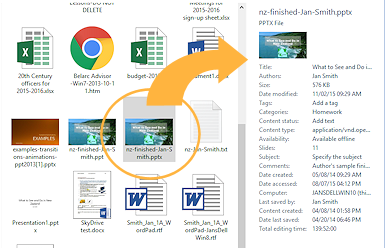 The Details pane shows more details than the Details view can fit into the window. Which details are shown depends on the file type. Music files, image files, video files, and document files all have a different set of characteristics to show.
For example in the illustration the PowerPoint file details include the number of slides. A video would include its length. An image would include its dimensions. A document might include the date it was last saved or the date it was last printed.
Experiment: Preview Pane
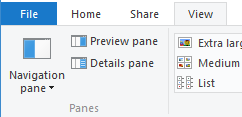 If the Preview pane is not showing, on the View tab, click the button to show the Preview pane.
-
Select different types of objects in the Contents pane, like drives, document files, image files, music files.
Suggestions on where to look: folders Documents, Downloads, Pictures, Music, Videos, OneDrive
- Observe which items show a preview in the Preview pane.
- Click the Preview pane button on the View tab to close this pane.
Experiment: Details Pane
- If the Details pane is not showing, on the View tab, click the button to show the Details pane.
-
Select different types of objects in the Contents pane, like drives, document files, image files, music files.
Suggestions on where to look: folders Documents, Downloads, Pictures, Music, Videos, OneDrive
- Observe which details show for what types of files in the Details pane.
- Click the Details pane button on the View tab to close this pane.
|
|
| © 1997-2017 Jan Smith All Rights Reserved |
Site Map What's New |
Privacy Policy Terms of Service Copyright Acknowledgements |
~~ 1 Cor. 10:31 ...whatever you do, do it all for the glory of God. ~~
Last updated: April 28, 2017