
Jan's Working with Words
AutoTools: Make Changes: Move Text
To move text, you select it and either drag to the new location or cut it and paste in the new location. On a long drag your finger might slip and accidentally drop your text in the wrong spot. Cut and paste will be safer in that case.
If the new location is not in view, dragging means you have to drag off the top or bottom of the screen. The document will scroll for you but this can be very slow. Cut and paste is faster.
Selecting exactly what you need can be tricky. Sometimes you want to include the paragraph mark in your selection and sometimes you don't. It makes a difference! A bit of practice will make it clear why.
|
|
Step-by-Step: Move Text |
|
| What you will learn: | to move selected text by drag and drop to move selected text by cut and paste to create a 3-section header to insert Date and Time to insert a field to check for spelling and grammar errors |
Start with: ![]() ,
trip_planner-Lastname-Firstname.docx from previous lesson
,
trip_planner-Lastname-Firstname.docx from previous lesson
Move Text: Drag and Drop
-
 Use
Save As to save your document with a new name: trip_planner2-Lastname-Firstname.docx to the word project2 folder on your Class drive.
Use
Save As to save your document with a new name: trip_planner2-Lastname-Firstname.docx to the word project2 folder on your Class drive.
You will be saving with variations on the file name from now on. This helps if you need to back up and start over at some point. - Select the paragraph that starts on line 16 with
the words You will be taken ...
Be sure to include the paragraph mark
on the next line after the paragraph ends, too.
Hint: Drag in the selection area to the left of the text to select all the lines. Or, double-click in the selection area beside the paragraph, then hold the SHIFT key down and click beside the paragraph mark below it.
-
 Drag
the selected paragraph and drop it at the beginning of the
paragraph above that starts Since most
travelers ...
Drag
the selected paragraph and drop it at the beginning of the
paragraph above that starts Since most
travelers ...
 Problem:
Nothing dropped
Problem:
Nothing dropped
If this didn't work, you must change a setting in Word Options.
Office Button/File tab > Word Options/Options > Advanced > Editing options: Check beside 'Allow text to be dragged and dropped'Problem:
No paragraph mark below in new location
If you didn't include in your selection the paragraph mark below the paragraph you are moving, you will have one too many paragraph marks in the old spot, and you'll be short one in new location.
Solution 1: Undo. Select again, making sure to get the whole paragraph plus the paragraph mark below it. Drag and drop again.
Solution 2: Delete one of the extras. (Move the cursor to the left of the extra paragraph mark and press BACKSPACE.) Add a paragraph mark after the dropped paragraph by putting the cursor at the end of the paragraph and pressing the ENTER key.
- Click out of the
selection if necessary to remove the highlighting.
- Hold down the CTRL key and click
in the sentence- You will be taken ... special
guest. in the paragraph that you just dragged.
The whole sentence plus the ending period and space are selected! A neat way to select a whole sentence!! Dragging from the right: It can be
hard to select by dragging and get that tiny period without catching the
first word of the next sentence. When you don't want
the whole sentence but you do want the period, you
might find it easier to start just to the right of the period and drag
to the left.
Dragging from the right: It can be
hard to select by dragging and get that tiny period without catching the
first word of the next sentence. When you don't want
the whole sentence but you do want the period, you
might find it easier to start just to the right of the period and drag
to the left.
- Drag the selection to the end of the
next sentence Once you are ... come
home! and drop.
Word will automatically fix the spaces at the beginning and end of the sentence by default. Word Options has a setting on the Advanced page in the Cut, copy, and paste section - Use smart cut and paste. The Settings dialog has a number of choices for things that Word can automatically adjust.
Move Text: Cut and Paste
Selecting text that runs over onto another page can be a little tricky. First you have to realize that part of the text you want is on another page!
-
 Select by dragging down the left margin
starting with Package 4 and ending on
the next page with the paragraph mark below Tahitian
dance
Select by dragging down the left margin
starting with Package 4 and ending on
the next page with the paragraph mark below Tahitian
dance  Alternate technique - if the page scrolls too
fast and makes you select too much:
Alternate technique - if the page scrolls too
fast and makes you select too much:
- Move the cursor to the left of Package 4
- Scroll to the next page
- Hold down the SHIFT key and
click to the right of the paragraph mark below Tahitian Dance . All the text between
the cursor and where you clicked will be selected. Be
sure you caught the paragraph mark below the line Tahitian Dance .
-
Use the key combo
CTRL + X to cut these lines.
-
Press the PAGE UP
key or the Up arrow key, if necessary, to scroll the document so
you can see the line which starts with Package
3 .
-
Click in that
line and press the HOME key to move the cursor to the beginning of the
line.
-
 Use the key combo
CTRL + V to paste the selected lines.
Use the key combo
CTRL + V to paste the selected lines.
Since you included a final blank line, your list remains spaced correctly. But the numbers are now wrong.
- Renumber Package 4 as Package 3 and the original
Package 3 as Package 4.
(Position the cursor to the left of the number to be changed, press the DELETE key to remove the number, and type the new number.)Automatic numbering: This list
was not created with Word's automatic numbering feature.
If automatic numbering had been used and you cut and pasted
correctly, the numbers would be automatically corrected. It is a little
tricky, however, to move numbered or bulleted text. Those final
paragraph marks and exactly where you paste are very
important. -
Save.
[trip_planner2-Lastname-Firstname.docx]
Create Header and Footer
You created a header and a footer in the last chapter. Do you remember how?
The header and footer have 3 sections by default: left, center, and right. The TAB key will move you to the next section of a header or footer. You will add information that will help identify your print-outs from those of other students. They are all correct and look just alike... right?
- Open the header by double-clicking the Header area.
- At the left, type your name.
- Press the TAB key.
The cursor moves to the center of the header.
- If necessary, click the tab
Header/Footer Tools: Design.
-
 In
the Insert tab group, click
the Date/Time button
.
In
the Insert tab group, click
the Date/Time button
.
The Date/Time dialog opens.
- Click, if necessary, the first format, like 10/5/2010.
-
Check the box Update automatically.
Now, whenever you open the document, the current date will be in the header to show when the document was viewed last.If you wanted the date be unchanged, you would leave the box unchecked.
- Click on OK to close the dialog.
- Press TAB again.
The cursor moves to the right margin.
 Type Word Project 2
The text is aligned to the right. That's different!
- Switch to the footer by clicking the Go to Footer
button
 or scroll down and click in the footer.
-
 In
the Insert tab group, click on
the
Quick Parts button to open the list.
In
the Insert tab group, click on
the
Quick Parts button to open the list.
- Click on Field.
The Field dialog opens. -
 Scroll
the list and select FileName.
Scroll
the list and select FileName.
Do not change the Field properties or Field options.
 Click on OK.
The current name of the file appears in the footer.
- Close the Header and Footer.
Check for Spelling and Grammar errors
Before printing or submitting your document electronically, you need to be sure it is finished and in good shape! Word helps you find spelling and grammar errors. You will have to use your eyes to spot layout errors.
-
CTRL + Home to move the cursor to the beginning of the document.
-
On the Review tab, click the button Spell Check to see spelling and grammar errors.
Which errors you see depends on the settings in Word Options > Proofing > Writing style section > Settings... The defaults are somewhat different between versions. Word 2016 will not check for writing style at all and has fewer Grammar rules, too.Word's grammar checker is really confused by the lists! Lots of wavy blue underlines. These are not errors since they aren't sentences! Most of the "errors" are from the spacing and capitalization of the lists. There is at least one real spelling error (not listed below!).
- Ignore the rule about Passive Voice.
- Accept the suggestion to capitalize 'time'.
- Ignore the rule about contractions.
- Ignore the suggestion to change '5' to 'five' but accept a suggestion to change to add a hyphen, '5-star'.
- Ignore the rule to change the word "But"
- Accept the suggestion to add a comma after 'that'.
- Accept changing a hyphen followed by 2 spaces to a hyphen followed by only one space.
- Accept all of the changes that capitalize the first word in the Package lists.
- Ignore the rule for changing a number in the list to the word for that number.
- Ignore the rule about a sentence fragment.
- Ignore Once the suggestion to change '!!' to '!'.
- Ignore changing 'deep
sea' to 'Deep-sea' but do change the capitalization to 'Deep sea'.
 Word 2016: You need to make several corrections manually since Word 2016 will not check for style problems.
- Capitalize the first word in each item in the list for a Package.
- Add a comma 'But after that, you have a choice..'.
- Print Preview. Make corrections, if
needed.
-
Save.
[trip_planner2-Lastname-Firstname.docx]
-
 Print. (trip_planner2-Lastname-Firstname.docx =
3 pages)
Print. (trip_planner2-Lastname-Firstname.docx =
3 pages)
Check with your instructor about whether or not to submit this document for grading or whether to submit it electronically.
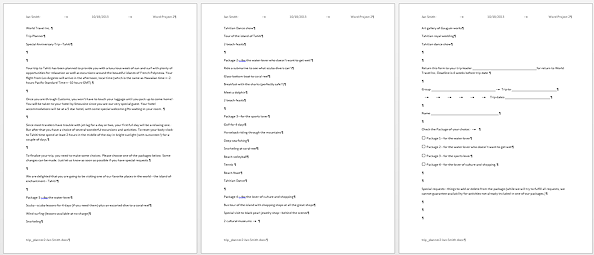
trip_planner2-Lastname-Firstname.docx after Move Text
|
|
| © 1997-2017 Jan Smith All Rights Reserved |
Site Map What's New |
Privacy Policy Terms of Service Copyright Acknowledgements |
~~ 1 Cor. 10:31 ...whatever you do, do it all for the glory of God. ~~
Last updated: March 22, 2017