
Jan's Working with Words
Formatting: Paragraphs
In the next few lessons, you will learn to format your document using the commands on the Home tab and the Mini-Toolbar plus a dialog or two.
-
Home tab
-
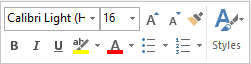
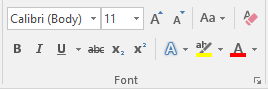 Font group:
Applies character formatting to selected text - font, font size, color, bold, italics, underline, text effects. -
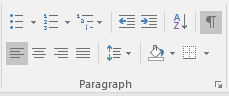 Paragraph group:
Format the whole paragraph - indentions, borders, bullets, numbered lines, line spacing
-
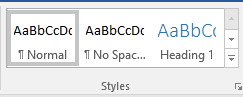 Styles group:
Named combinations of character and paragraph formatting that can be applied multiple times.
-
-
Mini-Toolbar:
Contains some of the most often used choices from the Home tab. Word 2013 has somewhat different tools from word 2007 and 2010.
Mini-Toolbar: Word 2010 and 2013
This toolbar floats over the document near where you selected text or right-clicked. It's in a faded state at first with Word 2007 and 2010. Just move the mouse toward the bar and it comes into its solid state, ready to be used.
Advantages of Using Styles
-
Consistency: Using styles makes it easy to keep your formatting the same throughout a long document or across a set of documents.
-
TOC/Outline/Document map: Word uses only paragraphs that are styled with one of the Heading styles to create a table of contents, an outline, a document map or navigation pane.
-
Scrolling ScreenTip: If you use the scroll box to move through a long document, any paragraph with a Heading style shows up as a ScreenTip near the scrollbar as you scroll by it. This can be a big help in finding the section you are looking for.
Default Styles
The styles you see in the Styles gallery depend on the template you used to create the document. The default blank document is different for different versions of Word.
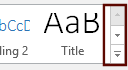 Only a few styles will fit on the ribbon at once. What you see is
actually the
first row of a larger gallery.
Only a few styles will fit on the ribbon at once. What you see is
actually the
first row of a larger gallery.
You
can rotate through the styles by clicking the down and up arrows at the
right end of the styles.
Or,
to
see a larger gallery of styles all at once, click the More button ![]() .
.

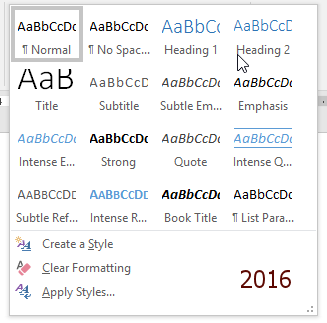
There are even more styles than what you see
from the More button. Other styles may show up when they are needed. For
example, once you have inserted a footer, the footer's style may be in
the gallery for you to use on your next footer. It depends on whether or not the style is set to show after being used. That can be quite confusing!
Styles Pane
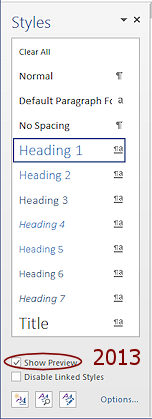
 Another way to see styles is the Styles Pane.
The Dialog Box Launcher button
Another way to see styles is the Styles Pane.
The Dialog Box Launcher button ![]()
![]() for the Styles group on the Home tab opens this pane. The pane can float or be docked at either the left or right side of the Word window.
for the Styles group on the Home tab opens this pane. The pane can float or be docked at either the left or right side of the Word window.
The default listing of styles is NOT alphabetical or complete. Only the 'Recommended' styles are shown by default.
Priority: Styles are listed in order by priority, which is part of the definition of the style.
The first item, Clear All, is not a style at all. It is a command to clear all of the formatting from whatever is selected!
The Heading styles have high priorities and so are listed before other styles.
Many styles are set as "Hidden Until Used", to keep the list fairly short.
Style Preview:
The style name is shown using its formatting if the Show Preview box is checked at the bottom of the pane.
Character and/or Paragraph style:
A paragraph style is marked with a paragraph symbol ![]() and has features that apply only to a paragraph, such as indention, line
spacing, and alignment.
and has features that apply only to a paragraph, such as indention, line
spacing, and alignment.
A character style is marked with an "a" and has features that apply to a text selection, like bold, italics, font, font size, and font color.
A linked style includes both types of formatting, paragraph and character styles. Those are marked with both symbols.
![]() Applying style to selection: When text is selected but not a whole paragraph, clicking on a style will apply only
the style's
character formatting, not any paragraph formatting like centering and
indentions.
Applying style to selection: When text is selected but not a whole paragraph, clicking on a style will apply only
the style's
character formatting, not any paragraph formatting like centering and
indentions.
Modify Styles
 The
Manage Styles
The
Manage Styles ![]() button is at the bottom of the pane. It opens a dialog to edit existing styles. On the Edit tab there is a long scrolling list of styles
available for this document. To make changes to a style, you select one and click the Modify... button to get yet another dialog.
button is at the bottom of the pane. It opens a dialog to edit existing styles. On the Edit tab there is a long scrolling list of styles
available for this document. To make changes to a style, you select one and click the Modify... button to get yet another dialog.
Note the Sort order drop list at the top. This controls how the styles display in the Styles pane. The choice 'As Recommended' leaves off most styles that have not yet been used.
In a later project you will learn how to
create your own styles and save them to the default template or to
your own document template.
| |
Step-by-Step: Format Paragraphs |
|
| What you will learn: | to open a new blank document to enter text to select a whole line or multiple lines to apply default paragraph styles to change formatting of paragraphs using the ribbon and the Mini-Toolbar to reduce document length to 1 page to create a bulleted list to use the Styles pane |
Start with: ![]()
![]() , a blank document open
, a blank document open
Enter Text and Save
- If necessary, open a new blank document.
 Word 2007: Office button
  > New > Blank document >
Create
> New > Blank document >
Create
 Word 2010: File tab > New > Blank document > Create
 Word 2013, 2016: File tab > New > Blank document
- Type in
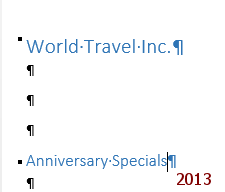
your blank document the text shown in the illustration below. Be sure to
include all the blank lines, too.
What you will typeReminders about your typing:
- See Paragraph marks: Show Marks must be turned on
 .
. - Start a new paragraph: Press the ENTER key.
- Dot in the middle between characters: Marks a space
- Space between sentences: Only 1 space
between sentences.
(Your typing teacher may have taught you differently. That's so old school!)
Modern fonts automatically adjust the amount of space between words and sentences to work well with the particular letters on either side. The exceptions are fonts that deliberately mimic text written on a typewriter. -
Text wrap: Long lines of text wrap to fit inside the page. You don't have to press ENTER when the text reaches the edge of the page. This is quite a change for folks who are used to typing on a typewriter! Your paragraphs will re-wrap as you make changes to your text or change the page margins or do anything that would change the fit of the text to the page. So remember - don't press ENTER until you need a new paragraph!
 Link: Copy of text you are to type.
An image of the text document will open in a new window. Print this from your browser. (If there is a menu, File > Print. Or maybe right click and select Print. Or possibly find a menu button and then Print.) Collect your document from the printer. Close the browser window and return to this window.
Link: Copy of text you are to type.
An image of the text document will open in a new window. Print this from your browser. (If there is a menu, File > Print. Or maybe right click and select Print. Or possibly find a menu button and then Print.) Collect your document from the printer. Close the browser window and return to this window.- Check your document against the image above to be sure you get the blank lines and spaces right.
- You can ignore any green wavy lines that some versions of Word add. The first indicates the suggestion to put a comma after "anniversary". The second suggests that the contraction "Don't" should be replaced with "Do not". We are not going to change either one yet!
- Note: In line 8, the "th" in "10th" should not automatically
format as 10th because we turned that off in AutoFormat
As You Type earlier. We will fix that later in the next lesson.
- See Paragraph marks: Show Marks must be turned on
-
 Click the Save button

 on the Quick Access Toolbar or access the Office/File menu and click on the Save command. Be sure your Class
flash drive is plugged in and active!
on the Quick Access Toolbar or access the Office/File menu and click on the Save command. Be sure your Class
flash drive is plugged in and active!
The Save As process lets you pick the location and then the file name and file type.
Word 2007 and 2010: The Save As dialog opens at this point. Word 2013 and 2016: Select Computer or This PC in the places list. You should see your Class drive folder word project1 as a Recent folder... IF you used this computer to do the previous lessons. Click on the folder in the Recent list.
If the folder is not listed, use the Browse button to navigate to the folder.Word always suggests using part or all of the first line of text in the document as the file's name. That's not usually what you want!
- Select as the location the word project1 folder on your Class device.
- Click in the File name text box in the Save As dialog.
The suggested name is highlighted. If you type while the name is highlighted, your typing will replace the selection. - Press the HOME key to move the cursor to the far left of the text.
Type flyer- in front of World Travel Inc.docx, take out the spaces in the suggested file name, and type your last name and first name, separated by hyphen.
So the name of the document is flyer-WorldTravelInc-Lastname-Firstname.docx, where of course you use your own first and last names.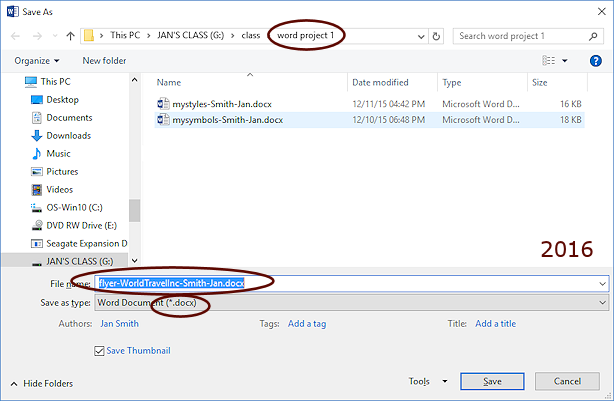 File Name Extensions: You
do not have to type the extension for the file name. Word will add
it for you, based on the file type shown below the file name.
File Name Extensions: You
do not have to type the extension for the file name. Word will add
it for you, based on the file type shown below the file name.
Word's default extension since Word 2007 is docx. Earlier versions use doc. Warning: You do not change the file's type by typing the extension you want in the File name text box. The type showing in the Save as type box will automatically add an extension. You can wind up with names like myreport.doc.docx which is a new Word file type, when you meant to use the old Word file type, doc.
 Problem: Don't see file extensions in the dialog
The default behavior for Windows, for unknown reasons, is to hide the extensions. This can be confusing if you save a document in several different formats with the same 'name', meaning the first part of the name, like:
myreport.docx Word 2007- 2016 format File names with and without showing the extension
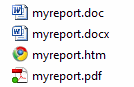
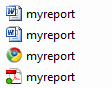
myreport.doc Word 97 - 2003 format myreport.pdf portable document format - opens in Adobe Reader or another PDF reader. Icon is for your PDF reader program. myreport.htm HTML format for a web page. Icon is your default browser's icon Different formats can actually have the same icon when the same program can open them. This is very common for graphics programs, which can work with a large number of file formats. It can get REALLY confusing if you cannot see the extensions.
- Click on the Save button.
The dialog closes and the Word window shows up again.
Select a Paragraph: Selection Area
There is an unmarked area just to the left of the text area, which
is called the selection area. The only way you know you are
there is that the pointer shape changes from ![]() the I-beam shape to the selection shape, which is a right-pointing arrow
the I-beam shape to the selection shape, which is a right-pointing arrow ![]() . Move out of the selection area
and your pointer changes to a left pointing arrow
. Move out of the selection area
and your pointer changes to a left pointing arrow ![]() . It's a bit confusing
to have the pointer flicking around in different shapes until you get
used to it.
. It's a bit confusing
to have the pointer flicking around in different shapes until you get
used to it.
- Move your pointer to the margin area beside the first line until it changes from
 the I beam shape to the selection shape
  .
.
- Click beside the first line in the selection area.
The entire line is highlighted!Alternate Method: Drag from one end to the other of the text you want to select.
Reminder: Scrolling
As you work with the text, you may find some lines no longer show on the screen. Use the scrollbars to move the document inside its window.
Format Paragraph: Styles Gallery
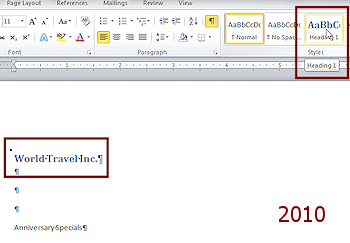
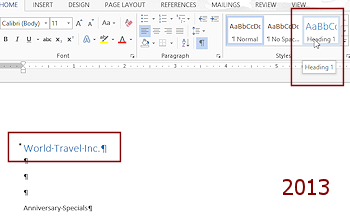
Word 2013and 2016 have different default styles in the blank document template than are used by Word 2007 and 2010. <sigh>
-
With line 1 still selected, on the Home tab in the Styles gallery, hover over but do not click the style Heading 1.
Live Preview changes the selected text to show what it would look like.
-
 Experiment: Styles
Move your mouse pointer over various styles but don't click on any just yet.Open the Style gallery by clicking the More button
 and
hover over other styles to see how your text would look with those styles.
and
hover over other styles to see how your text would look with those styles.Give Live Preview a good work out!
Once you have finished checking out the default styles...
 Problem: No Live Preview
Live Preview can be turned on/off in the Word Options dialog.
Solution: Open the Word Options dialog (Office button > Word Options button or File Tab > Options) and check the box on the first page to Enable Live Preview. - Click on the Heading 1 style to
apply it.
- Select line 5, containing the words Anniversary Specials, by clicking in the margin beside it.
 Use the Style
gallery to apply Heading 2 to this line.
Use the Style
gallery to apply Heading 2 to this line.
The formatting of this line is now different, but not the same as Heading 1.
Heading
Styles: Heading styles 1 and 2 added extra white space around
the text. You might not notice without checking the position of the lines on the vertical ruler before and after you apply the style. - Save your document with these changes.
[flyer-WorldTravelInc-Lastname-Firstname.docx]
 Keyboard shortcut to Save: CTRL + S
Format Text: Change Font from Ribbon
On the Home tab in the Font group you have commands for
formatting your text.
- Select line 1 again.
- On the Home tab in the Font group, click the down arrow at the right end of the Font box.

The list of installed fonts appears. Don't click on anything yet.
Your list may be quite different from the illustrations.
- Experiment: Font
Open the Fonts list and hover over, but do not click on, different fonts to see Live Preview change the document. Problem: Can't see the Live Preview because the text is
hidden by the font list.
Solution 1: Scroll the document so that the selected text is below the bottom of the font list and open the list again.
Solution 2: Resize the window so that the font list will not overlap the selected text and open the list again.
Solution 3: Add spaces temporarily to move your text to the right far enough to see while the Font list is open. Sometimes it just too hard to see the list and the text at the same time.
- With the Font list open, type the letter M.
The list scrolls to the first font (from the top of the list) with a name that starts with M. -
Type an s after the M.
The list scrolls to MS Gothic, or thereabouts.Did you expect that? Or did you expect the list to scroll to the first font with a name that starts with an S? That's the old way. Not anymore!
Try other letters and combinations.
-
 Scroll, if necessary, and click on the font Matura MT Script Capitals to apply it to the first line, World Travel Inc.
If you added spaces to move the text, take them out now. Problem: Matura MT Script Capitals is not in the
list
This font comes with MS Office up through 2010. Office 2013 has a smaller set of fonts. BUT if you previously installed other versions, the fonts are probably still there.
Solution: Choose a similar font - heavy strokes, fancy shapes.
We will be using this font in several documents. Your document won't look like the illustrations if you must choose a different font. That's OK with me. Your instructor may have picked out a font for you to use. Just be aware that you might not have the fonts used in the directions. Sometimes we just have to do the best that we can at the moment.
- Save your document with these changes.
[flyer-WorldTravelInc-Lastname-Firstname.docx]
Format Text: Font Size from Ribbon
-
 With
the first line still selected, on the Home tab
in the Font group, click on the down arrow at the right of the Font Size box.
With
the first line still selected, on the Home tab
in the Font group, click on the down arrow at the right of the Font Size box. 
- Experiment: Font Size
Scroll through the list and hover over, but do not click on, different sizes in the drop list.
Live Preview changes the document as you move over different sizes. - Click on 36.
The values in this list are in points, abbreviated pt. A point is 1/72 of an inch. - Save your document with these changes.
[flyer-WorldTravelInc-Lastname-Firstname.docx]
Format Text: Font Color from Ribbon
Clicking the Font Color button will apply the color showing across the bottom of the button. That color will change when you apply a different color using the gallery of colors.
 About Font Color:
- Theme colors: The default styles use colors from the Theme colors palette. If you change the theme, the document will use the new palette of colors. Sweet!
- Standard colors: Basic rainbow colors. Any text formatted with these colors will not change when you change the document's theme.
- More colors: Opens a dialog for choosing
other colors, which also will not change if you change the theme. We will look at this dialog later.
- With the first line still selected, on the Home tab
in the Font group, click the down arrow at the right of the Font Color button
 .
.
A gallery of colors appears. The top part shows the current theme colors.
- Experiment: Font Color
Hover over, but do not click, various colors in the gallery.
Live Preview shows the change in the selected text. - Click on Green in the Standard Colors list.
The Font Color icon changes to show a green bar at the bottom. If you click this button now, any selected text will change to green. No
need to open the gallery again!
If you click this button now, any selected text will change to green. No
need to open the gallery again!
- Save your document with these changes.
[flyer-WorldTravelInc-Lastname-Firstname.docx]
Format Text: Text Effects - Font
Dialog/ Ribbon
Word 2010 has more text effects and they are easier to get to than in Word 2007. Word 2013 and 2016 have fewer pre-designed schemes.
![]()
![]()
![]() Word 2010, 2013,2016:
About Text Effects
Word 2010, 2013,2016:
About Text Effects
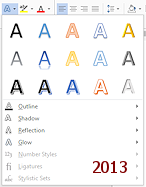
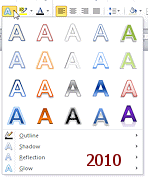 Button on ribbon: Opens the gallery.
The button's icon does not change when you apply an effect.
Button on ribbon: Opens the gallery.
The button's icon does not change when you apply an effect.- Top section of gallery: Shows some pre-designed effects that combine several effects.
- Outline, Shadow, Reflection, Glow: Galleries of single effects
-
Number Styles, Ligatures, Stylistic Sets:
Extra features for some Open Type fonts, like Gabriola. These features are also on the Advanced tab for the Font dialog in both Word 2010, 2013, and 2016.A ligature joins two or three letters into a single character to avoid ugly or difficult-to-read combinations. The most common ligatures are ff, fl, fi, ffi and ffl.
Examples of ligatures:

 A stylistic set offers one or more changes to the basic font shapes. The example shows the sets available for the font Gabriola. The letter 'a' has two different shapes in these sets. The tall letters can be taller or have a flourish at the top. The fancy curves in the last two sets are different depending on where the letter falls in the word and sentence. Complex! Only a few fonts include stylistic sets so far.
-
View choices for Text Effects:
Word 2007: On the Home tab in the Font group, click the Dialog
Box Launcher button  to open the Font dialog. Word 2010, 2013, 2016: On the Home tab in the Font group, click the arrow beside the Text Effects button
  to open the gallery of effects.
-
Experiment: Text Effects Word 2007: In the Font dialog, select
various effects and watch the changes in the Preview area. Then
click on Cancel to close the dialog without applying any changes. Word
2010, 2013, 2016: Hover over, but do not click,
the various text effects in the gallery to see the effect in Live Preview.
Click on the commands at the bottom for Outline, Shadow, Reflection, Glow to open each of the galleries. Hover over various choices in each of the galleries.
When you have checked out the choices...
-
Apply a Text Effect:
 Word 2007:
- Open the Font dialog again with the Dialog Launcher button.
- Click on Shadow.
Word
2010, 2013, 2016: 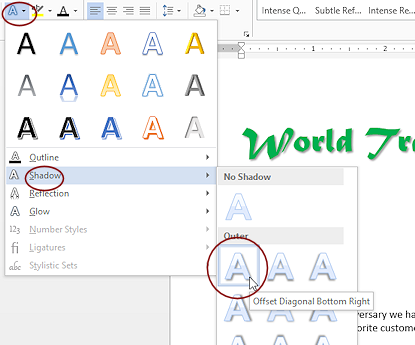 With the Text Effects gallery open, hover over Shadow at the
bottom of the gallery to open its
separate gallery.
With the Text Effects gallery open, hover over Shadow at the
bottom of the gallery to open its
separate gallery. -
Click on the first Shadow effect, Offset Diagonal Bottom Right, to apply the effect to the selected text.
Word 2010, 2013, and 2016 use an item's characteristics to name the item. They may not be "fun", like Sky or Mediev or Embossed, but they do tell you exactly what the effect will do.
A ScreenTip will show you the name of any gallery item, whether it is a color or a style or a text effect.
- Save your document with these changes.
[flyer-WorldTravelInc-Lastname-Firstname.docx]
Format Paragraph: Alignment from Ribbon
The
Paragraph group on the Home tab has buttons for commands that apply only to whole
paragraphs.
There are buttons to align a paragraph to the left,
center, right, or justified. ![]()
Justified makes both the left and right
edges line up evenly. To make this happen, Word changes the space
between words and sentences and even between letters.
- On the Home tab in the Paragraph group, hover over each button to see the ScreenTip about it.
- Click in the text "World
Travel Inc." to deselect the line but put the cursor in that line.
- Click on
 the Center button.
The whole paragraph is centered on the page. It would also have been centered if you had left the paragraph or only part of the paragraph selected.
Format Paragraph and Text: Using Mini-Toolbar
In Word 2007 and 2010, when you select text, the Mini-Toolbar appears but it is in a faded state.
You might overlook it. Move the mouse toward the bar to make it completely visible. You can
also make this bar appear by right clicking on selected text.
In Word 2013 and 2016 the tools included on the Mini-Toolbar are somewhat different. There is a Styles button and buttons for numbered lists and bulleted lists. The indention and Center buttons are missing.
-
 Select line 5, containing the words "Anniversary
Specials", by clicking in the margin beside it.
Select line 5, containing the words "Anniversary
Specials", by clicking in the margin beside it.
The Mini-Toolbar fades into view, but is quite transparent in Word 2007 and 2010.  If necessary, move the mouse toward the Mini-Toolbar to make it solid and completely visible.
Problem: Lost
the Mini-Toolbar before finishing
If you move the mouse too far off the toolbar, it will vanish.
Solution: Right click on the selection. A context menu and the Mini-Toolbar will appear. Ignore the menu for now since you don't need it. It will vanish when you make a choice on the Mini-Toolbar.
-
 On
the Mini-Toolbar, change:
On
the Mini-Toolbar, change:
- Font = Arial
- Size = 24
- Style = Bold, Italic, Underline
Word 2007: Use the ribbon for Underline or the key combo CTRL + U.
- Center
Word 2013, 2016: Use the ribbon for Center or the key combo CTRL + E. - Color = Green
Just click the Font Color button. It has a green bar at the bottom from your previous choice.
- Save your document with these changes.
[flyer-WorldTravelInc-Lastname-Firstname.docx]
Select Multiple Paragraphs: Drag
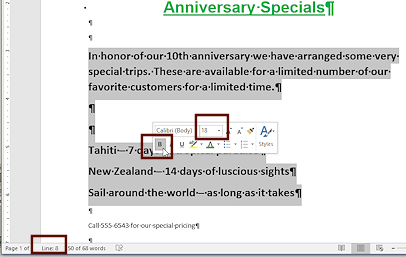
- Move the pointer to the left margin beside line 8,
which starts the paragraph "In honor of...".
 Show Line Number on Status Bar:
Would you like to know what line you are in without counting? Right click on the Status bar and a list of options appears. Click on Line Number to put a check mark by it. The list closes. Now, to see which line your cursor is in, just look at the Status bar at the left.

 Click to
select line 8, but don't release the mouse button yet.
Click to
select line 8, but don't release the mouse button yet.
- Drag down the left margin to the end of the list of trips and release the
mouse button. You will highlight all the lines you dragged across.
The Mini-Toolbar should appear
Format Text: Mini-Toolbar
-
 If necessary, while the highlighting remains, right click on the
selection.
If necessary, while the highlighting remains, right click on the
selection.
A context menu and the Mini-Toolbar appear.
- Change Font Size to 18.
The menu vanishes but the Mini-Toolbar stays. - Click on
 the Bold button.
Format Paragraph: Styles from Ribbon
-
 Scroll, if necessary, and select the last two lines of text, the blank line between them, and the two paragraph marks below them.
-
While the lines are selected, on the Home tab in the Styles group, click on Heading 2 to apply this style to your selected paragraphs.
- With the method of your choice make the following changes to the selected
lines:
- Center
- Font = Calibri
- Font size = 28
- Font color = Black
- Bold
The selected lines all pop over to the next page, even though there is room on the first page for some lines. Why?
Word is trying to keep all the Heading 2 paragraphs together, like they were part of a list. There must a rule there somewhere, but it is not obvious!
- Save your document with these changes.
[flyer-WorldTravelInc-Lastname-Firstname.docx]
Reduce to One Page
There are a number of things you can do to a document to help get left over lines all onto the same page.
Ways to reduce by a page:
- Delete final blank lines(!)
- Adjust font size of one or more lines.
- Adjust white space with Space After and Space Before in the Paragraph dialog.
- Format the font size of a blank line.
- Change page margins.
- Change height of header and/or footer.
- Use the Shrink One Page button (You will see this one shortly)
-
Select the two blank lines at the end of the document.
- Press the DELETE key.
-
Change the Font Size to 20 for the last two lines of text and the blank line between them.
The text is now back onto the first page and the second page vanishes, for now.
Create Bullet List: Ribbon
In a bulleted list each item in the list is preceded by a dot, square, or other shape or image, which is called a bullet.
-
 Select the lines which list the trips: Lines 13, 14, 15.
-
On the Home tab in the Paragraph group, click the Bullet button
 (not the arrow)
The selected lines turn into a bulleted list, using the most recently used shape for bullets.
Are your bullets small solid circles? Great! You won the bullet-shape lottery. Word remembers what was used last. Problem:
Bullets aren't circles
Problem:
Bullets aren't circles
Word used a different shape the last time it applied bullets. It's remembering for you. It's a "feature", not a "problem"! Truly, this is only a problem when you don't understand what happened and why.
Solution:
While the lines are still selected:- Click the down arrow at the right of the
Bullets button.
A gallery of bullets opens.
- If one of the options shown is small solid circle, click on it. Success!
Problem:
Bullet
Gallery does not show solid circle bullet
The Bullet Library section shows bullets that are remembered and can be used in any Word document. The ones in the illustration are the default bullets so the circle will be there unless someone deliberately removed it.
Solution: If you do not see a choice with circles, you must format the bullets the hard way using the command Define New Bullet...- Click the down arrow at the right of the Bullet button to open
the gallery.
 Click on
the command Define New Bullet...
Click on
the command Define New Bullet...
A dialog opens which allows you to choose the bullet symbol. Notice that you could choose a picture or from a font that is not a symbols font.
- Click on the button Symbol...
If the Symbol font is not showing, from the Fonts list, choose the font named Symbol. Scroll until you can click on the small solid circle. It is below the symbols for club, diamond, heart, spade if the dialog window is at its default size. - Click on OK until you are back in your document. Whew!
- Click the down arrow at the right of the
Bullets button.
Styles Pane
In addition to the Styles gallery on the ribbon, you can also see a list of styles in the Styles pane.
-
 With the
bullet list still selected, on the Home tab in the Styles group, click the Dialog
Box Launcher button
With the
bullet list still selected, on the Home tab in the Styles group, click the Dialog
Box Launcher button

 .
.
The Styles pane appears. It may appear as floating or as docked at either the left or right edge of the Word window, depending on the version. Word will remember where it was the last time it was opened. -
Scroll, if necessary, to find the style for the current selection, List Paragraph.
Your bullet list paragraphs have a style! The Bullet button was actually applying a style. Who knew??
-
 Hover over List Paragraph in the Styles pane.
A ScreenTip shows the exact formatting for this style.Hmm. The ScreenTip shows the indention and that there is no added space between paragraphs in the list, and that it has priority 35. That puts it pretty far down the priority list. But there is nothing here about the bullet shape. Interesting!
- Save your document with these changes.
[flyer-WorldTravelInc-Lastname-Firstname.docx]
Preview
-
 Click the Print Preview and Print button

 on the Quick Access Toolbar to see how your document would print
right now. We won't print until the document is completed.
on the Quick Access Toolbar to see how your document would print
right now. We won't print until the document is completed.
- Close the preview and return to the document:
Word
2007: Click the Close Print Preview button.
Word 2010: Click the Home tab.
 Word 2013, 2016: Click the Back arrow at the top left of the window.
- If you are finished for this session, close Word.
Otherwise continue to the next lesson.
|
|
| © 1997-2017 Jan Smith All Rights Reserved |
Site Map What's New |
Privacy Policy Terms of Service Copyright Acknowledgements |
~~ 1 Cor. 10:31 ...whatever you do, do it all for the glory of God. ~~
Last updated: March 27, 2017
Different fonts:
Your computer may have different fonts to choose from than the illustrations show. Different versions of Windows and of Microsoft Office include different fonts. When you upgrade, you keep fonts from the previous version. Many other programs add their own fonts, especially word processors and graphics programs.
At the top on the list, you see a default heading font and a default body font. The particular template you used to create the original document sets these. Cambria and Calibri are the default fonts for the blank document template for Word 2007 and 2010. Word 2013's template uses Calibri Light and Calibri. If the font names in the sentences above look the same as the rest of the text in the sentence, you don't have those fonts installed.
Shows the 10 fonts mostly recently used by Word, in any document, not just the current document.
Displays all of the installed fonts in alphabetical order by font name. The name is shown using the font itself, except for symbol fonts, like Wingdings, and fonts for scripts of languages like Arabic, Hindi, Japanese, Hebrew. At the right of the font name you can see a sample of the script for the languages that do not use our Latin alphabet.
Fonts in Office 2000 through 2007 24 fonts from Office 2003,
  216 fonts
 67 fonts in Pro version
161 fonts in Publisher 2003
216 fonts in Office 2007
Fonts in Office 2010
Fonts in Office 2013
[Dec. 12, 2015 - I have not been able to find a list of fonts installed with Office 2016 or with Windows 10. My own system had other versions previously installed so I cannot tell which fonts are installed with these new versions.]
Windows installs a number of fonts itself. Windows 7 and 8 install a LARGE number of fonts. Microsoft Publisher installs even more fonts. Many of these fonts look the same when applied to English sentences. They are for languages that use a different script, like Arabic, Hebrew, Hindi, Chinese, Malay, Thai, etc.