
Jan's Working with Words
Brochure: Format Text Boxes
You are not stuck with boring white rectangles for your text boxes. You can use any of the AutoShapes. You can even modify the shape yourself.
You have a lot of formatting choices for your text boxes on the ribbon and on the Mini-Toolbar, such as background color, line color, line style, line weight, shadow, and 3-D effects. Plus, you can also format the text inside with all the normal Font formatting. Surely you can be creative with all these choices!
Mini Toolbar: Word 2007, 2010 and Word 2013, 2016
All these same choices, and more, can be found on the Format Text Box/Format Shape dialog or Format Shape pane.
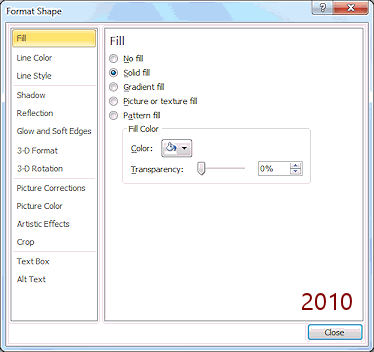
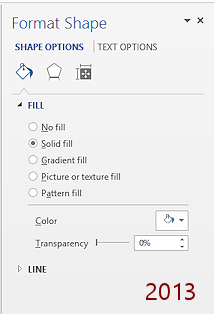
Word 2007,2010: Dialog; Word 2013, 2016: Pane
AutoShapes and Text Boxes
Before Word 2013, you must make a change to add text to an existing AutoShape.
To add text to an AutoShape:
![]()
![]() Word 2007, 2010: Right click the shape and pick from the context menu. Then type.
Word 2007, 2010: Right click the shape and pick from the context menu. Then type.
![]()
![]() Word 2013, 2016: Select the shape and start typing.
Word 2013, 2016: Select the shape and start typing.
|
|
Step-by-Step: Format Text Boxes |
|
| What you will learn: | to resize text box by dragging to change the shape of a text box to adjust shape with adjustment handle to format text box and its text |
Start with:
![]()
![]() ,
textboxes-Lastname-Firstname.docx
,
textboxes-Lastname-Firstname.docx
Resize Text Box: Drag
It is easy to change the length and width of a text box. You can drag or, as you did in the previous lesson, use the Size boxes on the ribbon.
-
If necessary, open
textboxes-Lastname-Firstname.docx
-
 Save
as textboxes2-Lastname-Firstname.docx in the word project3 folder of your Class
disk.
Save
as textboxes2-Lastname-Firstname.docx in the word project3 folder of your Class
disk.
-
Select Text Box
1 at the upper left.
- Drag one of the text box
handles in the corner.
The height and width of the text box change.
- Undo.
-
 Hold the SHIFT key down and drag a corner
handle.
Hold the SHIFT key down and drag a corner
handle.
The proportions stay the same. The upper left corner stays in place
- Undo.
-
Hold the CTRL key down and drag a corner
handle.
The proportions stay the same but it is the center of the shape that stays in place as you resize.
- Undo.
Your text box should be back to 1" x 1".
Change Shape
You are not stuck with plain white text boxes. You can change that plain shape to one of the other AutoShapes, but not by using the gallery for new shapes. It's a bit confusing since the galleries look exactly the same.
- Click on Text Box 1, if necessary, to select it.
-
Open the gallery of shapes to change the shape:
 Word 2007: On the
Text Box Tools: Format tab in
Text
Box Styles tab group, click the button
Change Shape
Word 2007: On the
Text Box Tools: Format tab in
Text
Box Styles tab group, click the button
Change Shape
 .
.
A gallery of shapes appears.


 Word 2010, 2013, 2016:
On the Drawing Tools: Format tab in the Text tab group, click the Edit Shape button and then on Change Shape.
The gallery of shapes opens. It looks exactly like the gallery for a new shape.
-
 Experiment: Apply a different shape.
Click on a shape of your choice. There is no Live Preview.
The selected shape sizes itself to fit the width and height of the existing text box.How does the text flow change? Is there enough room in your new shape for the lines that fit in the rectangle?
Try other shapes. Most shapes hold less text than the rectangle does.When you are ready to continue...
-
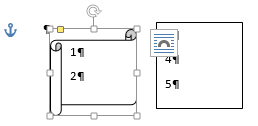 Select
the Horizontal Scroll shape
Select
the Horizontal Scroll shape
 in
the Stars and Banners section.
in
the Stars and Banners section.
Two paragraphs fit in this shape at 1" x 1".
-
Save.
[textboxes2-Lastname-Firstname.docx]
Adjust AutoShape with Adjustment Handle
All shapes have resizing handles and a rotation handle. The more complex shapes also have one or more adjustment handles that changes the proportions of the parts of the shape.


 Move your pointer over the
yellow/gold adjustment handle. The pointer changes to a delta
shape
Move your pointer over the
yellow/gold adjustment handle. The pointer changes to a delta
shape  for
editing a vector drawing.
for
editing a vector drawing.
 Problem:
No adjustment handle showing
Problem:
No adjustment handle showing
Solution: Click on the box border.
-
Drag in various directions. The figure shape changes, but the overall height and width of the figure do not change! This is just too cool!!
For this shape it's the tightness of the scroll and the height of the "paper" that the changes when you drag the adjustment handle. Many AutoShapes have a handle like this. The effect varies depending on the shape.
-
 Apply
a different shape of your own choice to each of the other text boxes.
Apply
a different shape of your own choice to each of the other text boxes.
- Resize, reposition, and
adjust the shapes as you wish.
-
Save.
[textboxes2-Lastname-Firstname.docx]
Format Text Box and its Text
-
 Experiment: Format text boxes.
Make each one different.
You may use tools on the Mini-Toolbar or the Text Tools or
Drawing Tools ribbon tab
that work on the text box itself: fill color, line color, line style,
effects. Try to arrive
at an attractive, or at least interesting, combination.
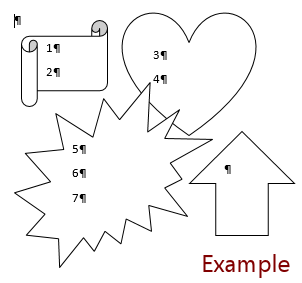
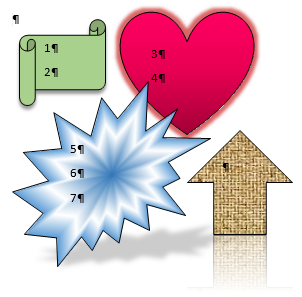
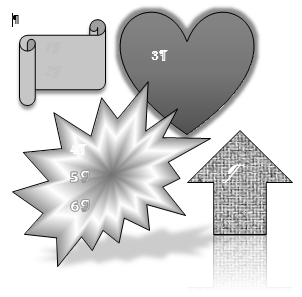
Your results should be different from the illustration and from any other student's formatting.
FYI: A gradient with a path shape can create the effect for the explosion shape in the example. -
 After you have finished formatting the text boxes themselves,
format the text inside
using the tools on the Home tab and on the Text Tools or Drawing Tools
tab.
After you have finished formatting the text boxes themselves,
format the text inside
using the tools on the Home tab and on the Text Tools or Drawing Tools
tab.
(Your document should be different from the illustration and from any other student's!)
As you format, you may find your text moves into the next text box. The text formatting does not change to match its new home! It may not work very well. Can you see the 4 in the explosion text box in the illustration? It's white color was OK in the red the heart but does not work well now.
-
 Preview.
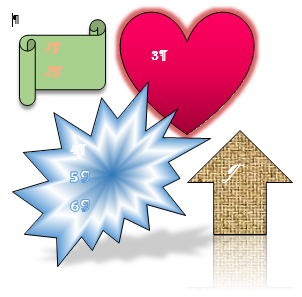
Keep in mind that Print Preview does not show what the page will look like if you print in gray scale or black and white instead of color.Some of your color choices may print as the same gray. This can make text disappear!
Make changes, if necessary, so that your print out will be clear. In the illustration, the numbers in Text Box 1 barely show in gray scale. (They did not show really well in color to start with!)
- Save.
[textboxes2-Lastname-Firstname.docx]  Print.
- Close the document.
|
|
| © 1997-2017 Jan Smith All Rights Reserved |
Site Map What's New |
Privacy Policy Terms of Service Copyright Acknowledgements |
~~ 1 Cor. 10:31 ...whatever you do, do it all for the glory of God. ~~
Last updated: March 22, 2017