 |
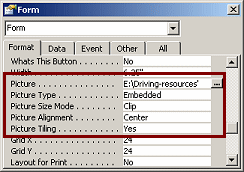 The way images display is
managed in the Properties dialog. The way images display is
managed in the Properties dialog.
Picture Properties:
- Picture: Path to the picture.
Examples:
Absolute path C:\Company Photos\Staff\gardner.bmp
Relative path ..\photos\staff\gardner.bmp
gardner.bmp
URL
http://jegsworks.com/photos/gardner.bmp
- Picture Type: Embedded or Linked
- Picture Size Mode: Clip,
Stretch, or Zoom (Examples
below)
- Picture Alignment: Top Left,
Top Right, Center,
Bottom Left, Bottom Right, Form Center
- Picture Tiling: Yes or
No
Not all of these properties are appropriate for all kinds
of images on a form or report.
For background images and Image controls, you will see
all of these properties. The Properties dialog for the whole form or
report controls background images like textures and watermarks.
For unbound object frames, you will see only Size Mode
(instead of Picture Size Mode), and OLE Type (instead of Picture
Type).
For bound object frames (required for pictures in
records) you will see Size Mode and OLE Type, plus OLE Type Allowed.
|
 |

Where you are:
JegsWorks >
Lessons >
Databases
Before you start...
Project 1: Intro
Project 2: Access Basics
Project 3: Tables & Queries
Project 4: Forms & Reports

Import/Export/Link
Designing Forms

 Form
Wizard Form
Wizard
 Controls Controls
 Create
Form Manually Create
Form Manually
 Format
Form Format
Form
 Tab
Control Tab
Control
 Form View Form View
Images in Forms & Reports
 Form Images Form Images
 Record
Images Record
Images
 Printable Form Printable Form
Designing Reports
Special Forms & Reports
Summary
Quiz
Exercises
Search
Glossary
Appendix
|
|
Picture Size Mode
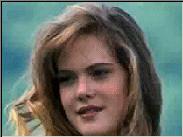
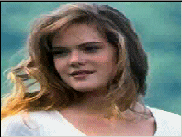
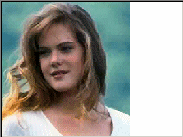
All images have a size mode property in the Properties dialog. There
are 3 modes: Clip, Stretch, Zoom.
 |
 |
 |
|
Clip
Shows only what will fit in the control, starting from the upper left corner of the image |
Stretch
Image is stretched or shrunk to
fill the space, even if that deforms the image |
Zoom
Image is stretched or shrunk to fit into the
space but the proportions remain
the same.
The control's Back Color shows when the image does not
completely fill the control.
If the Back Color is "Transparent", the form's background
shows in the gaps. |
Recommendations:
- Match the control's size to the image.
If the control is much larger than the image, Zoom may enlarge the image
so much that its quality becomes poor.
- For images in records, use Zoom if the images in different records are different sizes or
if you don't know what size they might be in the future.
 |
Step-by-Step: Form Images |
 |
|
What you will learn: |
to backup database
to use Properties dialog to control image display
to add a background image
to add an image to a form in an Image control
to format an Image control
to resize header and footer sections |
Start with:
 ,
resource files,
worldtravel.mdb from the previous lesson ,
resource files,
worldtravel.mdb from the previous lesson
You now have two forms ready for use, plus some versions
of those forms as you went along. Those forms are already formatted, so
you will create a new form that will have a custom background and a form
image.
Backup Database
Before adding any images or new objects, you want to see
what the smallest size is for the database. Backing up the database is the
easiest way to get that. Besides, you should be making backups regularly
anyway.
-
Close any open forms or tables and save
if necessary.
-
From the menu select |The Save Backup As dialog opens.
-
If necessary, navigate to your
databases project4 folder on your Class disk.
-
 Save with the name worldtravel_beforeimages.mdb.
The database closes. A copy is made with the name that you chose. The
original database opens.
You will see security warnings again if you saw them the first time you
opened the database.
-
Open a My Computer window and navigate
to your Class disk to the databases project4
folder. You should see worldtravel.mdb and
worldtravel_beforeimages.mdb.

By the way, you may see a 1 KB file
worldtravel.ldb. This is a temporary file that
appears only while the database is open.
- Write down the sizes of these two files. (They are almost certainly different from
the illustration!) As you work, the database size increases. Compacting it
reduces the size somewhat, sometimes a LOT. When you do a backup, the file is
automatically compacted as part of the process.
You can leave the My Computer window open.
Create New Form
Now you can create a new form that you will add a background and image to
yourself.
- In the database worldtravel.mdb,
open the Tables list in the Database Window.
-
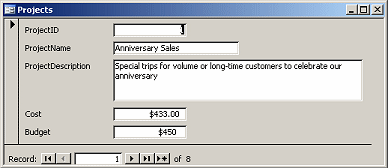 Create
an AutoForm for the table Projects. Create
an AutoForm for the table Projects.
(Select the table. From New Objects button select AutoForm)
An AutoForm is a good start for a table with just a few fields
like this one.
-
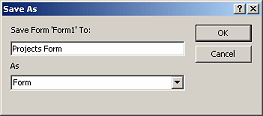  Save the form as Projects Form.
Add Background Image
The AutoForm used the Standard AutoFormat style, which does not have an
image background, just a color.
-
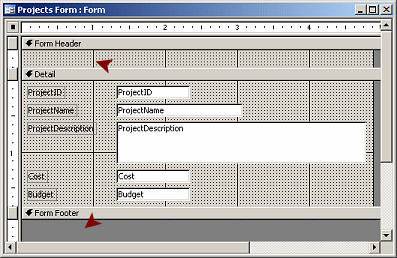 Switch
to Form Design View. Switch
to Form Design View.
- From the menu select |.
- Resize the window to show all of the form.
- Drag the bottom edge of the footer up until it vanishes.
-
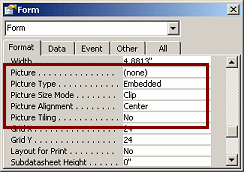 If
necessary, open the Properties dialog for the
Form. If
necessary, open the Properties dialog for the
Form.
- Click on the Format tab and scroll to the
Picture properties.
These 5 properties affect the background of the form.
-
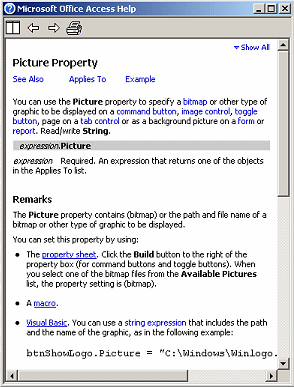 Finding
Help about properties: Finding
Help about properties:
-
Click
in the box for the Picture property.
(It shows the text (none).
-
Press the F1 key.
A Help window opens and loads an article that explains this property.
-
Read this article, which explains what the
property is all about and what kind of objects have the property. Parts
are very technical but the Remarks section usually has helpful
information.
-
Repeat for the other "Picture" properties:
Picture Type, Picture Size Mode, and Picture Alignment, Picture Tiling.
- Click in the Picture property's box ,where it
says (none).
-
 Click the 3 dots button Click the 3 dots button
 that appeared. that appeared.
The Insert Picture dialog appears.
- Navigate to where you saved the databases
resource
files.
-
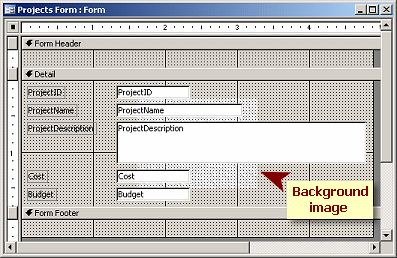 Select
the image wall.bmp and click on
OK. Select
the image wall.bmp and click on
OK.
The image appears in the center of the form, below all of the
other controls.
 The Properties dialog now shows a path to the image in the Picture
box and uses the default settings for the other Picture properties
- Embedded, Clip mode, Center alignment, and no tiling. The Properties dialog now shows a path to the image in the Picture
box and uses the default settings for the other Picture properties
- Embedded, Clip mode, Center alignment, and no tiling.
-
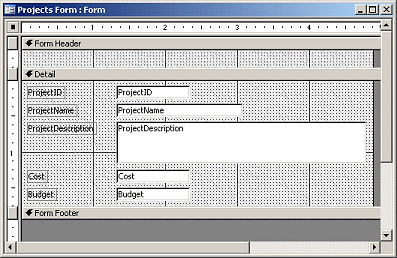 Change
the Picture Tiling property to Yes and click
in another property to
accept the change. Change
the Picture Tiling property to Yes and click
in another property to
accept the change.
The background for the whole form changed to show the pattern,
including the Form Header and Footer (if you could see the footer).
Add Image
An image may be appropriate in the Form Header, for example a company
logo. You do want to think carefully, however, about how much space you
want to spend on decorations. You do not want to crowd your data
controls.
- Click the Image control button
 on the Toolbox bar.
- Move the mouse pointer over the Form Header area.
The pointer changes to the Image shape . .
-
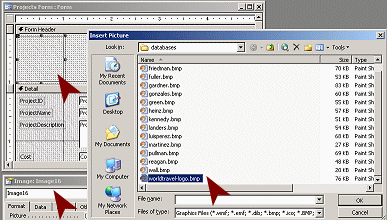 Click
at the upper left of the header area. Click
at the upper left of the header area.
A default size Image control appears, the header area resizes, and
the Insert Picture dialog appears.
The Properties dialog changes to show an image control.
- Navigate, if necessary, to where you saved the
resource files.
-
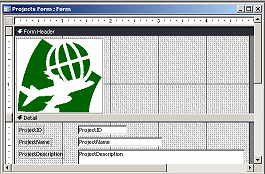 Select
worldtravel-logo.bmp Select
worldtravel-logo.bmp
The icon beside the file in the dialog or in a My Computer
window will match the graphics program that
is associated with the BMP file type.
- Click
OK.
The header area resizes again to show the image at its full size.
Format Image and Form Header
The image is too large and needs some more formatting to make this look
good.
-
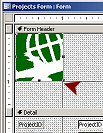 Resize
image with Properties: With
the image selected, in the Properties dialog, change both the
Width and Height to 1". Resize
image with Properties: With
the image selected, in the Properties dialog, change both the
Width and Height to 1".
- Click in another property to accept the change.
Whoops! The current Picture Size Mode is Clip and the Picture Alignment
value is Center. These property values force the image control to show
just the middle part of the image.
-
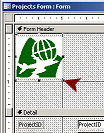 Change
the Picture Size Mode to Zoom. Change
the Picture Size Mode to Zoom.
Now the whole image shows in the smaller Image control.
- Change the Special Effect property to Etched.
-
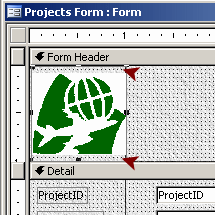 Drag the
bottom edge of the Form Header up to the bottom edge
of the image so that the Form Header section is just tall enough for
your image. Drag the
bottom edge of the Form Header up to the bottom edge
of the image so that the Form Header section is just tall enough for
your image.
Do you see the gap between the image and the border of the control at
the top and at the bottom? This is not highly annoying in this case, but
in other situations it may be very noticeable. You can fix it easily
enough.
-
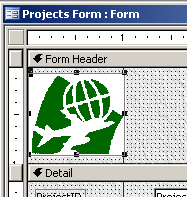 Resize
image by dragging: Drag the bottom edge of the image
control up just one grid row and release. Resize
image by dragging: Drag the bottom edge of the image
control up just one grid row and release.
- Drag the top edge of
the image control down just one grid row and release.
Now the image just fits inside the control.
-
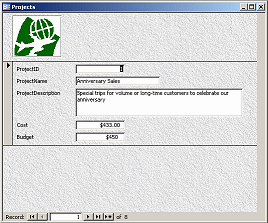 Switch to Form View to see how this is working out. Switch to Form View to see how this is working out.
Your
form may not have so much empty space at the bottom. Remember that when
switching between views, the window stays the same size. When you open
your form directly, the window will automatically be sized to fit the
form.
Add Labels as Titles
Headers normally have helpful info, like a title.
-
 Switch
to Form Design View. Switch
to Form Design View.
-
 To
the right of the image, add a label using the Label tool
from the Toolbox bar. Enter as text
World Travel Inc. To
the right of the image, add a label using the Label tool
from the Toolbox bar. Enter as text
World Travel Inc.
- Format the text as
Matura MT
Script Capitals
22 pts.
Green.
- Add another label below the first
with the text Projects
- Format as
Tahoma
16 pts.
Bold.
-
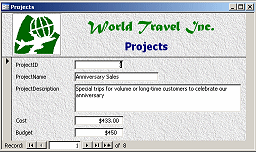 Switch to Form View to see the results. Switch to Form View to see the results.
-
 Save
the form. (Projects Form)
- Close the form.
Compare File Size
Now that you have added a background and an image, will there be any
difference in the file size?
- Verify that all database objects are saved. (Closing them
is a good way to do that.)
- Switch to the My Computer window. (If necessary open
one and navigate
to your Class disk to the databases project4
folder. )
You should see both worldtravel.mdb and
worldtravel_beforeimages.mdb.
- Compare the current size of worldtravel.mdb
to the size of
worldtravel_beforeimages.mdb, which was the
size of worldtravel.mdb at the beginning of
this lesson. There should be a significant difference!
- Switch to the Access window for worldtravel.mdb.
- From the menu select ||The database closes, compacts, and reopens.
- Switch to the My Computer window.
- Write down the file sizes
again. You will need the numbers at the end of the next lesson.
Did the World Travel database change sizes much after compacting?
Probably. How
does its size now compare to the size before adding the form images?
(Your file sizes are likely to be different from mine!)

|

