|
Exercise Web 2-4: Position Table
| What you will do: |
change background to use a side border
put text in a table to keep text off border |
Start with:
 ergonomics2.htm open in FrontPage or FPX
- Open ergonomics2.htm in FPX
 . .
 Save as:
Use the name ergonomics3.htm to save
the file to the same folder of your Class disk.
- Page Background:
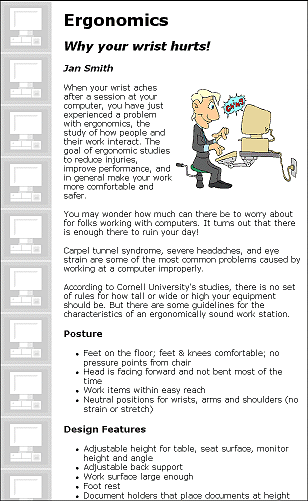
Change the background of the page to use the image
border-computer.gif from the Exercises
folder on your Class disk.
Where to find the image:
On your hard drive in C:\My Documents\complit101\web\HTML\Exercises.
Copy it to the Exercises folder on your Class
disk.
OR
Download from
the web site and place in the Exercises
folder on your Class disk.
OR
On your Class disk you may already have the image in the
Exercises folder.
 FPX: Notice that saving in
FPX again lost the justification that you added by hand previously. FPX: Notice that saving in
FPX again lost the justification that you added by hand previously.
- Copy:
Select the whole page and copy the contents.
- Create table:
While the contents of the page is still selected, use the Table
button to create a table with 1 row and 2 cells. This empty table
replaces everything you had selected.
- Paste:
Put the cursor in the second cell and paste. The text and image are now
in cell 2. If there is one, delete the blank line at the top of
the page.
- Table Properties:
Set the border size to 0.
- Cell Properties:
Set the Cell Properties for cell 1 on the left to have width 110
pixels.
Set the Cell Properties for cell 2 to not specify the width.
-
  Save and close.
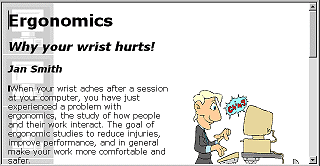
- View in IE: Open the page ergonomics3.htm
in IE. The text and image should be displayed without touching the left
side border.
- Internet Options: Change the setting in | to print the
background colors and images.
- Page Setup:
Header Exercise Web 2-4 your name &bPage &p of
&P
Footer: &u&b&d
 Check
Print Preview. How many pages. Is all the text on one page? If not,
reduce your margins or move the image up beside the headings. Check
Print Preview. How many pages. Is all the text on one page? If not,
reduce your margins or move the image up beside the headings.Why does
the second page print with a colored background abut no text? Once the
text stopped, the background remained for printing but not for screen
display. Odd!
This is why you should always check the number of pages in the Print
Preview before you actually print.
- Print page 1.
|

![]()
![]()
Individual files can be found at http://www.jegsworks.com/Lessons/resources/web resources/HTML/Exercises/ They should be copied to your Class disk in the folder A:\my docs\web\Exercises