 |
Now it is time to practice
converting an existing document to an HTML document.
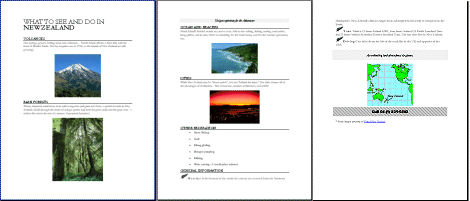
The document you will start with is a simplified version of a brochure
about New Zealand. The original brochure is shown on the
previous page. I deleted the parts that
are useless on the Web. We don't really need the address label, for
example.

NZinfo.doc
|
 |

Where you are:
JegsWorks >
Lessons > Web
Before you start...
Project 1: Browser Basics
Project 2: HTML Basics
HTML Code
About HTML
What You Need
Code by Hand
WYSIWYG
FrontPage/FPX
Images in HTML
Formatting
Tables
Print
Convert 
 Doc
to HTML Doc
to HTML
Summary
Quiz
Exercises
Search
Glossary
Appendix |
|

|
Step-by-Step: Convert to HTML
|
 |
| What you will learn: |
to convert a Word doc to HTML
some of the problems in converting |
Start with:  , ,
 ,
resource files, Microsoft Word ,
resource files, Microsoft Word
In this exercise you will convert a Word document to
HTML using Word.
It is important to carefully check a converted
document. There will be changes from the original.
Convert .doc to HTML
- In Word open the document NZinfo.doc
in your resource files.
Where to find the file -
On your hard disk in the installed resource files -
C:\My
Documents\complit101\web\HTML\NZ\NZinfo.doc
Online -
http://www.jegsworks.com/Lessons/resources/web%20resources/HTML/NZ/NZinfo.doc
On your floppy disk -
a:\my
docs\web\NZ\NZinfo.doc
  If
you click on the link for the online doc, look carefully to see if the
document opens in the browser instead of opening in Word. If
you click on the link for the online doc, look carefully to see if the
document opens in the browser instead of opening in Word.
Do you see
 a Tools button? IE5+ hides/shows the Word toolbars with this
button. A few commands will be missing or not available. This can be
very confusing if you don't realize you are in a browser that is
pretending to be Word.
-
 Print the document from Word. [File | Print]
- Make a list of features that you think may change or
vanish when the document is saved as HTML.
- From the menu select-
 Word 97: | with file type HTML document
(*.htm; *.html; *.htx)
 Word 2000/2002: |
with file type
Web page (*.htm; *.html)

 Browser:
|
and choose file type Web page (*.htm; *.html) Browser:
|
and choose file type Web page (*.htm; *.html)
-
 Save the document as NZinfo.htm
to your Class disk in the subfolder NZ of the
web folder. The images will be saved to a
subfolder of NZ.
 You
may see one or more message boxes. You
may see one or more message boxes.
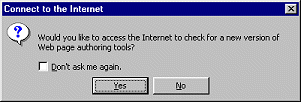
- Prompt to check the Internet for a newer HTML assistant.
Click on No, if it shows up.
-
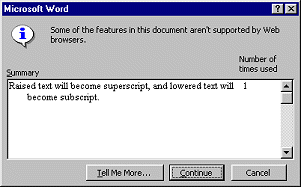
 Warning
that you will lose some formatting if you save as HTML. Read the list
of changes, which will be different for each version of Word, and then
click on Yes or Continue to finish the conversion. Warning
that you will lose some formatting if you save as HTML. Read the list
of changes, which will be different for each version of Word, and then
click on Yes or Continue to finish the conversion.
- Prompt to install missing graphics filters. You must have
the installation CD to do this.
If you cannot install right now, choose to continue the process
anyway. You can install these missing filters later by using the
installation CD for Word or Office and changing your choices to
include the missing filters.
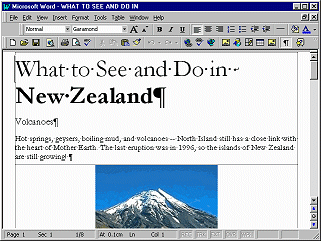
 The
Web Layout view shows in Word now. The
Web Layout view shows in Word now.
- Click on OK.
- Open the Header/Footer. [ |
]
- Click in the textbox for the Header. (Otherwise your typing
may go to the Address Box!)
- Type your name, tab once, insert the date, tab again, type
Web Project 2 .
-
 Print the HTML document. If you used Word 2000/02, there are very
few differences from the original. Word 97 does not do as good a job.
HTML Source
You may find a number of changes when you save a Word
document in HTML format. Many things you can do in Word cannot be done
with HTML. Check carefully and make corrections to get a HTML page that
you like.
Remember - you cannot get the same level of
control of the appearance of the page with HTML that you have with Word.
Common Changes:
-
Paragraphs all have the Normal style, even though the
original Word document used other heading styles.
-
Text size may be too small for comfortable reading.
Text that is small on a PC computer can be too small to read on a Mac.
-
Bullets on blank lines.
-
Jagged image, if the image was sized down in Word
from the original
-
No transparency in images. White background looks
transparent in Word because the page is white.
- Open in Word the HTML file you saved on your Class disk:
A:\my docs\web\NZ\NZinfo.htm
 If
the document opened in IE, the Word command will not be available and neither will the IE
command | . What an odd omission! Be sure you have the document open in
Word. If
the document opened in IE, the Word command will not be available and neither will the IE
command | . What an odd omission! Be sure you have the document open in
Word.
- From the menu select |
. The HTML source code appears,
but Word 97 and Word 2000/02 handle this quite differently.
 Word 97: This is not as easy to read as in FPX! There is no color
coding.
The source
code would take 2 pages to print.
 Word 2000/02: The
source
code here is color coded, but there is so much of it!
The source code takes 10 pages to print. The first 6 pages are
the stylesheet info. Automation created too much of a good thing!!
-
 Word 97: Correct the nesting of tags. Especially check the FONT,
B, and I tags. Word97 usually closes these in the same order they were
opened instead of in reverse order. Word97 is not a smart as it should
be!
- Look at the paragraph tags which have the attribute
ALIGN="JUSTIFY" to makes the left and right margins even.
 "Justify" is not a choice in FPX's Paragraph Properties dialog. FPX does
not understand this code. Another odd "feature" of FPX! You will see
shortly that this can be a big problem.
- Close the source code window.
-
 Save
as NZinfo2.htm to the web
folder of your Class disk. Out of room? Save
as NZinfo2.htm to the web
folder of your Class disk. Out of room?
 How to handle a full disk
- Close the document in Word.
Compare
- Inspect the print-outs of the original document Word document
and the web page you just created.
- Find any differences. Some may be subtle. Some may not be so
subtle! (especially with Word97) How accurate were the guesses you made
earlier?
 View
HTML in FPX View
HTML in FPX
If you are not using FPX, skip this section.
 FPX
will dump code that it does not understand! FPX
will dump code that it does not understand!
- Open NZinfo.htm in FPX.
- View the HTML code. [View | Source]
Look at the paragraph tags.
Where is the attribute ALIGN="JUSTIFY"?
FPX dumped it!
- Type ALIGN="JUSTIFY" back in a P tag and close HTML
View.
- Reopen HTML View. FPX dumped it again!
- Close the HTML view. Close FPX without saving.
You could use the command
| to put in code that FPX will
ignore. But you cannot use the command to modify an existing tag! Rats!
 When
converting documents or switching between HTML editors, KNOW your
editors. Your code may not be retained! When
converting documents or switching between HTML editors, KNOW your
editors. Your code may not be retained!
Format & Print
- Open NZinfo.htm in FrontPage or
FPX.
- Apply heading styles, if necessary:
title: Heading 1
subtitles (Volcanoes, Rain Forest, etc.): Heading 2
- Format the page in any way that you think will improve
it. You might change the fonts, the image alignments, add horizontal
lines, or use tables. Have fun with it!
-
 Save as NZinfo2.htm to the
web folder of your Class disk. You may not
have room on your disk. You can probably delete some of those old
versions of Hector's page now.
 How to handle a full disk
- Check before print and make corrections if necessary:
- HTML code for errors in nesting or spacing.
- Page Setup - change the header to show the current file name.
- Spelling/grammar errors.
- Browser- at different window sizes for wrapping or centering
errors.
- Page title - change to New Zealand Information
- your name
- Close document in the editor and open in Internet
Explorer.
-
 Print the corrected (and improved!)
NZinfo2.htm from IE.
|

![]()
![]()