HTML Basics:
Positioning Table

español![]()
Did you want IE9+, Chrome, Firefox; Notepad? ![]()
HTML Basics:
|
|
|||||
|
Tables are used in two ways on web pages.
Positioning TablesHTML was designed to give the browser a LOT of flexibility in how pages display. Text wrapping is a great strength of HTML, but it can also get in the way. Problem: How to put things side by side on the page (and make sure they stay there)? Solution: Put them in a table. The parts of a positioning table do not have any logical relationship to each other. It's just a trick to keep things in position on the page.
|
|
Project 2: HTML Basics |
|||||||||||||||||||||||||||||||||
Example of a positioning table:Below is an illustration of the page you are reading. Dotted lines show the table cells used to position the parts. Sizing these parts can be quite a challenge!
Using a table to position parts of page The title text and the image logo for the course are in separate cells in the same row. A blank cell at the left has a transparent image in it to keep the text off of the side border background. Another table puts the text and table of contents in separate cells.
Start with: You will create a table to improve the alignment of the top of Hector's page. Insert Table
Move Image and Text
|
|||||||||||||||||||||||||||||||||||
|
<table border="0"> <tr> <td><img src="hchavez-transparent.gif" width="206" height="43"></td> <td><font color="#008040" face="Tahoma">My house is your house!</font></td> </tr> </table> |
The second <td> tag does not include the <h2> tags that you assigned to this line when you started this page. The H2 tag automatically added 2 sizes to the default text size and makes the text bold. You must add those characteristics yourself now, since your drag and drop action lost them.
![]() If you include the paragraph mark at
the end of the text when you drag, then the H2 tag does get moved inside
the TD tag.
If you include the paragraph mark at
the end of the text when you drag, then the H2 tag does get moved inside
the TD tag.
|
|
|
| FrontPage | FPX |
In FrontPage, did you notice the extra blank space below the text "My house is your house" in the cell? The text is in Heading 2 format, which includes extra white space below the text. This extra white space keeps the image and the text from lining up nicely. You need to remove it.
 Right
click and choose
 Or you can move the pointer to the left of the table until it turns
to ![]() the Select Row shape and then click.
the Select Row shape and then click.
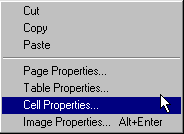 Right
click on a cell and from the popup menu select . The Cell Properties dialog appears.
The default settings are:
Horizontal Alignment = Left
Vertical Alignment = Middle (FPX) or Default(FP)
This dialog is also available on the Table menu.
 Change
Horizontal Alignment to Center
 |
|
 |
| FrontPage | FPX |
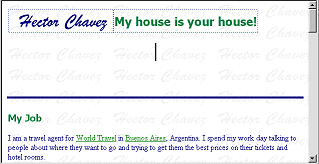
![]() In FPX the image
and text are centered in the table, but you cannot see any change
yet because the table cells are just big enough for what is in them.
In FPX the image
and text are centered in the table, but you cannot see any change
yet because the table cells are just big enough for what is in them.
The table has a dialog of properties similar to the one for cells. With it you can align the table on the page and set its borders.
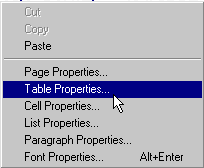 Right
click on the table and from the popup menu select .
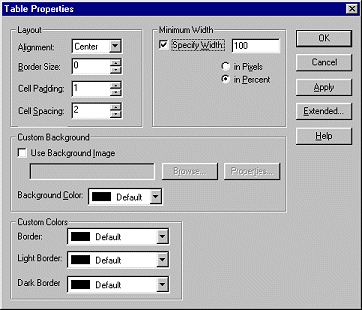 Alignment
= Center
Specify Width = checked
Specify width = 100 in Percent
Border = 0
![]() The table now
stretches across the whole page no matter what size the window is. This
choice avoids the problems of unexpectedly wrapping at different window
sizes. Now you can see the effect of applying Center to the cell
contents. Both the signature image and the text are centered in their
cells.
The table now
stretches across the whole page no matter what size the window is. This
choice avoids the problems of unexpectedly wrapping at different window
sizes. Now you can see the effect of applying Center to the cell
contents. Both the signature image and the text are centered in their
cells.
![]() The
default table already had a width of 100%, but you did get that ugly
border to vanish.
The
default table already had a width of 100%, but you did get that ugly
border to vanish.

~~ 1 Cor. 10:31 ...whatever you do, do it all for the glory of God. ~~ |