 |
Step-by-Step: Change Margins |
 |
What you will learn: |
to use Page Setup to change margins
to use the ruler to change indention
to fix alignments
|
Start with: ,
trip planner4.doc
Adjust Margins with Page Setup
You need to get the dividing line that you created earlier onto the same page as the form and get the blanks lined up with their labels.
- Select
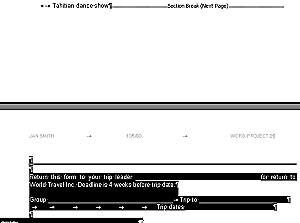
lines starting with the dividing line on page 2 through all the lines of
the form on page three.
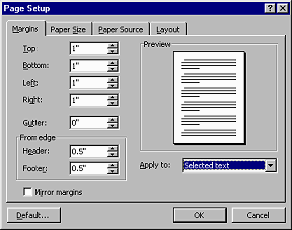
- While the lines are selected, open the Page Setup dialog.
( | )
-
 On the Margins tab, set the left and right margins to 1".
Be sure that the Apply to box says Selected Text!
- Click on the OK button.
The default margin in Word is for side margins to be 1.25". Smaller margins leave more room for text and now your form lines are in
the right place.
- Scroll
to see what has changed. Word creates a Next Page section break, which
moves the double dividing line you drew over to page 3.


Adjust Indent with Ruler
The line starting with Name is now too far to the left. Sometimes it seems like the more changes you make, the
more messes there are to clean up!
We can fix this one using the ruler to change the
indention.
-
 Move the cursor to the line starting with Name. Anywhere in the line
will do just fine.
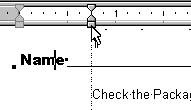
- On the ruler, drag the rectangle under the pointer from the margin edge to the
right. A dotted line appears while you drag. When the dotted line
reaches the left end of the top lines of text, release the mouse button.
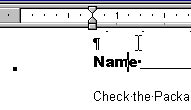
 Now
the whole paragraph (Name plus the fill-in-the-blank line
after it) lines up with the line below it. You
just changed the indention of the paragraph.
Adjust Alignment with TAB and DELETE
The fill-in-the-blank lines for Trip
to and Trip dates are no
longer lined up. Sometimes you need to change the
size of part of your document to get a good fit. In this case
its the length of the lines.
Applying the style from the Style Gallery changed the
justification. Changing the margins has made some of the blanks too long.
- Move your cursor somewhere to the left of Trip dates on its line. Each arrow
 shows a tab stop.
 Marks
for tabs
 are not showing: Turn on the showing
of marks by clicking the Show Marks button
 .
.
- Press the TAB key once. The words Trip dates move
right and are now directly underneath Trip to since
Trip to is positioned with a tab stop itself. However,
now the fill-in-the-blank line is on a
different line. It's too long to fit in the space to the right of Trip to.
Do you feel like everything
you fix breaks something else?!
- Place your cursor in the middle of the blank below Trip
dates.
- Press
the DELETE key. This shortens the line enough to fit on the previous
line. It should take only 1 deletion, if you got the margins and
indention right.

Apply Heading Style
Now to a really odd bit of
autoformatting. AutoFormat did not format the 4 checkbox
list items all the same! What kind of sense is this?!
You will have to apply the correct style yourself.
- Click in the line with a
checkbox for Package 1. What style shows in the Styles selection box? It should
be Heading 3.
- Select the line for Package 2, which is
using the style Body Text.
- Apply the style Heading 3.
Hint: Drop the
Styles list and type an H to move quickly to the right section.
 Or you can use the
key comb CTRL + ALT + 3 and not have to deal with the long list of
styles that AutoFormat created.)
- Repeat
for
the line about Package 4.

 Save as trip planner5.doc
 How to handle a full disk

