 |
Step-by-Step: Print Access Objects |
 |
What you will learn: |
to change page margins
to change orientation of paper
to print all records in a datasheet
to select multiple records in a datasheet and print
to change properties for a form
to add a page header and footer
to hide the page header
to print a form
to print a report
to print a data access page
|
Start with:
mytrips.mdb from previous lesson
Learning to use Print Preview, the Print dialog instead of
the button, and the Page Setup dialog will help you save a lot of wasted paper.
Look before you print!
Datasheet: Print Preview, Page Setup Dialog, Print Button
-
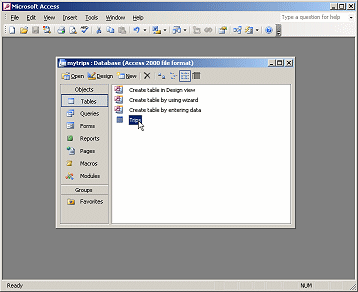 If necessary, switch to the Database Window.
-
Open the table Trips.
- Click the
 Print Preview button.
The preview shows that in portrait orientation it will take 2 pages to
print the table.
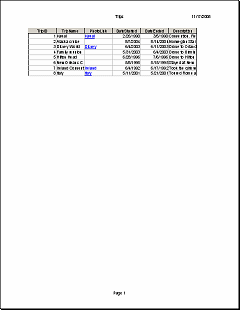
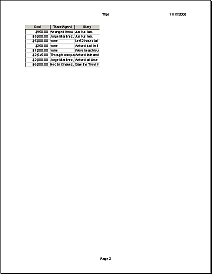
The page header shows the table name in the center and the date at the
right.
The page footer shows the page number in the center.
You cannot change these choices other than to turn them off in the Page
Setup dialog. (Uncheck box for Print Headings.)
 The
Page Setup dialog is also available from the File menu in most views.
-
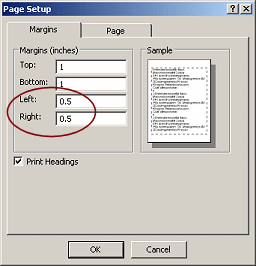 Click
the button Setup...
 . The
Page Setup dialog appears.
- Change the Left and Right margins to 0.5
inches and click on OK. Leave Print Headings checked.
You return to the preview. It
still will take two pages.
-
 Click
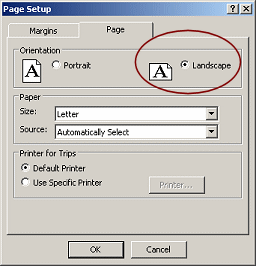
Setup... again and click on the Page tab.
- Change the orientation to Landscape. Click on
OK.
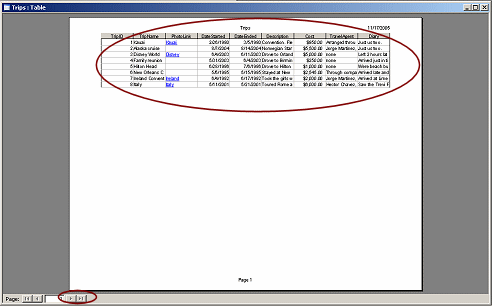
Now you have just one page in the preview.
How do you know?? Look at the navigation buttons. The Next and Last
buttons are grayed out. Just one page now!
-
 Click
Click
 the
Print button on the toolbar.
You may briefly see a dialog flicker by. This dialog reports the progress of the
formatting of the
document for printing. It goes out of sight quickly for such a short and
simple document.
Note how long it takes to print this page in landscape orientation. Is it slower
than normal?
 The Print button starts
printing right away. You will have no choices of what to print or how. Be
sure you know what is going to happen!
- Inspect your print-out. Which columns are too narrow to show
all of the data?
You could improve this print-out by adjusting the
column widths. However, you cannot get all of the memo fields (Description,
TravelAgent, and
Diary) to show all of their text
without wasting a lot of paper. So we will experiment shortly.
Datasheet: Select Multiple Records, Print Selected Records using Print dialog
-
 Click
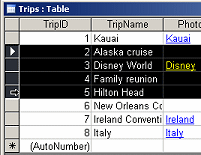
on the record selector at the left of the Alaska trip, record #2,
and drag down to record #5, Hilton Head. Four records
are selected.
-
 From
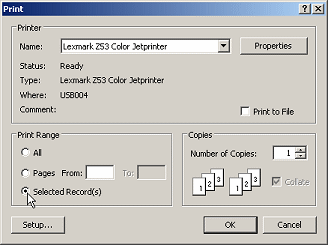
the File menu select
The Print dialog opens.
(Remember: If you click the Print button, the printer
starts right up and prints all records!)
- Select to print Selected Records by clicking its radio
button.
There is no Print Preview button in this dialog. You can open the Page
Setup again, which is actually a good idea.
-
 Click
the the Setup... button.
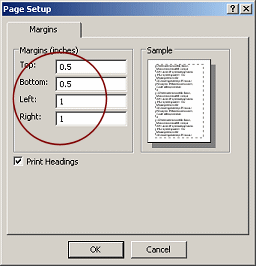
The Page Setup dialog appears, but it only has one tab and the margin
sizes are reversed from what you did a minute ago!
Why??
You set the margins in Portrait orientation and then switched to
Landscape. The "top" of the page is a different edge now. The dialog
values are
right but the Sample image is wrong!
-

 Click
on OK to close the Page Setup dialog and then on OK again to
start printing.
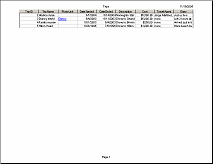
Your page should be in landscape orientation with just 4 records showing.
- Experiment:
Switch to Table Design View and experiment with
different column widths and row heights. What does it take to get all of
the memo fields to show all of their text? (Hint: the Diary field for
the Ireland trip has the most text.)
You will probably find that only one record will fit on a page and there
will be lots of empty space. There are better ways to get a printed copy
of these records that shows all of the text!
- Close the table without saving your changes.
Form: Print Preview, Behavior Properties
The Properties dialog often has choices that affect the way the form or
report behaves. Other properties affect only the look.
Can Grow and Can Shrink Properties for text boxes:
By setting these properties to Yes for the controls for memo fields, the
controls will expand and contract to fit the amount of text.
Keep Together Property for Detail section:
By setting this property to Yes, all of a record's controls will print
together and will not be split between two pages. However, if the form is too
wide for the paper, a second page will print before the next record is
printed.
-
 If necessary, switch to the Database Window.
- Click on Forms in the Object list and then open the
Trips AutoForm.
- Click on
 the Print Preview button.
- Use the navigation bar to view each page and
inspect the records. Look at the memo fields in particular.
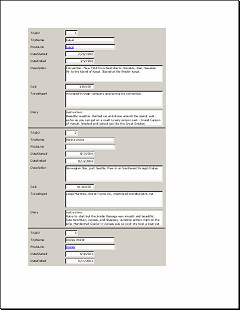
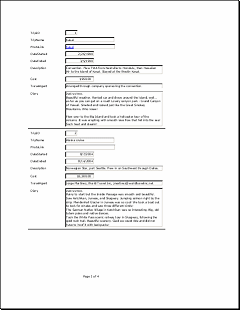
The first page holds 2 complete records and part of a another. The third record is split between
this page and the next one. The Diary field is cut short. The header and footer are blank. The
background color will print. These are all bad for printing.
Happily, you can make changes that will help.
- Switch to Form Design View.
 If
necessary, open the Properties dialog by clicking
 the
Properties button on the toolbar.
 Problem:
Properties dialog vanished
You clicked the Properties button when the dialog was already open,
and therefore closed it.
Solution: Click the button again and it will reappear.
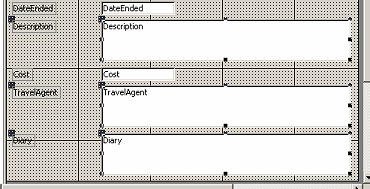
- Click on the control Description, which
is a memo field.
- Hold the SHIFT key down and click on the
TravelAgent and Diary controls.
All three are selected at the same time.
-
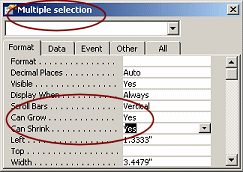 In
the Properties dialog, click on the Format tab and change
the Can Grow and Can Shrink properties to Yes.
(The All tab lists all of the properties on the other tabs.)
-
 Click on the
Detail bar to select the Detail section (the part that
has the form's controls in it).
The Properties dialog changes.
-
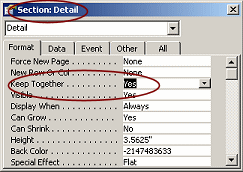 Change
the Keep Together property to Yes.
- Switch to Form View and navigate through the records. No changes!
Why not??
These particular changes will apply to the printed version of the form.
-
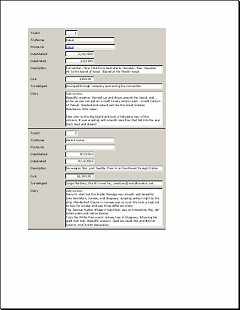 Switch
to Print Preview.
- Navigate through the pages. Do you see changes now??
- The first page no longer has part of record #3.
- The memo controls are shrinking and expanding to fit the text.
- No records are split between pages.
Hurrah!
Notice that there is nothing in the header or footer of the page. The
AutoForm wizard does not put anything there, but you could.
Form: Page Header/Footer
The AutoForm wizard did not include a header or footer for this form. A form
can have a form header and footer as well as a page header and footer. A form
header or footer will appear with each form. A page header or footer will
appear only on each page. The difference matters when you have more than one
form on a page.
You will create a footer that shows the page number.
- Switch to Form Design View.
-
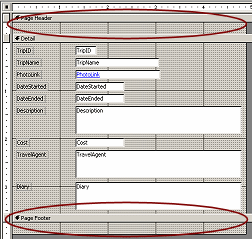 From the View menu,
select .
Two new sections appear in the Form Design View.
- Click on the Page Footer. The Page Footer section bar turns
to black to show that the section is currently selected.
-
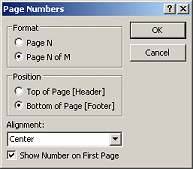 From the menu select | . The Page Numbers dialog appears.
- Select
Page N of M
Bottom of Page [Footer]
Alignment =
Center.
- Click on OK. A text box appears with some code in it.
In Design View you see the formula that creates what will show on the page in
Print Preview. It can be quite hard to read in Design View!

For this form, you won't put anything in the page header.
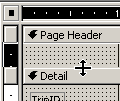 Move
the mouse pointer over the upper edge of the Details bar
until it turns in to the Vertical Resize shape
 .
.
- Drag up and drop at the top of the Page Header section.
There should be no gap between the two section bars.
-
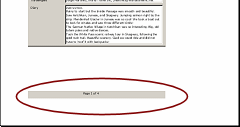 Switch
to Print Preview to see your changes.
The footer shows with a gray background like the Detail section. There is a big white gap between the bottom of the form
and the top of the footer.
Perhaps it would be better to remove the background color for printing.
Form: Back Color
Some of the choices in the Properties dialog affect the look of the object.
The font, font size, font color, background color, and style of the control are
all changeable.
To improve the way the form prints, you will change the background colors and
then save the form with a new name.
- Switch back to Design View.
-
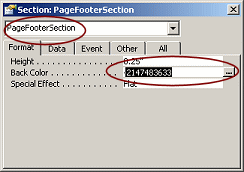 Click
in the Page Footer to select it. The Properties dialog should have
PageFooterSection in the title bar.
- In the Properties dialog, click in the value for Back Color.
A button appears at the right with three dots
 .
.
- Click on
 the three dots. The Color dialog appears.
-
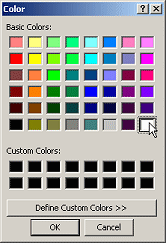 Click
on the white square, at the lower right. Then click OK.
-
 Click
a different property in the Property dialog. Your change is applied
only after you leave the text box.
The footer background color is now white.
- Repeat for the Detail section.
- Switch to Print Preview. Inspect all 4 pages.
-
 Click
Click
 the
Print button button to print all four pages.
- On the File menu select . The
Save As dialog appears with the current name in the text box.
-
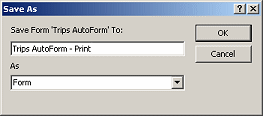 Edit the name to read Trips AutoForm - Print.
- Click OK.
You now have a form to use when you want to print instead of view it on a
screen.
- Close the Print Preview and then close the Design View.
Report: Print
You can make the same type of changes to reports as you just did for forms.
The Properties dialog is full of choices! For now, you will just print the report that you created. In later lessons
you will learn to make more changes.
- Switch to the Database Window and select Reports.
- Right click on Trips AutoReport.
A menu appears that includes the command Print. You don't want to click that
at this time. You should always look at the print preview
before you print! This will save you many wasted pages.
- From the popup menu select .
-
 Click
on the button Multiple Pages
 on the toolbar
and drag the palette to select 2 x 3 Pages. All 5 pages show
at once. They may be too small to read on your screen but you can see how
the records are laid out on each page. The last two records are too long to
fit on the same page.
-
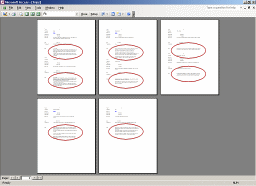 Inspect all pages. Are the memo fields showing all of their text?
They should be. You changed the Can Grow/Can Shrink Properties already.
How handy!
-
 Click the Print button to print all of the records.
- Close the Print Preview window.
Data Access Pages: Print
A data access page is used to view database records in a browser. While you
can print from inside Access, that is not what your users will be doing.
- Open a new browser window.
If you do not create a new window, the page you are reading now will be
replaced with the data access page.
- In the Database Window, select Pages
and right click on Trips Page.
- From the popup menu, select . The data access page should open in the new browser window and display the first record.
 Only the
title displays:
Cause: Security settings in your browser.
 Solution:
In IE6, look for a bar above the web page that says something like: To help
protect your security, Internet Explorer has restricted this file from
showing active content that could access your computer...
Click on the bar itself. A menu appears. Select Allow Blocked Content. A
confirmation dialog
appears. Click on Yes.
-
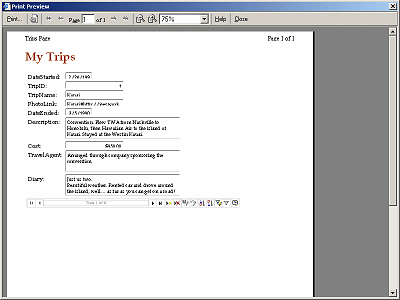 From the
browser's menu select |.
There is only one page. Each record shows on a
separate data access page. You can print them only one at a time.
- Print the page.
To change to a new record, you must go back to the browser.
You cannot use the navigation bar that is on the page while in Print Preview.
- Close the print preview.
- Back in the browser, display record #5 and print it.
- Close the browser window.
- Close the Trips Page window in Access.

