Access Basics:
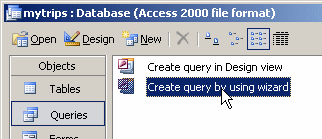
Query Wizard

Did you want: Working with Databases: Access 2007, 2010, 2013, 2016
Access Basics:
|
Did you want: Working with Databases: Access 2007, 2010, 2013, 2016 | |||||
|
|
||||||
|
A query is a way to view, analyze, or organize your records. You can also make some kinds of changes using a query, like deleting or updating a group of records. The magic behind a query is the programming language SQL (Structured Query Language). Happily, Access provides a wizard for creating simple queries and a visual Query Design View when your query is more complex. You won't have to write the SQL code yourself. At least, not for these lessons! Examples below are from starwars.mdb. Query WizardThe Access query wizard makes it very easy to create simple queries. It walks you through most of the choices that you need to make. Afterwards, you can use the Query Design View to add sorting and criteria.
|
Project 2: Access Basics
|
|||||||||||||||||||||||||||||
Views
|
||||||||||||||||||||||||||||||
|
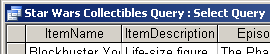
Select query |
Selects certain fields and certain records from a table or from a set of related tables and shows them in a datasheet. Can sort on several fields. Can filter using simple or complex criteria. Most often used type of query. |
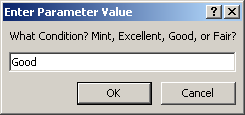
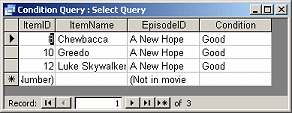
| Parameter query | Asks for input for the criteria. Example: You are asked to type in a value to select records that match that value.
Parameter dialog appears when you run the query
Query shows only the records that |
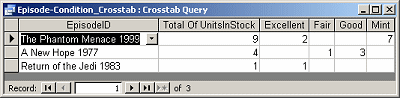
| Crosstab query | Calculates totals of various sorts based of
two types of information, one across the top of the results datasheet
and one down the left side. Example: Show total UnitsinStock, by Condition (across the top) for each EpisodeID (down the left).
|
| Action query | |
|
Deletes a group of records based on criteria. |
|
Selects certain records and adds those records to a table. |
|
Changes values in a group of records. |
|
Creates a new table from the results of the query. |
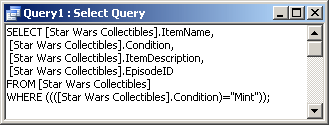
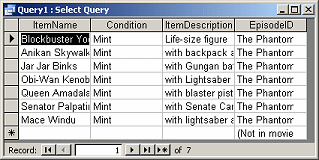
| SQL query | Query is written in SQL.
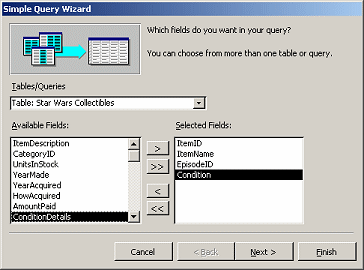
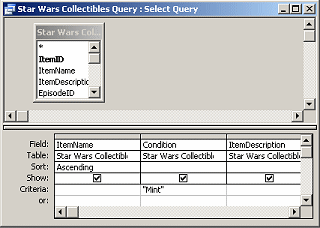
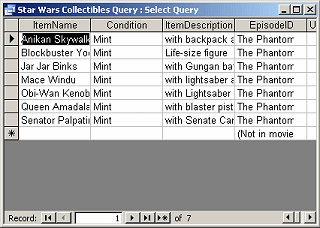
Simple example: Select several fields from the table Star Wars Collectibles but shows records only for those that are in "Mint" condition.
Some advanced queries cannot be designed in the Access Query Design View but must be written in SQL. |
|
|
Step-by-Step: Create a Query |
|
What you will learn: |
to create a simple query with the Query Wizard |
Start with: mytrips.mdb from previous lesson
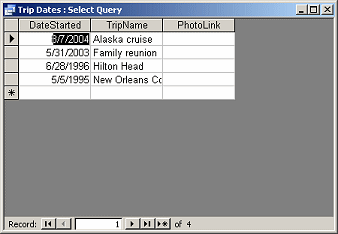
The Simple Query Wizard walks you through the choices you need to make to create a simple query. You will create a query that will show just the trip names, the photo links, and the starting dates.
 If
necessary, open mytrips.mdb.
If
necessary, open mytrips.mdb.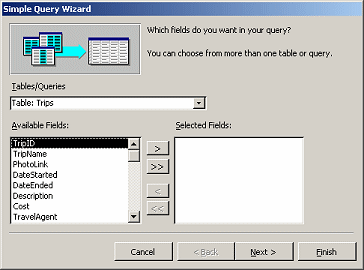 The
Simple Query Wizard opens.
The
Simple Query Wizard opens. 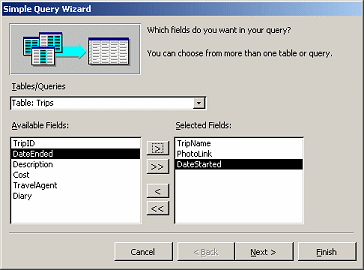 Click
on TripName and then click on the > button in the
middle. The field TripName appears in the list of
Selected Fields and disappears from the list of Available Fields.
Click
on TripName and then click on the > button in the
middle. The field TripName appears in the list of
Selected Fields and disappears from the list of Available Fields.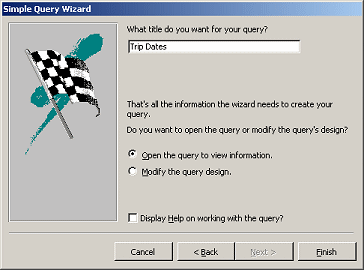 Type
Trip Dates in the box for the title of your query.
Type
Trip Dates in the box for the title of your query.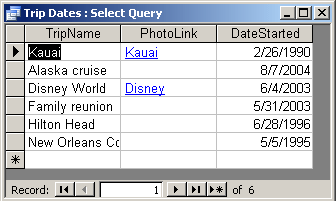 The
datasheet for the query opens, showing only the fields that you selected.
The
datasheet for the query opens, showing only the fields that you selected.
This datasheet works the same way the Table Datasheet did.
For review, practice with the Navigation buttons and with the shortcut keys that move you around in the datasheet.
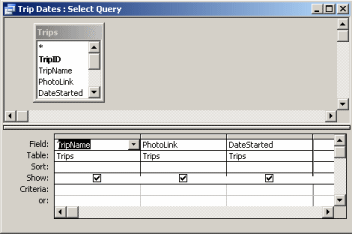
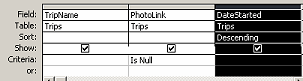
The Query Wizard is only the start of what you can do with a query. Did you notice that the wizard did not ask you about how to sort or if you wanted to use criteria to filter the records? You can do that in Query Design View. You can also change the order of the fields.
 With
the query's datasheet open, click on the Views button on the
toolbar, which currently shows the Design View icon
With
the query's datasheet open, click on the Views button on the
toolbar, which currently shows the Design View icon
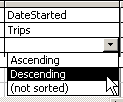 Click
in the third row under DateStarted. An arrow
appears at the right.
Click
in the third row under DateStarted. An arrow
appears at the right. 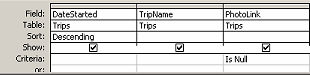 Filter:
 Click
to select the whole column.
Click
to select the whole column.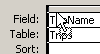 Drag
to the left and drop to the left of the TripName
column.
Drag
to the left and drop to the left of the TripName
column.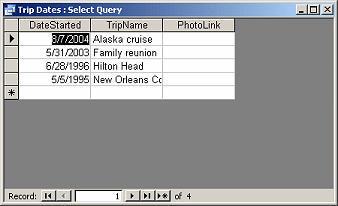 Click
on
Click
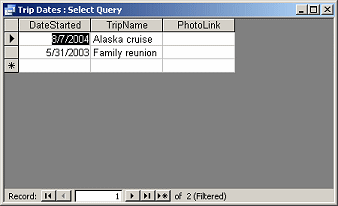
on Any datasheet can be filtered, including a query datasheet. Yes, you already used criteria in the query design. You can still apply an additional filter.
 Click
on the button
Click
on the button
 Click
on
Click
on Why didn't we include the filter's criteria in the original query?? To be honest... so you could create a filter, of course!
In the real world, a filter is often used when you want to pick out certain records temporarily, but you do not expect to need to use those exact criteria regularly.
Your filter will be saved with the query, but it will not be applied automatically when you run the query again. Until you create a new filter for this query, you can apply the saved filter by clicking the Apply Filter button.
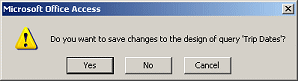 Close
the query window by clicking its Close button
Close
the query window by clicking its Close button
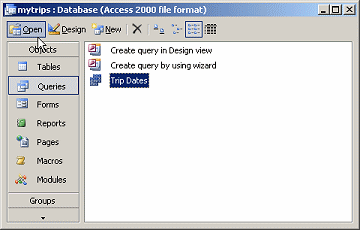 If
necessary, switch to the Database Window.
If
necessary, switch to the Database Window.
 The
query runs and displays the
datasheet of results.
The
query runs and displays the
datasheet of results.
![]()
![]()
![]()
![]()
|
Teachers: Request permission to use this site with your class Copyright © 1997-2012 Jan Smith <jegs1@jegsworks.com> All Rights Reserved |
~~ 1 Cor. 10:31 ...whatever you do, do it all for the glory of God. ~~