Excel Intro:
Select a Range

Did you want Working with Numbers: 2007,2010,2013,2016 or
español![]()
Excel Intro:
|
|
|||||
|
|
||||||
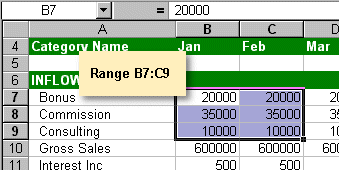
A range is a rectangle of cells. The normal form for the range reference lists the upper left cell first, then the lower right cell, like B7:C9. (The column letters do not have to be capitalized.)
To select more than one cell is not hard, if the cells are next to each other. For cells and ranges that are scattered around, you will need to use the CTRL key along with your mouse. The SHIFT key is a great help when you need to select large numbers of cells. |
Project 1: Excel Intro Search Glossary Appendix |
|||||||||||||||||||||||||||||||||||
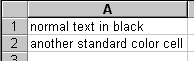
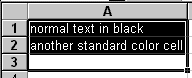
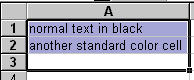
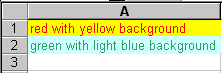
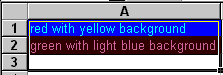
Highlight ColorsWhen you select more than one cell, Excel highlights all but the first cell in the selection. Most computer programs that highlight selections reverse the colors of text and background. With Excel, it depends on which version you are using. Standard colors = black text on white:
Other Colors: If the cells have colored text or colored backgrounds, however, the difference is more noticeable.
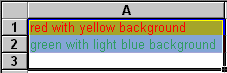
When you select cells that have a dark background, the highlighting is harder to see in later versions than it is in Excel 97. The highlight border shows up well in both.
[Note from author:
Start with:
Select Range: DragIt's easy to drag when the corners of the range are fairly close together.
While you are dragging, the Name Box shows the number of rows and columns you have selected. The row and column headings for the selected cells are raised and bold to help you see what you are selecting. Once you release the mouse button, the Name Box will
always show just the cell reference of the cell you started with. The Formula bar shows the contents of
that cell the whole time. Select Range: KeysThis technique is especially useful when the corners of the range are far apart. You do not have to select the upper left and then the lower right cell in the range. Either pair of diagonal corners in any order will do. The range reference is normally written with upper left: lower right.
Select Range: Range ReferenceWhen you know the cell references for the corners, the Name Box is even easier than dragging.
You are moved directly to the range and the cells are all selected. Again the
Name Box shows only the upper left cell of the range.
Select Range: NameCell references are hard to remember. Give a name to cells that you will be looking at often.
You are returned to range N44:N46 and it is selected again. Success! Select Cells/Ranges: Not Adjacent - CTRL keyA range is a set of adjacent cells. They are right next to each other. You can also select non-adjacent cells, ranges, or a combination. These are not next to each other. The CTRL key gives you the power to skip around with your selections.
Select Cells/Ranges: Extend or Reduce Selection - SHIFT keySuppose you have a selection that is one row too short. Or perhaps it is a column too wide. You don't have to start your selection all over. You can extend or reduce it using the SHIFT key.
|
||||||||||||||||||||||||||||||||||||
~~ 1 Cor. 10:31 ...whatever you do, do it all for the glory of God. ~~ |
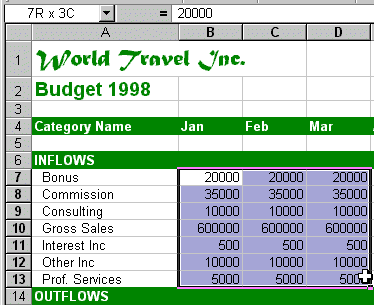 Drag from cell B7 to cell D13,
the opposite corner of the range.
You have selected all the cells in range B7:D13. The Name Box shows B7
and the Formula Bar shows what is in cell B7 = 20000.
Drag from cell B7 to cell D13,
the opposite corner of the range.
You have selected all the cells in range B7:D13. The Name Box shows B7
and the Formula Bar shows what is in cell B7 = 20000.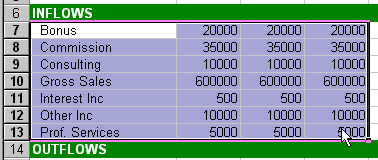 Select
one corner of the range: cell A7.
Select
one corner of the range: cell A7.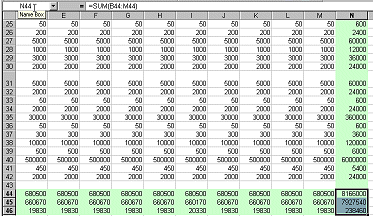 Click in the Name Box and type
the range reference n44:n46 and press ENTER.
Click in the Name Box and type
the range reference n44:n46 and press ENTER. 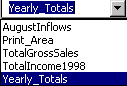 If
necessary, select the range N44:N46.
If
necessary, select the range N44:N46.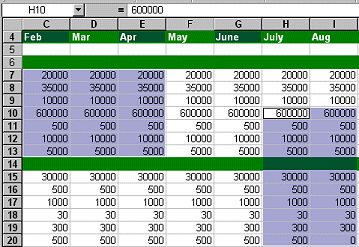 Select cell C4. (Hint:
Type the cell reference in the Name Box and press ENTER. This will avoid the long
scroll from N44:N46.)
Select cell C4. (Hint:
Type the cell reference in the Name Box and press ENTER. This will avoid the long
scroll from N44:N46.)