
Jan's Working with Presentations
Advanced: Images: Master Background
You may be satisfied with a simple colored background for your slides. On the other hand, you do have other choices, from simple to quite complex.
Solid color |
Gradient colors |
Textures |
Patterns |
Single image |
Compound image - A background plus drawings or photos or text. |


Background Image
You can apply an image as the background of a slide or of a Slide Master.
![]()
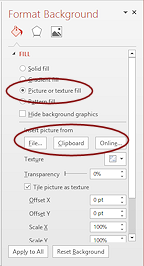
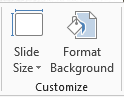
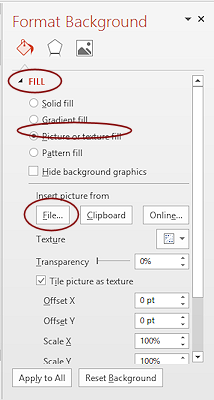
![]() PowerPoint 2013, 2016: Design ribbon tab > Customize tab group > Format
Background > Picture or texture fill >
Insert picture from File... or Clipboard or Online...
PowerPoint 2013, 2016: Design ribbon tab > Customize tab group > Format
Background > Picture or texture fill >
Insert picture from File... or Clipboard or Online...
But sometimes the results can be quite unhappy!
Background Problems
![]() Problem: Background image is stretched out of shape.
Problem: Background image is stretched out of shape.
![]() Problem: Background image is cropped.
Problem: Background image is cropped.
Cause: Image does not have the same shape as the slide.
Example:
|
|
|
|
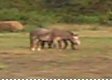
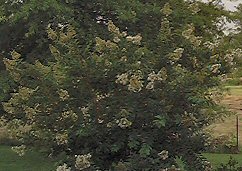
| Original image | Stretched to fit | Cropped to fit |
|
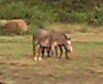
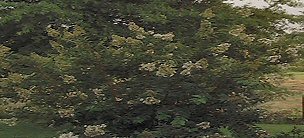
View of details in image: Horses and shrub |
||
| From Original | From Stretched | |
 |
|
|
 |
||
![]() Stretched images may look OK
inside PowerPoint or even at full screen on your monitor. When projected
onto a screen, the deformed shapes are much more noticeable.
Stretched images may look OK
inside PowerPoint or even at full screen on your monitor. When projected
onto a screen, the deformed shapes are much more noticeable.
Possible Solutions:
 Solution 1: Crop your image first to approximately the same proportions as the slide.
-
 Solution 2: Insert the full image as a picture instead of a background and use a fill color or
fill effect for the rest of the background.
Solution 2: Insert the full image as a picture instead of a background and use a fill color or
fill effect for the rest of the background.
- Solution 3: Pick a different image!
| |
Step-by-Step: Master Background Image |
|
| What you will learn: | to add a background image to master
Title layout to format placeholder text |
Start with: ![]() , nz-Lastname-Firstname.pptx
, nz-Lastname-Firstname.pptx
In this lesson you will add a background image to the Slide Master: Title layout and format the Title placeholder text to show up well over the photo background. The background is deliberately difficult to make work well.
Title Master: Background Image
You will use a photo as the background for the Title Master. Photo backgrounds are hard to work with for normal slides, but for a title slide you should be able to position and format the text to be easy enough to read. Title text is usually much larger so it is easier to see against a complex background.
- Open Slide Master View, if necessary, for the file you have been working on, nz-Lastname-Firstname.pptx.
-
 Right
click on the background of the Title layout Slide Master.
Right
click on the background of the Title layout Slide Master.
- From the context menu select Format Background...
The Format Background dialog or pane appears.
- On the Fill page, select Picture or texture fill.
-
Click the File... button under Insert from:
The Insert Picture dialog opens.
-
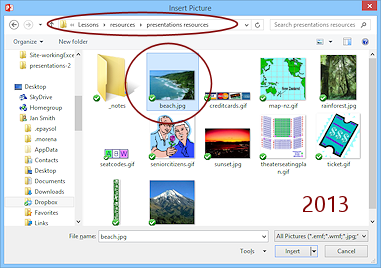 Navigate to the resource files on your hard disk and select the image beach.jpg.
The Open button changes to Insert. Problem:
No resource files on the hard disk
Problem:
No resource files on the hard disk
Solution 1: Download the resource files and unzip to the default location.
Solution 2: Download the file beach.jpg and save it to a location you can find in the Insert Picture dialog.
-
Click on the Insert button.
You are back in the Format Background dialog.Live Preview changes the Slide Pane to show your picture in place as a background.
PowerPoint tries to make the whole picture fit on the slide, so the picture may be cropped off or stretched to fit using the Stretch options, depending on the slide's size and the picture's dimensions.
When you insert a picture on a slide, you have an option to 'Lock aspect ratio' to keep it from stretching out of shape. No such choice here for the background!
- Return to Slide Master View but do NOT click on Apply to All.

 PowerPoint 2007, 2010: Click the Close button.
You are returned to the Slide Master view with a new background for your Title layout.
 PowerPoint 2013 2016: Click the X button to close the pane.
-
 Save As nz-background-Lastname-Firstname.pptx to your Class
disk.
Save As nz-background-Lastname-Firstname.pptx to your Class
disk.

Title Master: Format Text
The green text is not showing well over part of the photo background. That is a common problem with backgrounds that have both light and dark areas behind the text. There are a few formatting tricks to help - font color, shadowing, place holder background color with transparency, placeholder size and location. For this one, you need to use most of these tricks!
 Click in the Title placeholder to select it.
- Font Color: On the Home ribbon tab, change the font color to white using the Font Color
palette.
- Shadow: On the Home ribbon tab, click the Shadow button
 to shadow all of the text.
Did you watch the text when you clicked. The shadow is a subtle effect but it does help.
-
 Placeholder
Background: On the Home ribbon tab, click the arrow beside the
Shape Fill button and choose More Fill colors....
Placeholder
Background: On the Home ribbon tab, click the arrow beside the
Shape Fill button and choose More Fill colors....
The Colors dialog appears.
- If necessary, select the Standard tab.
- Click on gray hexagon on the top row, 3rd from left.
- Set the transparency to 50%.
Using a partial transparency allows the photo to show through but it won't compete as much with the text. A good compromise!
- Click on OK.
-
 Click out of the placeholder to deselect it and see the effect of
your changes.
Click out of the placeholder to deselect it and see the effect of
your changes.Better! Now your text shows well over both the ocean and the forest in the photo background.
- Close the Master view and show the title slide in the Slide pane.
-
Click the Slide Show button


 on the Views bar to see
your title slide at full screen size.
on the Views bar to see
your title slide at full screen size.Detail of image:
Hmmm. That photo is rather fuzzy. The detail shown above is at full size. The effect will be even more noticeable when projected onto a wall screen. This presentation is intended to be viewed on a monitor, so this background would be acceptable, but not great.
Why so fuzzy?? Two causes:- Enlarging: The image is only 485 x 318 pixels. PowerPoint enlarged the photo to fit the slide, which enlarged each pixel in the original.
- Sharpening: The original photo was sharpened in a graphics
program. This causes the outlines around edges, called JPEG artifacts.
- Save.
[nz-background-Lastname-Firstname.pptx]
|
|
| © 1997-2017 Jan Smith All Rights Reserved |
Site Map What's New |
Privacy Policy Terms of Service Copyright Acknowledgements |
~~ 1 Cor. 10:31 ...whatever you do, do it all for the glory of God. ~~
Last updated: March 22, 2017