
Jan's Working with Presentations
Basics: Exercise PPT 1-3
 You need to use what you just learned, and maybe learn a little more. Complete all parts of the following exercises. Don't forget to backup your Class disk when you have
completed the exercises or whenever you stop for the day and saved a document
along the way.
You need to use what you just learned, and maybe learn a little more. Complete all parts of the following exercises. Don't forget to backup your Class disk when you have
completed the exercises or whenever you stop for the day and saved a document
along the way.
In this exercise you will edit an existing presentation in an older file format and add some notes to it and print those notes.
Exercise PowerPoint 1-3: Notes
| What you will do: | Add notes to slides. Edit slides. Move slide. Add slide. Print notes. |
Start with:![]() , choosing.ppt from resource files.
, choosing.ppt from resource files.
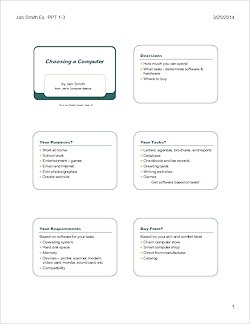
The newsletter/magazine Computers Today is offering free training in computer topics using PowerPoint presentations. You will edit a presentation that is based on Jan's Computer Basics: On Your Own, covering the topic of Choosing Your Own Computer.
- Open from the resource files
 the presentation choosing.ppt.
This presentation was saved in the older ppt file format. It can be opened and edited by more recent versions of PowerPoint but will be in Compatibility Mode. That means that new features won't be used. This is not an issue for this presentation. Of course it is annoying to have newer, fancier software and not be able to use those new features because someone else is still stuck with old software!  Save As: to your Class disk in the powerpoint project1 folder with the name
ex1-3-choosing-Lastname-Firstname.pptx
- Slide #4: Your Tasks?
Remove the bullet from the last line and center the line on the slide.
- Slide #5: Buy From?
Remove the bullet from the first line.
- Move the slide Decisions to be the
second slide.
- Add a new slide before Slide #5: Buy From? with the title Your Requirements and the following text:
Based on software for your tasks:
- Operating system
- Hard disk space
- Memory
- Devices – printer, scanner, modem, video card, monitor, sound card, etc.
- Compatibility
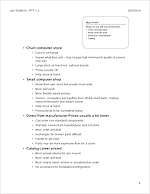
- Slide #6: Buy From?: In Notes Page view, add the comments below to the Notes placeholder
(Hint: Copy from this page and paste onto your slide. Delete any blank lines after pasting.)
Format the main points as bold and 14 pt. Add bullets. Indent the subpoints.
Resize and/or reposition the slide and the notes placeholder to allow all of the notes to show on the page. Format the placeholder shape for the slide thumbnail to use No border. The slide itself has a border.
- Chain computer store
- Easy to exchange
- Repair what they sell – may charge high minimum & quality of service may vary
- Large stock on hand incl. national brands
- Prices usually OK
- Help close at hand
- Small computer shop
- Know their own stock but usually must order
- More personal
- More flexible about pricing
- Clones - computers put together from off-the-shelf parts, making replacement parts and repairs easier.
- Help close at hand
- Pricing tends to be somewhat higher
- Direct from manufacturer
- Prices usually a bit lower
- Can order non-standard components
- Warranty comes from manufacturer and not store
- Must order and wait
- Exchanges for broken parts difficult
- Harder to get help
- Parts may be more expensive than for a clone
- Catalog
- Lower prices!
- Most accept returns for any reason
- Must order and wait
- Must ship to return broken or unsatisfactory order
- No assistance for installation/configuration
- Chain computer store
- Use Pre-Print Check List in the Appendix to verify your work. Fix any
errors.
- Create a header for Notes and Handouts with the date (update
automatically), page number, and, in the header text box, your name and Ex. PPT 1-3 on the
left. Be sure to Apply to All!
- Save
[ex1-3-choosing-Lastname-Firstname.pptx]
You must change the file type to pptx. Do not just type in the extension! -
 Print the Notes page for slide #6 by itself in grayscale.
Do not frame the slides as each slide has a border already. Make sure the print-out is only 1 page.
- Print a handout with all 6 slides on one page in grayscale or,
you may print in color, if your printer can do color.

|
|
| © 1997-2017 Jan Smith All Rights Reserved |
Site Map What's New |
Privacy Policy Terms of Service Copyright Acknowledgements |
~~ 1 Cor. 10:31 ...whatever you do, do it all for the glory of God. ~~
Last updated: March 27, 2017
These exercises may use one or more files from the presentations resource files . Save the changed documents to your Class disk. This
keeps the original resource files intact in case you need to start over or
another student will be using this same computer.
. Save the changed documents to your Class disk. This
keeps the original resource files intact in case you need to start over or
another student will be using this same computer.