 |
Step-by-Step: Settings |
 |
What you will learn: |
to change settings in Page Setup dialog
to change settings in Options dialog
to customize toolbars in Customize dialog
to change settings in AutoCorrect dialog |
Start with:
 (PowerPoint open to a blank document)
Dialog: Page Setup
The Page Setup dialog has fewer choices than in many
other programs. The proportions of your slides will change
depending on your choice in the Slides sized for:
box!
 Page Setup choices apply only to the
current
presentation. Page Setup choices apply only to the
current
presentation.
 There
does not seem to be a way to change the margins on your print-outs. There
does not seem to be a way to change the margins on your print-outs.
-
Open PowerPoint, if necessary, to a blank presentation.
-
 From
the File menu, select . The
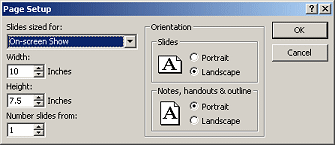
Page Setup dialog appears. From
the File menu, select . The
Page Setup dialog appears.
The default settings should be just fine for you.
-
Slides sized for: On-screen Show
-
Width: 10 inches
-
Height: 7.5 inches
-
Number slides from: 1
-
Orientation - Slides = Landscape
-
Orientation - Notes, Handouts, Outline = Portrait
  The
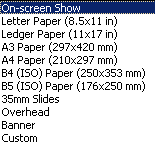
Slides sized for: choice changes the
proportions of your slide, depending on what media you choose. The
default is On-screen Show. The dimensions
of the slide are important to your layout! Choose based on your
primary use for the presentation - on screen, on paper, as 35mm
slides, etc. The
Slides sized for: choice changes the
proportions of your slide, depending on what media you choose. The
default is On-screen Show. The dimensions
of the slide are important to your layout! Choose based on your
primary use for the presentation - on screen, on paper, as 35mm
slides, etc.
|

On-screen |

A4 |

35mm |

Overhead |
Printing: PowerPoint seems to set the margins on your paper to
half an inch on all sides. There does not seem to be a way to adjust this.
-
Click on Cancel to close the dialog.
Dialog: Options
The Options dialog has several tabs. The default settings are
usually fine. We will check on just some of the settings.
Options: View Tab
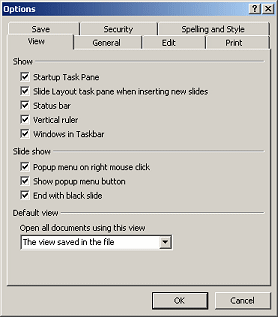
The View tab controls some of aspects of the PowerPoint
window, the Windows Taskbar, and PowerPoint slide shows.
-
 From the menu
select | . The Options dialog appears. From the menu
select | . The Options dialog appears.
-
If necessary, select the View tab.
-
 PowerPoint 2002:
Click on
 the Dialog Help button on the Title Bar. The mouse pointer changes to
a select arrow with a question mark
 . .
Click
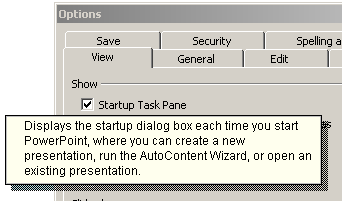
on the first item on the View tab -
Startup Task Pane. A popup tip appears with some information about this item.
Click somewhere else to close the popup tip. The pointer returns to its
normal Select shape
 . .
Repeat for each item on the tab to see what PowerPoint can tell
you about it.
Be sure you have a checkmark in each item on this tab.
 PowerPoint 2003: PowerPoint 2003:
Click on the Help button. A Help panel appears. Click on each link
and read what it says about the topic of each of the tabs in the Options
dialog. This is not as directly helpful as in PowerPoint 2002.
 The
Startup Task Pane or dialog appears when you are opening PowerPoint with a
blank presentation, but not if you are opening an existing presentation
directly. The
Startup Task Pane or dialog appears when you are opening PowerPoint with a
blank presentation, but not if you are opening an existing presentation
directly.
Options: General Tab
-
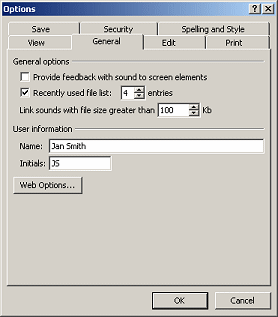 Click
on the General tab. Click
on the General tab.
-
Use the Dialog Help pointer
 to check out the items
on the General tab. to check out the items
on the General tab.
-
Set Recently used file list: to
at least 4, which is the default. The maximum is 9.
-
If necessary, change the User information to your
name.
 Changing
the User information here changes it for all future Office documents, not
just PowerPoint presentations. The Name is recorded as the Author in the
document's Properties. To change the Author for a particular presentation or
another Office document, use the document's own properties Changing
the User information here changes it for all future Office documents, not
just PowerPoint presentations. The Name is recorded as the Author in the
document's Properties. To change the Author for a particular presentation or
another Office document, use the document's own properties
||.
Options: Edit Tab
-
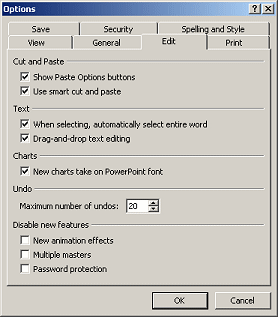 Click
on the Edit tab. Click
on the Edit tab.
-
Use the Dialog Help pointer
 to check out the items. to check out the items.
-
Put a checkmark in each item in the top three sections:
Cut and Paste, Text, and Charts.
-
Undo: The default of 20 may be OK for you, but you
can increase that to as high as 150. How many Undo's your computer can handle
depends on its memory.
-
Remove any checkmarks from the section
Disable new features.
Options: Spelling and Style Tab
-
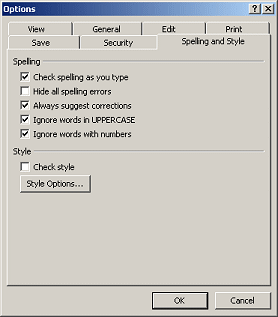 Click
on the Spelling and Style tab. Click
on the Spelling and Style tab.
-
Use the Dialog Help pointer
 to check out the items. to check out the items.
-
Be sure to have a checkmark in:
- Do not have a check mark for Hide all spelling errors.
- For now have Check style not checked.
- Click the Close button
 to close the Options dialog.
 The
Check style option requires that Office Assistant be turned on. We will work
with the Check Style feature later, after a presentation is nearly done. Office
Assistant gets annoying and is in the way when turned on all the time! The
Check style option requires that Office Assistant be turned on. We will work
with the Check Style feature later, after a presentation is nearly done. Office
Assistant gets annoying and is in the way when turned on all the time!
Dialog: Customize (Toolbars)
Microsoft has a separate Customize dialog
for managing the toolbars and Menu bar. In this dialog you can change what bars are
showing, what items are on the bars, and how the bars display on the screen.
Customize: Toolbars Tab
-
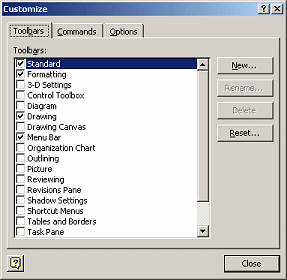 From
the Tools menu, select . The Customize dialog appears. From
the Tools menu, select . The Customize dialog appears.
-
If necessary, click the Toolbars tab to select it.
The bars with checkmarks are the ones currently being displayed. The default
bars are:
-
Standard
-
Formatting
-
Drawing
-
Menu Bar
 If you find
later that your bars contain different items from mine, you can use the Reset
button to return all the bars to their original state, if you wish. Be courteous - Don't do
this on a computer that is not yours! If you find
later that your bars contain different items from mine, you can use the Reset
button to return all the bars to their original state, if you wish. Be courteous - Don't do
this on a computer that is not yours!
Customize: Commands Tab
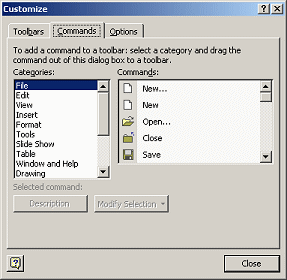 With
the Commands tab open, you can edit your menu bar or any displayed toolbar
by simply dragging a command to the location on the toolbar that you want or
by dragging it off
while this dialog is open. We will assume that no one has been playing games
with your bars! With
the Commands tab open, you can edit your menu bar or any displayed toolbar
by simply dragging a command to the location on the toolbar that you want or
by dragging it off
while this dialog is open. We will assume that no one has been playing games
with your bars!
Customize:
Options Tab
-
Click the Options tab.
-
Use the Dialog Help pointer
 to check out the items.
-
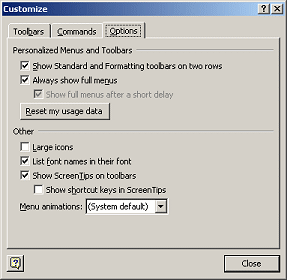
Be sure to check the boxes for:
-
Click the Close button
 to close the Customize dialog.
Dialog: AutoCorrect
As you work with your slide text and placeholders, PowerPoint
may make some changes automatically. This can be quite startling if you are not
aware of the AutoCorrect and AutoFormat features.
AutoCorrect: AutoCorrect Tab
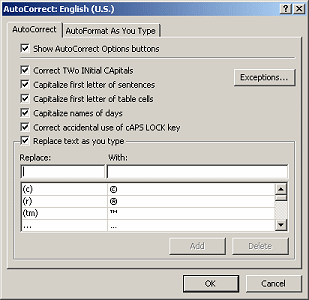
The AutoCorrect tab is very much the same in all Office
programs. These settings are supposed to correct the most common typing errors.
You can also uses this feature to automatically replace some short text that
you type with longer text.
-
From the Tools menu, select
The AutoCorrect dialog opens.
It has two different tabs: AutoCorrect and AutoFormat As You Type.
 PowerPoint 2003 also has a tab for SmartTags.
-
 If
necessary, select the AutoCorrect tab. If
necessary, select the AutoCorrect tab.
-
Use the Dialog Help pointer
 to check out the items.
 You can add to the
list under Replace text as you type. You would enter a short set of characters and have your Office
applications replace them with a long phrase or even a whole paragraph. Very
helpful for long business names or often-used standard paragraphs. You can add to the
list under Replace text as you type. You would enter a short set of characters and have your Office
applications replace them with a long phrase or even a whole paragraph. Very
helpful for long business names or often-used standard paragraphs.
-
Check all of the checkboxes.
AutoCorrect: AutoFormat As You Type Tab
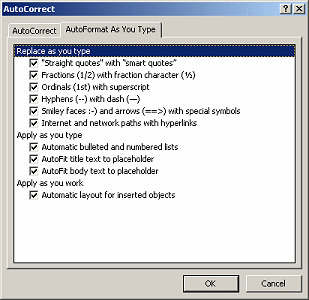
The AutoFormat choices do not replace your text. They just
change the look, like changing 1/2 to ½ and 1st to 1st.
The AutoFit and Automatic layout choices are special to
PowerPoint.
-
Click on the AutoFormat As You Type
tab.
-
Use the Dialog Help pointer
 to check out the items.
-
Check all of the boxes.
AutoCorrect
Options Button
The AutoCorrect Options button is available in Office XP
(which includes all of the 2002 versions of its individual programs) and in
Office 2003. This button has
a different look, depending on exactly what change was made. It only
appears after the program has made a change.
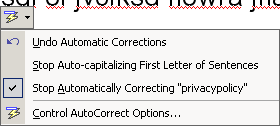  Text changes:
A small blue rectangle
marks where an AutoCorrect made a change in your text. However, you must move your mouse near the spot to
see it. Not very helpful if you did not notice the formatting change!
  See
it - AutoFormat double caps: Click on the image at the right to see Autoformat in action. In this
case the capital A changes to a lower case a. The mouse pointer moves over the
word and the AutoCorrect box appears. The animation will run 3 times. Click
again to view again. See
it - AutoFormat double caps: Click on the image at the right to see Autoformat in action. In this
case the capital A changes to a lower case a. The mouse pointer moves over the
word and the AutoCorrect box appears. The animation will run 3 times. Click
again to view again.
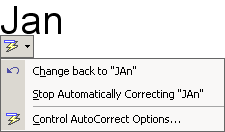 The
AutoFormat Options button gives you the choice of undoing the change in this
particular instance, or of stopping this correction for this editing session. The
AutoFormat Options button gives you the choice of undoing the change in this
particular instance, or of stopping this correction for this editing session.
  AutoFit:
Changes the size of the text so that all the text will fit in
the placeholder.
For Title and Subtitle placeholders, PowerPoint only goes down 1 size. After
that, it adds more lines that lie outside the placeholder. Titles aren't
supposed to be so long!
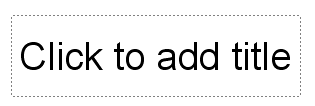  See
it - Title placeholder: Click on the image at the right to see how AutoFormat changes the
text's size to fit in the placeholder. The size goes down from 44 pts. to 40
points. See
it - Title placeholder: Click on the image at the right to see how AutoFormat changes the
text's size to fit in the placeholder. The size goes down from 44 pts. to 40
points.
  See
it - Bullet list placeholder: See
it - Bullet list placeholder:
Click on the image at the right to see how AutoFit changes the size in a
text placeholder. It just gets smaller and smaller and smaller!
  AutoCorrect Options: AutoCorrect Options:
Appears when PowerPoint changes something
other than the text, like the layout.
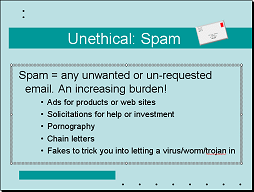  See
it - AutoLayout inserted image: See
it - AutoLayout inserted image:
Click on the image at the right to see what changes AutoLayout makes when
you insert an image in PowerPoint 2002. The original placeholder changes shape and position, it's
text is reduced in size, and the title placeholder shifts up to make room. Not
a happy effect.
 AutoLayout
does not apply to inserted images but will affect tables and diagrams. AutoLayout
does not apply to inserted images but will affect tables and diagrams.
|

