PowerPoint Formatting:
Exercise PowerPoint 2-2

Title: Jan's Illustrated Computer Literacy 101

Did you want: Working with Presentations: PowerPoint 2007,2010,2013,2016 or español


You need to use what you just learned, and maybe learn a little more. Complete all parts of the following exercises. Don't forget to backup your Class disk when you have completed the exercises or whenever you stop for the day and saved a document along the way.

These exercises use files from the presentations resource files. The default location for these files is c:\My Documents\complit101\presentations\ You cannot make changes to these files and save them in the same place. Save the changed documents to your Class disk. This keeps the original resource files intact in case you need to start over or another student will be using this same computer.
Full floppy disk How to handle a full Class disk


Where you are:
JegsWorks > Lessons > Presentations

Before you start...

Project 1: PowerPoint BasicsTo subtopics

Project 2: PowerPoint Formatting
    Design Issues
    TemplatesTo subtopics
    Transitions & AnimationsTo subtopics
    Summary
    Quiz
    Exercises Arrow to Subtopics
    Icon: Exercise Ex. 2-1:Wizard
    Icon: Exercise Ex. 2-2:Format & Animate
    Icon: Exercise Ex. 2-3:Color Scheme 
    Icon: Exercise Ex. 2-4:On Your Own

Project 3: Advanced PowerPointTo subtopics


    Search
    Glossary
    Appendix


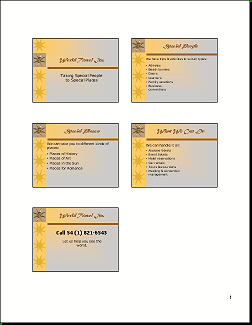
Exercise PowerPoint 2-2: Format & Animate


What you will do:

Apply a design template.
Format fonts on master.
Resize textboxes on slides.
Apply animation scheme.
Edit animation.
Apply slide transition that advances automatically.

Start with:  Icon: PowerPoint with blank presentation, people.ppt  from the resource files

  1. Open the presentation people.ppt from the resource files. There are text boxes on the slides in addition to placeholders.
     
  2. SUNIDAYS.POT templateDesign Template: Apply the design template SUNIDAYS.POT. 
     
    Icon: TroubleIf you do not find this template, you can download it as part of PowerPoint Templates Pack #2 (1554 KB) from Microsoft. Directions for manual extraction
     
  3. Change fonts:
    1. Masters: Change the font for all titles to Matura MT Script Capitals. Sample of font Matura MT Script Capitals
      This is the font that World Travel Inc. uses for its name on all company publications. The company name is normally in green, but that would clash with the colors in the template.
       
      Icon: TroubleIf you do not have the font Matura MT Script Capitals, use a font that has wide brush strokes and looks like handwriting.
       
    2. Masters: Change the font of the text and subtitle placeholders to Verdana.
       
    3. Slides: Change the font of the textboxes to Verdana and Bold. (Text boxes cannot be formatted from a Master.)
       
  4. Adjust placeholders:
    The placeholders and textboxes on some slides are now too close together or are not well shaped for the text. Adjust the size and/or location so that the text lies neatly on the slide.
     
  5. Format last slide:
      
    Phone number = Bold
       Slogan = centered, not bold
     
  6. Animation Scheme:
    1. Apply the scheme Fade in and dim to all slides.
    2. On the last slide, under Custom Animation, change effect #1 to start After Previous.
    3. On the last slide, add Fade In to the slogan and then edit its Effects Options, After animation, to use the dark orange color in the color scheme. This makes the animation for the slogan textbox match the animation in the Animation Scheme.
       
  7. Slide Transition:
    On Master, apply Cover Left, AutoPlay after 8 seconds. (The long time allows for each bullet item to display.) Apply to all slides.
     
  8. Use the Pre-Print Checklist.
     
  9. In Print Preview, select:
      
     Handout layout with 6 slides per page
        Print in black and white
        Header that includes your name and PowerPoint Exercise 2-2 at the left.
     
  10. Icon: Printer Print the handout.
     
  11. Icon: Class diskSave with the name   specialpeople.ppt  to your Class disk instead of the default name.
    Full floppy disk How to handle a full Class disk [You probably have filled up a floppy disk by now!]

Exercise 2-2: completed