
|
Step-by-Step:Data Table
|
 |
| What you will learn: |
to create a data table
to add data to cells
to format the table
to format cell contents |
Start with:  ,
hector 19.htm (FrontPage or FPX)
You will add to Hector's page a data table listing the
countries he has visited.
Insert Table
-
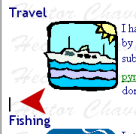 Create,
if necessary, a blank line below the paragraph Travel.
-
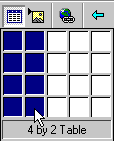 With
the cursor in the new line, click on
 the Table
button on the Standard toolbar and drag in the palette to select two
cells wide and 4 rows tall.
|
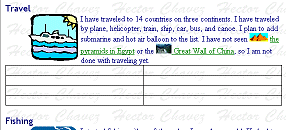
FrontPage default table -
width 100%, each column same width |

FPX default table -
minimum size for cells |
A blank table is inserted at the cursor. The default sizes for
FrontPage and FPX are different.
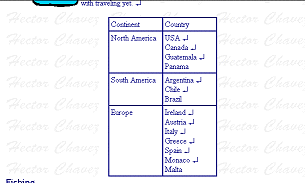
- Type data in the cells, as shown below in the illustration
from FPX.
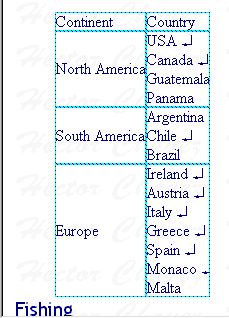
Use line breaks (SHIFT+ENTER) to create new lines in the Country
column. Using ENTER alone creates a new paragraph with extra white
space.
You now need to format the table and the cells.
Format: Table
First you will make choices for the way the table itself displays.
After that you can format what is in the cells.
- Insert a Clear Left line break at the end of the
Travel paragraph. This will keep your table from wrapping around
the Travel image at certain window sizes.
-
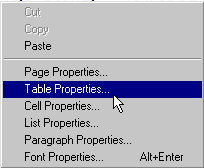 Right
click on the table and from the popup menu select
.
The dialog appears with the default settings -
Alignment = Left
Border Size = 0
Border Color = Default
Minimum Width is not checked.
Your table needs some borders and needs to be easy to read against
the page background. You will need change the default table settings.
-
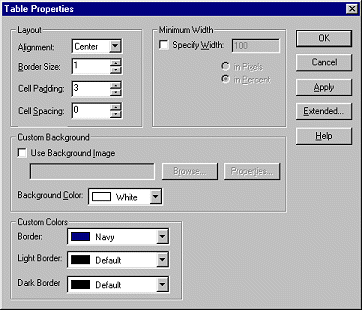 Change
the default settings to:
Alignment = Center
Border Size = 1
Cell Padding = 3
Cell Spacing = 0
Background Color = White
Border = Navy
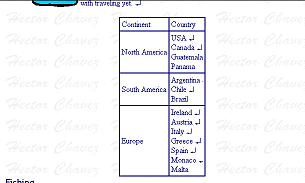 The
table now has a navy border and is centered on the page. The table
background is white, a subtle difference in this case, but still
helpful.
Format: Cells
Now you can work on the look of the data. First you will change the
alignment in the cells.
-
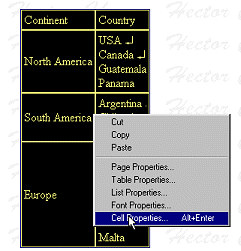 Select
all the cells in the table by dragging across all the rows.
- Right click on the selected cells and from the popup menu
select .
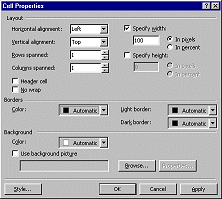
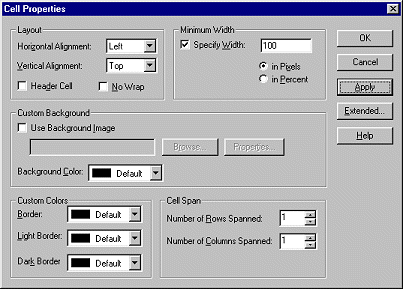
The Cell Properties dialog appears with the default choices. The
FrontPage and FPX versions of this dialog are arranged differently, but
they have the same choices.
- Look at all of the formatting choices.
You can set alignment, minimum width, background, and color for the
border. You can "merge" cells by setting how many rows or columns to
span.
|
FrontPage |
FPX |
- Change the Vertical Alignment to Top.
This sends the names of the continents up to the top of their cells.
-
 Set
the width to 100 in Pixels. (Be careful not to set 100
percent!)
 Setting the width in
pixels is a good idea only for narrow tables. Bigger tables should have
widths set as a percentage of the available space.
Format: Text
Now you can format the text itself.
Design tips:
- Column headings should look different from the table body text.
- Table text should usually be different from the regular page text.
- Sans-serif fonts are best if the text is small.
 Unlike Word and Excel,
FrontPage and FrontPage Express do not have a Sort function to alphabetize
your table entries. You could sort them yourself, of course, or copy and
paste each cell's contents to Word, sort, and then copy and paste back
into the cell. However, Word may add some formatting tags for you.
Headings
- Select the top two cells, the column headings.
-
 Increase
the font size once.
- Make Bold.
- Change the font to Trebuchet MS.
Cell Contents
-
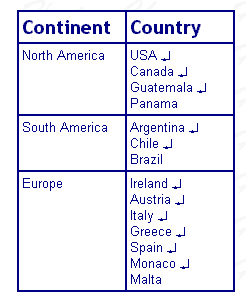 Select
all the data cells (not including the column headings).
- Apply the font Arial.
- Decrease the font size once.
 Save as
hector20.htm in the same folder of your Class
disk.

![]()
![]()