
Jan's Working with Windows 10:
Folders: Move, Delete, & Restore
There are several methods of copying or moving files and folders:
 Left click to drag and drop
 Right click to drag and drop
 Context menu
 Key combo: Copy or Cut; Paste
- Move to or Copy To button on toolbar or ribbon
Since this is a very important set of skills, you will see all of the methods. One of the safest methods is using right drag and drop since it gives you choices on its context menus, but the others have their uses, too.
In previous lessons you moved or copied items between two different windows. This time you will use the folder tree and some new methods.
| |
Step-by-Step: Move, Delete, & Restore |
|
| What you will learn: | to move selected folders in folder tree to undo a copy or move to refresh the window to delete using the keyboard and context menu to restore deleted item from Recycle Bin to rename folders using mouse context menu ribbon |
Start with: ![]() , Removable disk contents showing in a window in Details view
, Removable disk contents showing in a window in Details view
Move: Right Drag and Drop to Folder Tree
 If necessary, insert the Class disk into the drive
or port and open a window that displays its contents in Details view with the folder tree expanded.
If necessary, insert the Class disk into the drive
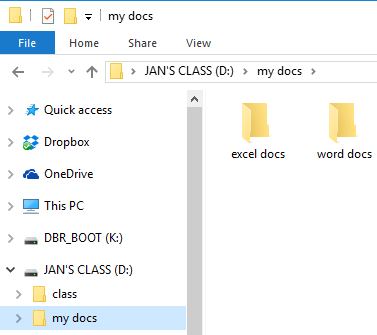
or port and open a window that displays its contents in Details view with the folder tree expanded.- Open the class folder which contains several folders.
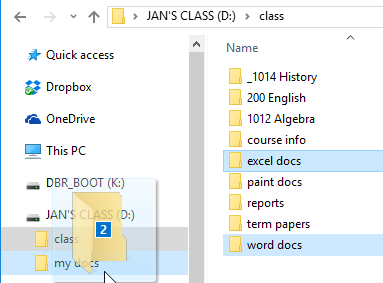
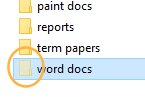
- Select the folders excel docs and word docs contained in the folder class.
- Right drag either of the selected folders over to the left pane to the folder my docs on the removable drive.
 When the folder my docs is highlighted, drop.
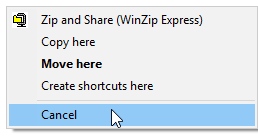
A context menu appears with some choices. The default choice is in bold letters, .- From the context menu, select .
Your move doesn't happen after all! Remember that
if the thing you are dragging is on a different drive than the new
location, it will be copied. If it is on the same drive
as the new location, it will be moved. The action in bold text is the current default. If you hold the CTRL key down while you drag, this is reversed.
Remember that
if the thing you are dragging is on a different drive than the new
location, it will be copied. If it is on the same drive
as the new location, it will be moved. The action in bold text is the current default. If you hold the CTRL key down while you drag, this is reversed. The best idea is to use a right drag so that you get the popup menu to choose from! Much easier on the brain!
Move Inside Folder Tree: Right Drag
In the Navigation pane on the left, you can select only one folder or drive at a time.
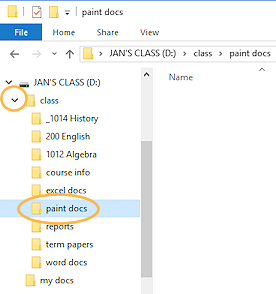
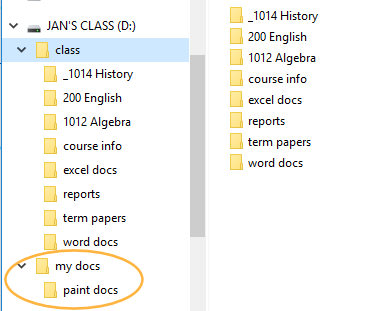
 Click the arrow in the folder tree beside class.
The folder tree expands to show the folders inside the class folder.- Click on the folder paint docs in the folder tree to select it.
The Contents shows that the folder is empty.
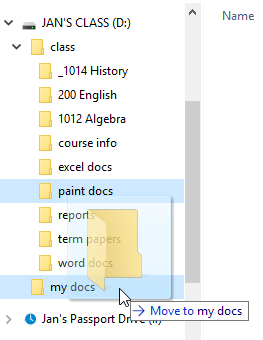 Inside the folder tree in the left pane, right drag the folder paint docs to the folder my docs.
- When the folder my docs is highlighted, release the mouse button.
A context menu appears.
-
 Click on .
The folder paint docs is moved to the folder my docs.
The folder tree may automatically expand to show the folder in its new location.The selection does not change. The right pane changes to show the new line up of folders - without paint docs.
Move: Undo
-
Did you notice the keyboard shortcut beside the Undo Move command?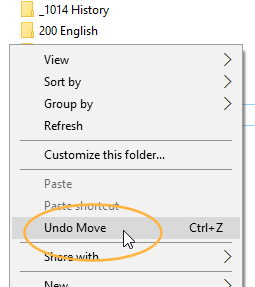 Right click in a blank area of the right
pane select .
Right click in a blank area of the right
pane select .
The folder paint docs returns to the class folder. Are you dizzy yet?? Keyboard method to Undo: CTRL + Z
Hold down the CTRL key and press the Z key.
Keyboard method to Redo: CTRL + Y
Hold down the CTRL key and press the Y key.
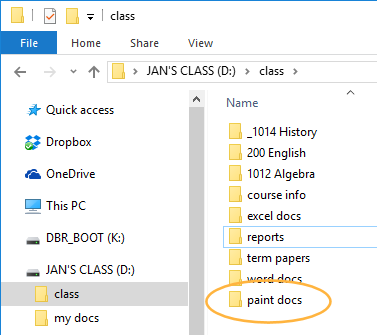 Location at end of list: The folder paint docs was not put back in its alphabetical spot in the display. It is at the end of the list now, out
of alphabetical order.
Location at end of list: The folder paint docs was not put back in its alphabetical spot in the display. It is at the end of the list now, out
of alphabetical order.
- Refresh the pane:
Method 1: Context menu
Right click and in the context menu select
The display refreshes and returns the folders to alphabetical order.Method 2:
F5
Press the F5 key (usually in the top row of your keyboard) to refresh the window in many programs, as well as in Windows itself.Method 3: Refresh Button
 Click the Refresh button at the right end of the Address box
Cut and Paste to Folder Tree: Context Menu
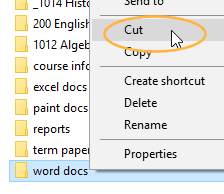 Right click on the folder word docs in the right
pane.
Right click on the folder word docs in the right
pane.
A context menu appears.
- From the context menu choose .
 The icon
turns partly transparent. A ghost of itself!
The icon
turns partly transparent. A ghost of itself!
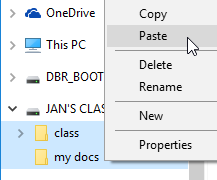 Right click on the folder my docs in the folder
tree (!).
Right click on the folder my docs in the folder
tree (!).
- From the context menu choose
The folder is moved to the new location.This Cut-and-Paste method accomplishes the same result as a Move. It is useful when dragging is a problem because you cannot see the destination folder without scrolling.
 Paste right away! If you copy anything else before you Paste,
it will replace what was on the Windows Clipboard! In these
file/folder management windows, you are safe. If you Cut but never Paste, nothing is moved at all. The action is canceled.
Paste right away! If you copy anything else before you Paste,
it will replace what was on the Windows Clipboard! In these
file/folder management windows, you are safe. If you Cut but never Paste, nothing is moved at all. The action is canceled. But in most programs, cut material is removed from documents, even if you don't ever paste it anywhere. So you can easily lose the cut material entirely.
- Undo Move: Use the key combo CTRL + Z to undo the move.
Button: Copy To
- If necessary, click in the folder tree on the folder class to display its subfolders in the right
pane.
- Select in the folder tree the folders excel docs and word docs by holding down the CTRL key and
clicking on each of the folders.
Whoops! It does not work! You cannot select multiple items in the folder tree. - Repeat using the Contents pane- Click on the class folder in the folder tree. In the Contents pane click on excel docs, hold the CTRL key down and click on word docs.
Two folders are selected. - On the Home ribbon tab, click the Copy
To button on ribbon
 or
or  .
.
The size of the button depends on the width of the window.
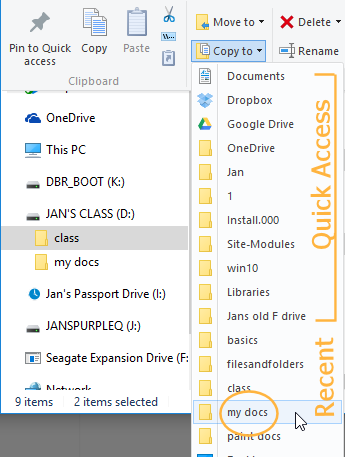 A menu of locations appears. At the top are Quick Access locations and recently used folders. The destination folder my docs is here!
 -
Click on my docs in the list.
Your folders are copied to the selected folder.
 Problem: Folder is not in the list
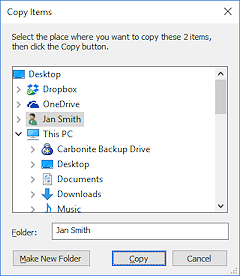
You have used enough folders recently to move my docs off the list.You can use the menu item at the bottom of the list. The Copy Items dialog will appear with its own folder tree. This is useful when the new location is not near the old on the folder tree.
You can scroll the folder tree in the dialog and select the folder my docs.
Click the Copy button.
Both folders are now copied to the new location. The originals are left in place.
(The Move To button works in a similar way.)
 Click in the folder tree on the folder my docs.
The copied folders show in the Contents pane.- Undo the Copy.
Delete: Context Menu
![]() Deleting
from most removable drives is permanent, no matter what method you use.
Undo will not restore what you deleted. In most cases a flash drive or other
removable drive does NOT send deleted objects to the Recycle Bin. Only if your drive
shows as an additional hard disk will your deleted files go to the Recycle
Bin. Check yours out!
Deleting
from most removable drives is permanent, no matter what method you use.
Undo will not restore what you deleted. In most cases a flash drive or other
removable drive does NOT send deleted objects to the Recycle Bin. Only if your drive
shows as an additional hard disk will your deleted files go to the Recycle
Bin. Check yours out!
 Double-click on the folder class in the
folder tree of your removable drive to expand that branch and show its subfolders in both panes.
Double-click on the folder class in the
folder tree of your removable drive to expand that branch and show its subfolders in both panes.
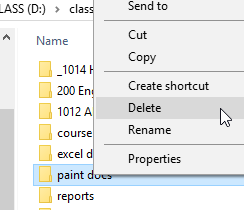
- Right click in the right pane on the folder paint docs.
- From the context menu choose .
The selected folder is deleted. In the Confirm dialog box choose Yes. Which
dialog did you see? The one for the Recycle Bin or the one to permanently delete?
Which
dialog did you see? The one for the Recycle Bin or the one to permanently delete?
Delete: Keyboard
- In the folder tree, select the folder my docs of your removable drive.
- Press the DELETE key on your keyboard
to delete this folder.
Click on Yes in the confirmation dialog.Under DOS and UNIX you have to delete
a folder's contents before you can delete the folder. Not so with Windows.
- Open the context menu.
Is there an Undo command?
It is most likely NOT to undo the deletion of the folder class. If there is an Undo command, can
you tell what object will be restored with the Undo Delete command?
Restore from Recycle Bin
![]() The Recycle Bin saves the files and folders that you delete from your hard disk... for a while. Undo will
not work if you have done a number of other things since deleting.
The Recycle Bin saves the files and folders that you delete from your hard disk... for a while. Undo will
not work if you have done a number of other things since deleting.
The original Desktop icon for the Recycle Bin is a wastebasket, which will look full if there are files in it. But your icon may look different. Many themes change the look, even to something that does not look like a waste basket at all.
Below you will create a folder on the computer's hard disk, delete it, (which sends it to the Recycle Bin), and then restore it from the Recycle Bin. Then you will delete it permanently to return the disk to its previous state.
- In File Explorer in the Navigation pane, click on Drive C:.
- Create a new folder.
Leave the name as New Folder. It will be the last item in the list for Drive C:If another folder already exists with this name, Windows will call yours New Folder (2). No problem! Just continue using the name Windows gave it. It won't be around for long anyway.
- Delete the folder that you just created with the method of your choice.
When the Confirm Folder Delete dialog box appears, choose Yes.
-
 Double-click the Recycle Bin icon on the Desktop.
It may take a while for the Contents pane to show anything if the Recycle Bin holds a lot. There is a progress bar overlying the Address bar.
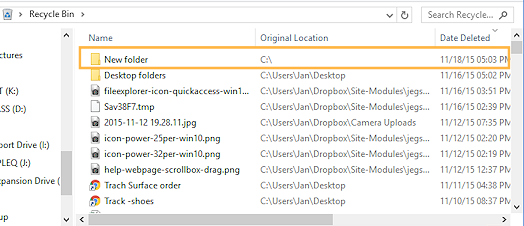
The Content pane will show a list of recently deleted files and folders. This pane shows different properties in Deatils view: Original Location and Date Deleted.
Your Recycle Bin will have different things showing in the Contents pane. There may be many other things listed or none at all. The Recycle Bin should be emptied from time to time to save disk space.
 Problem: No Desktop icon and the Recycle Bin does not show in the folder tree
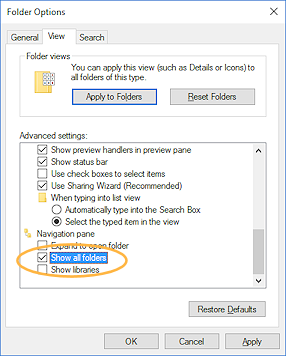
Solution: Open the Folder Options dialog.
View > Options > View tab > Check the box 'Show all folders'. Click OK to close the dialog and save changes.Problem:
You don't see 'New folder' in the Recycle Bin
Solution: Sort on Date Deleted. Your folder
named New Folder should be the most recent deletion. Many 'New folder' folders: If you are using a classroom computer and other students have already done this exercise or if you practiced deleting several times, you may find a LOT of folders named New Folder! Look at the Date Deleted to see which is yours.
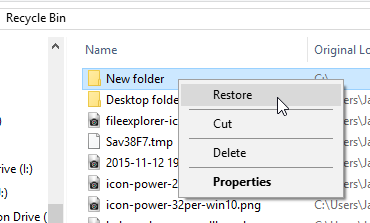 Right click on New Folder and from the context menu, choose .
The folder vanishes from the list and reappears in the folder tree, in its alphabetical place.Problem: Restore is not in the context menu
You did not right click on the 'New folder' item but in a blank area. The command is in the menu, but that does not tell you which item will be undeleted!
Solution: Click somewhere to close the menu and try again.
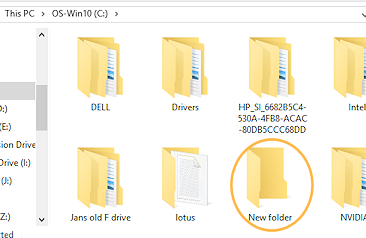 Click on Drive C:\ in the Navigation pane and find New Folder, now listed alphabetically in the
Contents pane.
Click on Drive C:\ in the Navigation pane and find New Folder, now listed alphabetically in the
Contents pane.
- Delete the folder New Folder permanently by holding the SHIFT key down while
pressing the DELETE key. (SHIFT + DEL).
- In the Confirm File Delete dialog, choose Yes.
- Open the Recycle Bin again and look for your New Folder.
It should not be there this time, but there may be other deleted folders with this name.
Check the Date Deleted.
Rename
In this section you will revise the folder names so you can use them to store the projects you work on in these and other lessons. Many of you will be going on to the Working with Words lessons. Others may not do any other lessons or may go to a different topic.
Mouse:
- In the Navigation pane click on your removable drive.
- In the Contents pane, click on the folder excel docs; pause; click again to highlight the
folder name.
- Type win project2 and press the ENTER key.
Context Menu:
- Right click on the folder word docs in the Context
pane.
- From the context menu select .
- Type word project1
- Click on the folder 200 English in the Context pane.
The new name took effect when you clicked somewhere.
Ribbon:
- From the Home ribbon tab select the button Rename .
 Type word project2 .
- Delete the extra folders in your class folder.
- Refresh the view (F5 key).
Check it out!
![]() Your Class disk should now contain:
Your Class disk should now contain:
-
 class
class
- win project2
- word project1
- word project2
-
|
|
| © 1997-2017 Jan Smith All Rights Reserved |
Site Map What's New |
Privacy Policy Terms of Service Copyright Acknowledgements |
~~ 1 Cor. 10:31 ...whatever you do, do it all for the glory of God. ~~
Last updated: March 22, 2017