
Jan's Working with Words
AutoTools: Exercise Word 2-1
 You need to use what you just learned, and maybe learn a little more. Complete all parts of the following exercises. Don't forget to backup your Class disk when you have completed the exercises or whenever you stop for the day.
Exercise Word 2-1: Correct & Format
| What you will do: | Convert a document to the new file format Correct typing errors Modify the text Use Find and Replace Apply a theme Adjust white space |
Start with:![]() , Show Marks is on.
, Show Marks is on.
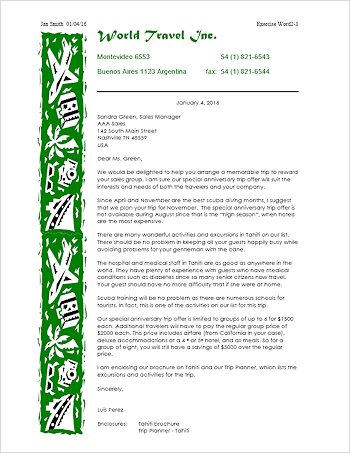
World Travel Inc. has written a letter in response to the letter you edited in Word Project 2 from AAA Sales about the Tahiti trip. You will correct the errors in the letter, rearrange the paragraphs, and use AutoFormat to improve the document. Save often!
-
From the resource files
 , open the document response.doc in
the words resources folder. You can't save changes back to this file. Read the
letter!
, open the document response.doc in
the words resources folder. You can't save changes back to this file. Read the
letter! The Title bar shows [Protected Mode] if Word thinks this file was downloaded from the Internet. If there is a button Enable Editing, click it. If there is no button, click the link in the yellow bar at the top to learn more. The Trust Center dialog opens to the page you need, File Block Settings. Change the behavior at the bottom to 'Open selected file types in Protected View and allow editing'. Close Word and reopen the file. Now there is a button Enable Editing. Click it.
The Title bar will show [Compatibility Mode] once you can edit the document. This letter was saved in the older doc format.
- Insert your Class disk.
 Save the document in the word project2 folder of your Class disk as
ex2-1-letter-Lastname-Firstname.docx
Be sure to change the file type to docx format instead of the old doc type.
Now you can make changes.
You should see a message about updating the file's format.- Font: Select all of the text below the green text and change the font to the theme Body font.
(It's second from the top of the font list.)
This removes any manually applied styles so that the font will change when you apply a theme. - Date: Change the date to today's date, using the same
format - month day, year.
- Correct spelling and grammar: Correct the spelling errors that are underlined. There are at least
2. (The correct name is Luis ). Grammar errors may not be
actual errors. Make Word ignore all possible grammar errors.
- Correct wrong words: In the first paragraph there is a not missing in the last sentence of the paragraph and the word in is used for is. These are the hardest kinds of errors to
spot.
- Replace phrase: Use Find and Replace to make 3 replacements.
In the Find What box, type special offer and, in the Replace with box, type special anniversary trip offer .
Type carefully!
- Modify and
Move:
- Break the first paragraph into two paragraphs at Since April and November… by placing the cursor in front of Since and pressing the ENTER key twice.
- Move the paragraph that starts The hospital to be above the paragraph that starts Scuba training…
- In the last paragraph, delete the words that are included in our anniversary special and then modify the sentence to read which lists choices of excursions and activities for the trip.
- Change the words trip planning
guide to Trip Planner .
- Apply theme: Select the theme Aspect (Word 2007, 2010) or Vapor Trail (Word 2013, 2016) from the gallery of themes. [If these are not available, pick a theme that applies a sans-serif font]
- Fix text wrapping: For some fonts and font sizes the fax phone number wraps to another line or the number no longer lines up with the phone number. Fix this by adjusting the tab stops or spaces.
- Modify style: Modify the Normal style to include 12 pt
Space After.
- Adjust white space to make one page:
- Remove blank lines: Delete the
 paragraph
marks for blank lines, except the line below the green letterhead text, two
blank lines between the Closing and the signature, and one blank line between the
signature and Enclosures. Be sure to delete the final blank line.
paragraph
marks for blank lines, except the line below the green letterhead text, two
blank lines between the Closing and the signature, and one blank line between the
signature and Enclosures. Be sure to delete the final blank line. - Space After: Select the line with "Sandra Green" and the lines of her address, except the line "USA". Reduce the Space After to 0 pts for the selection. Similarly, select the lines from Closing through the first Enclosures line and set Space After to 0 pts.
- View: Change the view to show the whole page. The letter does not fit on one page yet.
- Top Margin: With the cursor on page 1, on the vertical ruler, drag the boundary between the white and gray parts at the top of the ruler upward enough for at least one more line to show at the bottom of page 1.
- Bottom margin: Drag the margin at the bottom of the ruler down until both Enclosure lines show back up on page 1 and page 2 vanishes.
- Graphic: The letter extends below the bottom edge of the graphic on the left. Drag the bottom of the graphic down as far as the last line.
- Remove blank lines: Delete the
 Header: Open the header and type your name on the left, two spaces, and
insert the current date. Tab twice. Type Exercise Word2-1.
Header: Open the header and type your name on the left, two spaces, and
insert the current date. Tab twice. Type Exercise Word2-1.
In some versions the new text is partially off the page because the right tab stop is too far right.
Also the name and date are not at the left margin but are aligned with the letter's body.
- Add tab: If necessary, add a right aligned tab stop on the far right of the header in the white
part of the ruler.
- Move indention: On the ruler's left drag the box below the pointer left to line up
with the left edge of the graphic in the letter.
 Go through the Pre-printing Checklist, discussed in Word Project
1. Make changes if necessary to make the letter fit on one page.
Go through the Pre-printing Checklist, discussed in Word Project
1. Make changes if necessary to make the letter fit on one page.
- Then save and print.
- Close the document.
|
|
| © 1997-2017 Jan Smith All Rights Reserved |
Site Map What's New |
Privacy Policy Terms of Service Copyright Acknowledgements |
~~ 1 Cor. 10:31 ...whatever you do, do it all for the glory of God. ~~
Last updated: March 27, 2017
The exercises use files from the word resource files. The default location for these files is c:\My Documents\complit101\words\
Save the documents to your Class disk as you make changes. These files are Read-Only so that you cannot save them in the original place. This keeps the original resource files intact in case you need to start over or another student will be using this same computer.