
Jan's Working with Words
AutoTools: Margins & Breaks:
Final Edit & Print
Once you think your document is finished, you need to go over it carefully from the beginning to be sure everything is just right. You may find that you need to revise the text to be clearer or perhaps alignments or text wrapping have shifted. It is easy to introduce new errors that you don't notice, like a paragraph out of order or an extra blank line or even a blank page.
In this document, you need to tweak the formatting of the table and add some more text. This will let you practice some of the techniques you learned in this chapter, too. Practice makes perfect!
|
|
Step-by-Step: Final Edit & Print |
|
| What you will learn: |
to use END to move to end of line to copy and paste a picture from a web page to wrap text around an image to select a whole table to increase Font Size with button to type in a font size to recolor an image to edit wrap points. |
Start with:![]() ,
trip_planner11-Lastname-Firstname.docx
,
trip_planner11-Lastname-Firstname.docx
Page 1: Use Image from Web Page; Wrap Text
-
 Save
as
Save
as
trip_planner12-Lastname-Firstname.docx in the word project2 folder on your Class disk.
Add Text:
- Click in the last line of page 1 and
press the END key.
The cursor moves to the end of the line.
- Press ENTER to create a new paragraph.
-
Type the following text, including the blank paragraphs:
-
Save
[trip_planner12-Lastname-Firstname.docx]
Copy Web Page Image:
-
 Put
the cursor at the left of the blank paragraph above
the new names.
Put
the cursor at the left of the blank paragraph above
the new names.
- Click on the picture of signatures on this page
that you are reading, signatures.gif,
at the right.
- Copy.
 Back
in Word, paste.
Back
in Word, paste.
The image of signatures appears on the page, where normal signatures would be. Sweet!
-
Save.
[trip_planner12-Lastname-Firstname.docx]
Insert Clip Art and Wrap Text:
 Put
the cursor at the left of
the paragraph "Looking forward ...."
Put
the cursor at the left of
the paragraph "Looking forward ...."
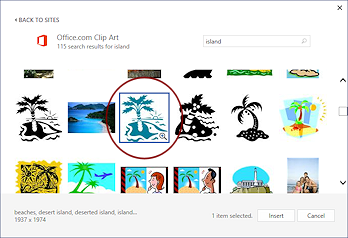
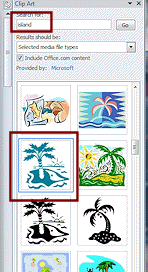
- Search for clip art with the keyword
"island".
- Insert the image in turquoise of a small island
with a palm tree from the online collection.
If you cannot find this one, use a similar image and recolor it to match.
-
 Apply Square text wrapping.
The text moves up to wrap along the side of the image.
 Word 2013, 2016: There is a smart tag to the right of the image. Click the tag
  to see a palette of wrapping choices.
 Problem: Line above picture is moved over
There was not a blank line above"Looking forward..." paragraph.
Solution: Drag the image down until the paragraph wraps correctly.
 Drag
the image by the bottom right corner to enlarge or reduce it while keeping the
proportions, until all of the names are beside the image instead of
below it and the page break is still on the first page. How much you need to resize the image depends on the particular image, of course.
Drag
the image by the bottom right corner to enlarge or reduce it while keeping the
proportions, until all of the names are beside the image instead of
below it and the page break is still on the first page. How much you need to resize the image depends on the particular image, of course.
-
Save.
[trip_planner12-Lastname-Firstname.docx]
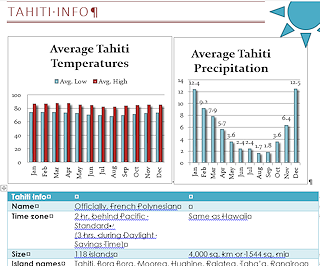
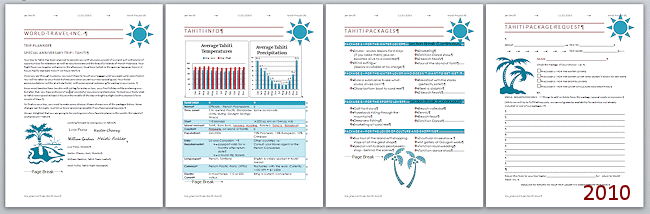
Page 2: Change Formatting
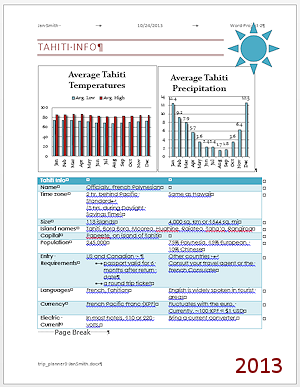
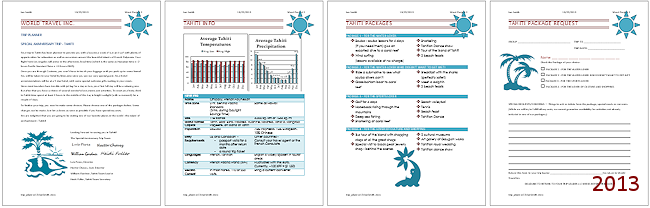
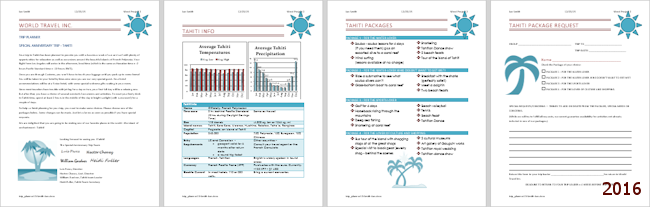
The charts are looking good on page 2, but the table has some problems. It's text is small, the bullet points in the middle look odd. The colors in Word 2013 and 2016 vfor the charts and table do not match the rest of the document. Let's make it better!
-
 Hover
over the table.
Hover
over the table.
A selection handle appears at the upper left of the table.
- Click on the handle
to select the entire table.
The whole table is highlighted.
- Change the Font to Century Gothic.
- Increase the Font Size twice,
using the Increase Font Size button.
The table appears to fit neatly on the page in some versions, but the page break moves over to the next page. In some versions the last row of the table also pops over to the new page.
-
 Click in the Font Size box,
type 11.5, and press
ENTER.
Click in the Font Size box,
type 11.5, and press
ENTER.
The font size is reduced just a bit from the 12 pt. that showed before.Now the table uses the same font throughout and those bullets in the middle changed back to the standard black circles. A happy surprise!
Problem: Page Break on next page
Solution: Click to the left of the ·····Page Break ····· to put the cursor there. Press the Backspace key. The Page Break moves back onto page 2.
-
Word 2013, 2016: Change colors
Word has several pre-designed schemes for table layout and colors as well as for charts. You will apply a new color scheme to the table and will change a color in the charts.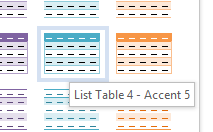 While the table is selected, on the Table Tools: Design ribbon tab, click the More button
  for the Table Styles gallery to show all of the choices.
- Select List Table 4, Accent 5.
- Click on the Temperature chart to select it.
-
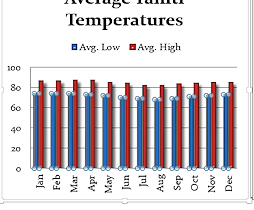 Click on a blue column bar in the chart to select the whole series.
The selected parts have resize handles. Problem: Only one bar is selected.
You double-clicked the bar.
Solution: Click out of the chart and try again.
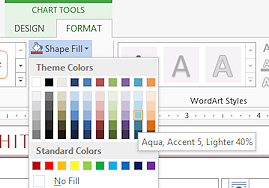 In the ribbon tab Chart Tools: Format, click the arrow for the Shape Fill button to open the palette of colors.
- Click on Aqua, Accent 5, Lighter 40%.
The columns change color without changing the shape effect.
 Similarly, change the color of the bars in the Precipitation chart to the same color.
 Save.
Save.
[trip_planner12-Lastname-Firstname.docx]
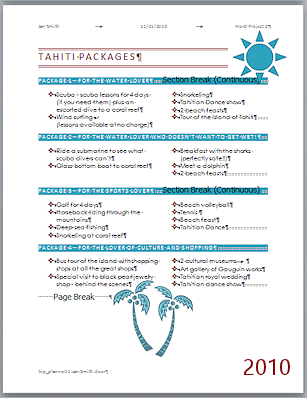
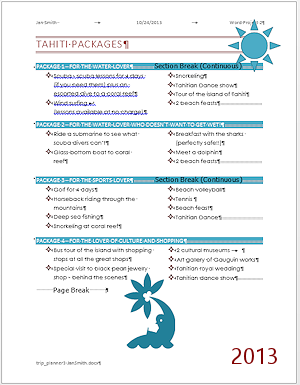
Page 3: Recolor Image; Edit Wrap Points
Page 3 is looking pretty good, except for the empty space at the bottom. Perhaps another piece of clip art would look good here, and could offer you practice in editing wrap points.
- Click to the left of the Page Break at the bottom of page 3.
-
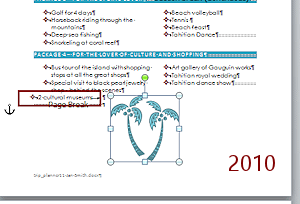
Search for clip art with the keyword "palm".
Your results are probably different from what you see in the illustrations!

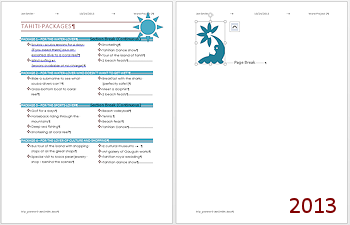 Insert a simple image of one or two palm trees.
If you do not see the clip art used in the illustrations, pick something similar.- If necessary, change the size of the image to 2.1".
The image and page break move onto a new page, if they were not already there.The image was inserted with text wrapping set to In line with text. We need to change that as well as the color of the image.
- Change the color of the image:

 Word 2007: On the Picture Tools: Format tab
in the Adjust tab group, click on Recolor.
Word 2007: On the Picture Tools: Format tab
in the Adjust tab group, click on Recolor.
Click in Dark Variations: Accent color 1 Dark.
 Word 2010: On the Picture Tools: Format tab
in the Adjust tab group, click on Color.
Word 2010: On the Picture Tools: Format tab
in the Adjust tab group, click on Color.
Click on Turquoise, Accent color1 Dark.
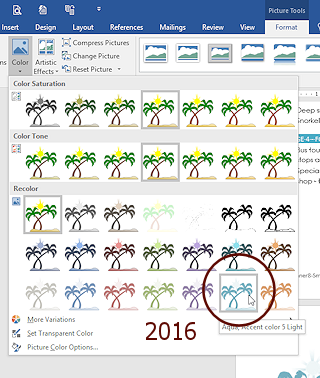
Word 2013, 2016: On the Picture Tools: Format tab
in the Adjust tab group, click on Color. Click on Aqua Color 5 Light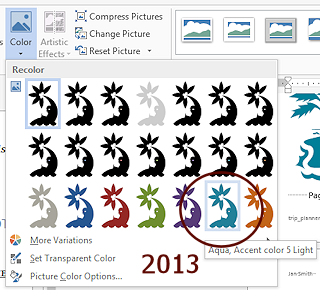
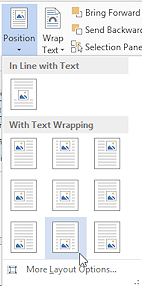
On the Picture Tools: Format tab click the Position button and then on the bottom center position.
The image moves back to the bottom of page 3 and is centered.
The flow of items in the column changes. Exactly what changes depends on which image you picked. Indention problems again!
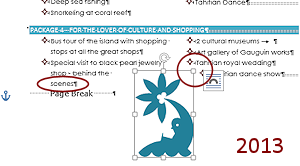
Edit the wrap points for the image by moving or removing enough points at the top of the image to return columns to a neat alignment. If your image has a background, you will need to make it transparent to allow the test to wrap
Problem:
Edit Wrap Points command is grayed out.
The text wrapping style is not one that allows editing of wrap points.
Solution: Change the wrap style to Tight.
-
Enlarge the image to the maximum size that keeps the list items in their columns while letting the image inhabit some of the white space between columns. Keep the proportions the same.
Examples of text flowing around image:
 Problem:
Third item moves back to Column 1
Problem:
Third item moves back to Column 1
Especially in Word 2007, enlarging the image may change the flow of text between columns. Downsizing the image might work OK or...
Solution: Insert a Column Break at the beginning of the wandering list item. [It's in the list of Breaks on the Page Layout tab.]
-
Save.
[trip_planner12-Lastname-Firstname.docx]
Page 4:
This page needs a lot of revising and polishing. The deadline to return the form should be very visible, don't you think? What the client is supposed to do with the form should be more obvious, too. The form needs a specific space for the customer to write in special needs or requests.
Move Paragraph:
- Save
as trip_planner13-Lastname-Firstname.docx in
the
word project2 folder on your Class
disk.
-
 Move the paragraph starting "Return this
form..." to be the last paragraph on the page.
Move the paragraph starting "Return this
form..." to be the last paragraph on the page.
-
Save with a new name:
trip_planner13-Lastname-Firstname.docx
Format and Edit Last Sentence:
-
 Put the cursor to the left of the word 'Deadline' and
press the
ENTER key to make the last sentence its own paragraph.
Put the cursor to the left of the word 'Deadline' and
press the
ENTER key to make the last sentence its own paragraph.
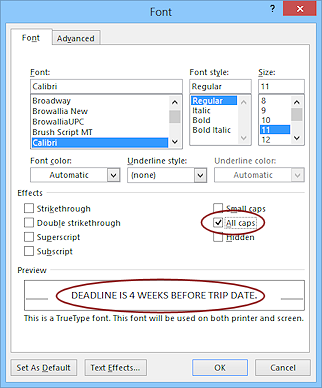
- Select the whole paragraph about the Deadline.
- On the Home tab click the
Dialog Box Launcher

 in the Font tab group to open the Font dialog.
- Check the box for All Caps and
click on OK.
The preview section shows the change.
-
 Center the paragraph.
- Delete the word "is".
- Add the following text after the word "Deadline":
to return to your trip leader =
-
Save.
[trip_planner13-Lastname-Firstname.docx]
Edit/Format Special Request
- Revise the paragraph that starts "Special Requests..." to read:
Special requests/concerns — Things to add or delete from the package, special needs or concerns.
(While we will try to fulfill all requests, we cannot guarantee availability for activities not already included in one of our packages.)
-
 Select
the text "Special requests/concerns" and format it with All Caps.
Select
the text "Special requests/concerns" and format it with All Caps.
- If necessary, change the hyphen after
"concerns" to an em dash.
Hint: It's a special character that AutoFormat as You Type should insert if you type two hyphens (without a space in between). If that does not work, you can insert it from the Symbols dialog on the Special Characters tab.
-
Save.
[trip_planner13-Lastname-Firstname.docx]
Add Lines to Write On:
A set of lines to write on can help the customer write neatly, which helps the travel agent figure out what they wrote!
- If necessary, create a blank line above
the sentence that starts "Return..."
-
 Apply a plain black bottom border, width ½
pt.
Apply a plain black bottom border, width ½
pt.
You may need to open the Borders and Shadings dialog and make changes since Word remembers what you did last with borders.The border extends all the way across the page, even though there is no text.
- Press the ENTER key repeatedly to insert enough blank
paragraphs
to fill the page, but do not let your text flow onto another page.
The new paragraphs do not show the border! Unexpected.
- Select the new paragraphs and
click the arrow beside the Borders button on the
Home tab.
A gallery of choices for borders opens.
- Click on Inside Borders.
Now the new lines show a bottom border, except the last one. - Select the paragraph directly above "Return this form..." and apply a Bottom Border to it.
Now all of the blank paragraphs have a bottom border. But the spacing for the last one is smaller than the others. Weird!
-
 Select
the last paragraph with a border (The short one).
Select
the last paragraph with a border (The short one). -
Click the Increase Font Size button
 two or three times, until the space appears to be the same as the other bordered paragraphs.
Notice that the paragraph mark for this last bordered line is larger than for the other lines. The font size is now 16 pt instead of 11 pt.
-
Save.
[trip_planner13-Lastname-Firstname.docx]
Format Top of Page:
The top of the form needs some tweaking to line things up and make it work together better.
-
 Click
to the left of Trip Dates.
Click
to the left of Trip Dates.
- Press the TAB key once.
Now "Trip to" and "Trip dates" line up.
- Select lines 3, 4, and 7 through 10.
(Hold the CTRL key down while you drag to select various lines that are not next to each other.)
-
 Apply
All Caps in the Font dialog.
Apply
All Caps in the Font dialog.
-
Save
[trip_planner13-Lastname-Firstname.docx]
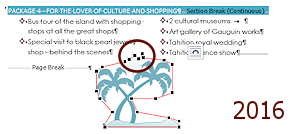
New Section with New Margins:
The paragraph for Package 2 now wraps to the next line. You could fix that in several different ways. This time you will create a new section and set different margins for just that section.
-
 Put the cursor to the left of "NAME:"
- Insert a Continuous Section Break.
Page Layout tab > Page Setup tab group > Breaks > Continuous Section Break
All you can see of the section break is a short section of double dotted lines.
- Put the cursor at the left of "SPECIAL REQUESTS/CONCERNS".
-
Insert a Continuous Section Break.
In some versions of Word you can't see any changes at all! This could be confusing!!!You will be able to tell where the section stops by what parts of the page changes and what parts don't.
-
 Put
the cursor in one of the Package lines.
Put
the cursor in one of the Package lines.
- On the Page Layout
tab, click the Margins button and
select Custom Margins...
- Change the Left and Right Margins to
0.5" and click on OK.
The image hangs into the area that is margin for the rest of the page. Package 2 now fits on a single line. Hurrah!
-
Save.
[trip_planner13-Lastname-Firstname.docx]
Final Review and Edit
Before printing, check your document thoroughly. You must read the document carefully to find errors that the Spell Check and Grammar Check will not notice. Be sure that you have not introduced any new problems on the pages that you could not see when you made a change.
Once you start creating different sections and margins and indentions in your document, you increase the likelihood of having problems with the layout. This is especially easy to do if you change the paper size or enter numbers in Page Setup instead of dragging on the ruler. You can omit a decimal, for example, so that a margin of 2.0" becomes a margin of 20"! Or you might apply a change to the whole document instead of to a paragraph or the current section.
- Alignments: Check
alignments of paragraphs, including
columns. Is there an extra blank page somewhere?
Check page 4 especially since it is the last one you worked on. Is there a page 5? There should not be!
- Spell Check.
- Read: Look for
errors like "it" for "is". Check capitalization of list items
- Page Setup:
Be aware of where the cursor is! It makes a difference if there are different sections to the document.
-
 Click
on the first page to put the cursor there.
Click
on the first page to put the cursor there.
- Page Layout tab >
Page Setup tab group > Dialog Box
Launcher
- On the Paper tab, look at the list of available sizes.
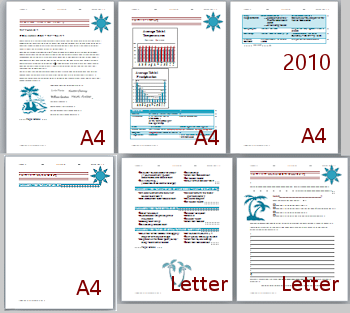
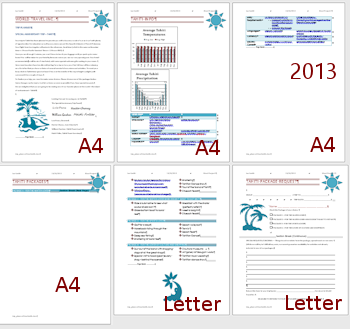
Those of you in the USA probably use Letter paper almost all of the
time. Those of you in other parts of the world may use A4 paper
mostly.
- Change the Paper size to A4, which is narrower than Letter size
and apply it to the This section.
(If you are already using A4, change the width to something smaller than the current number.)
-
Click on OK.
Surprise! Your document uses the new paper size ONLY for the current section, since that is what we chose. The first section break is at the beginning of the columns on page 3. This is NOT a good look!
The moral of this tale = pick your paper size before typing your document!
You may get a warning message (but not in Word 2013 or 2016).
- If necessary, click on OK to close the warning message.
-
Change your paper size back to the original for the whole document and click on OK to close the dialog.
You should be back to four pages with your latest layout.
Problem: Changing the paper back did not result in 4 pages again
Solution: Use Undo repeatedly until your document is back to the original paper size.
-
-
Update field: Open the footer and update the field for the file name by pressing the F9 key.
-
Print Preview: You may spot bad alignments in this view more easily. There are no marks and break lines to get in your way. Remember that you may not be able to find and use the same images that show in the illustrations.
Don't be startled by page 4 in Preview. When you view the whole page, the lines for the fill-in-the-blanks may not show. This depends on your window size and video display. Just zoom in to see the blanks.
 Distortions in Print Preview: When you view a preview at a small size, fonts may look distorted or the
wrong size and the lines for the
fill-in-the-blanks or the table borders may not show. Do not panic! Just zoom in and
the pages will show details better.
Distortions in Print Preview: When you view a preview at a small size, fonts may look distorted or the
wrong size and the lines for the
fill-in-the-blanks or the table borders may not show. Do not panic! Just zoom in and
the pages will show details better.
-
Save.
[trip_planner13-Lastname-Firstname.docx]
- From
the ribbon choose the Office Button or the File tab and then Print...
Check the Printer options before you print all four pages.
Is the correct printer chosen? Color or Black and White? Number of copies?
-
 Print.
|
|
| © 1997-2017 Jan Smith All Rights Reserved |
Site Map What's New |
Privacy Policy Terms of Service Copyright Acknowledgements |
~~ 1 Cor. 10:31 ...whatever you do, do it all for the glory of God. ~~
Last updated: March 22, 2017