
Jan's Working with Words
Getting Started: Help
There are several ways to get Help information.
ScreenTips: Hover over a button or palette to see its name, key combo, what it does.
-
Help button


 or F1 key: Opens a
Help search window where you can enter keywords and search for articles either on
your own computer or including Microsoft's online Help articles. Most articles are online for the most recent versions of Office.
or F1 key: Opens a
Help search window where you can enter keywords and search for articles either on
your own computer or including Microsoft's online Help articles. Most articles are online for the most recent versions of Office.Office 2016 does not have a Help button in the main interface of its programs. Use the F1 key or the Tell Me box instead (see below).
-
Search the Web: Use your browser and a search service like Google or Bing to search the whole Internet.
-
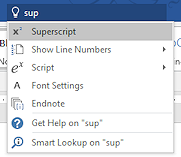
 Word 2016: 'Tell Me' text box:
The ribbon has a text box with the light bulb symbol. Type your search term in the box. As you type, a context menu appears with suggested actions, a link to a Windows search window (Get Hel on ...), and a link to search online (Smart Lookup on ...). The Smart Lookup results appear in a pane inside Word.
Unfortunately, what you want to know may not be easy to find inside Word's own Help files.
Step-by-Step: Help |
|
| What you will learn: | to use ScreenTips to get information to insert sample text with a function to use key combo to apply formatting to search for Help articles to learn how styles work to use Live Preview to apply styles with Style Gallery to use the Mini-Toolbar to remove formatting |
Start with:![]()
![]() (Word is open with a blank document.)
(Word is open with a blank document.)
Use ScreenTips
-
 If
necessary, open a new blank document and click on the Home tab to select it.
If
necessary, open a new blank document and click on the Home tab to select it.
- Hover your mouse pointer over the Paste
button.
A ScreenTip appears with the name of the button, the key combo for the command (since there is one), and an description or explanation. The ScreenTip appears even for buttons that are grayed out - not currently available. - Hover over the arrow below the Paste icon.
There is a somewhat different message. Did you expect that?
-
Repeat for all of the other buttons on the Home tab.
Did you know what these all were? Did you know the key combos? Keys with SHIFT: Some
symbols that are in a key combo require the SHIFT key, like > and *. The ScreenTip may not tell you to use SHIFT!Keys on Numeric Keypad won't work as a key combo. You must use the symbol on the regular keyboard.
Keys with SHIFT: Some
symbols that are in a key combo require the SHIFT key, like > and *. The ScreenTip may not tell you to use SHIFT!Keys on Numeric Keypad won't work as a key combo. You must use the symbol on the regular keyboard.
Insert Standard 'Dummy' Text
People who work with the layout of documents often need to figure out the layout and fonts that will look good before they have the actual text for the document. They need to create a "dummy" document with "dummy" text.
 Experiment: Add Dummy Text
- Try out each of the functions described above.
- Try each one with settings for a certain number of paragraphs and lines per paragraph.
When you are ready to continue...
- To get some dummy text into your blank document, type the following exactly: =lorem() and then press the ENTER key.
Paragraphs of Latin text appear. The number varies with the version of Word. This is enough to demonstrate some features - with no typing!
Format Text and Paragraph: Key Combo
-
 Use the key combos you saw to apply
formatting to various parts of the first paragraph, such as bold,
italics, change the font, change the font size.
Use the key combos you saw to apply
formatting to various parts of the first paragraph, such as bold,
italics, change the font, change the font size.
- Click in the second paragraph and use the key combo from the ScreenTip to align the text to the right.
- Click in the third paragraph and use the key combo to center the text.
-
 Save your document to your folder word
project1 as mykeycombos-Lastname-Firstname.docx
Save your document to your folder word
project1 as mykeycombos-Lastname-Firstname.docx
Use Help: Search for Styles
Offline Help for Office programs is vanishing more with each version. Office 2016 does not have any Help files offline at all!
Office programs have quite a number of 'styles' that define how something looks. There are styles for paragraphs, characters, lists, tables, shapes, and more! There are so many choices that it can get confusing quickly. Happily, there are usually pre-defined styles to help you get started.
[Not online: If you cannot get online to see the online Help resources, never fear! The lessons will cover these skills separately as we go along.]
-
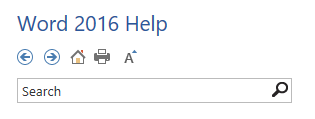
 Press the F1 key to open a Help window.
Or click the Help icon at the far right of the ribbon.
(Word 2016 does not have a question mark button for Help).Office Help appears in a browser-type window with its own buttons.
There is a search box in a bar. In Word 2007 and 2010 there is also one on the document itself. They do the same search. Once you start searching, you won't usually see a search box in the document displayed.
- To make Help search only local files:

 Word 2007, 2010:
Click the down arrow at the right of the Search button.
Click in the section' Content from this computer' on 'Word Help'.
 Word 2013:
Click the down arrow at the right of the title, Word Help.Click on 'Word Help from your computer.'
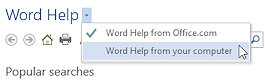
The results of your search will now come from documents on your own computer.
 Word 2016: Help is ALL online! This window will not find anything unless you are connected to the Internet.
-
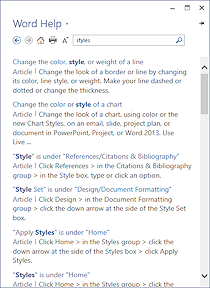
In a Search text box, type styles and then click the Search button (magnifying glass) at the right end of the box.


A list of topics about styles appears. The list is not the same between the versions. You will get yet a different list if you search online. So confusing when you do not understand how this works!
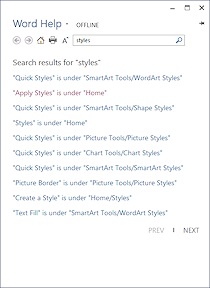
Search results from offline search: Word 2007, Word 2010, Word 2013
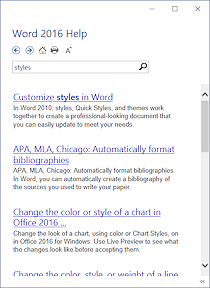
Online results for Word 2016, which does not have any offline Help. - Get info on styles:
Word 2007: Click in the list of topics on Style basics in Word. Word 2010, 2013, 2016: There is no article in the list similar to the
one in Word 2007.
There is an online version for Word 2007 that still makes sense for the newer versions. Click on the link here: 'Style basics' article online

Your browser will show an online version of the same document.There is lots of good information here about what a style is and how to use one.
- Read all of the information about styles, either in the
Help window or browser window. There are lots of 'styles'!
- Change to search online:
Word 2007, 2010:
Click the down arrow at the right of the Search button.
Click in the section' Content from Office online' on All Word'. Word 2013:
Click the down arrow at the right of the title, Word Help.
Click on 'Word Help from Office.com.'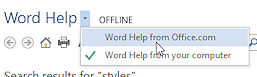
- Click the Search button, with styles still in the Search text box.
(Word 2013 automatically refreshes the window without clicking the search button.)
The results are different than before when you searched just the files on your computer.
The list from Word 2007 shows that same article on Style basics that you just read.
This time Word 2010 has a result that is useful to everyone! It's a short video - only 55 sec.
Results from searching online: Word 2007, Word 2010, Word 2013
- To
play the video:
 Word 2007, 2013, 2016: Click the following link: video
online
Word 2007, 2013, 2016: Click the following link: video
online
The results page for these versions does not include a video.
Word 2010: Click on the link in the results page, Video: Apply styles in Word 2010.Your browser opens a page from Microsoft which contains a video applet. You may need to download a plug-in for your browser to be able to play this video.
The video shows you what a style is by applying some styles so you can see the difference it makes.
If you don't hear any sound, click the button
 in the video interface to
show captions.
in the video interface to
show captions.
[Some computer labs block external speakers which means you need headphones to hear any sounds.]
- Click the big arrow in the middle of
the video area to play the video.
 You
have seen similar information in two forms: reading the article and watching
the video.
You
have seen similar information in two forms: reading the article and watching
the video.
Which method would make it more likely that you will later recall what you learned?
Which method was most efficient for you? - Close the Help window by clicking the Close button

 on the Title bar.
Apply Styles: Style Gallery
Start with: ![]() ,
, ![]() ,
, ![]() Show Marks is on.
Show Marks is on.
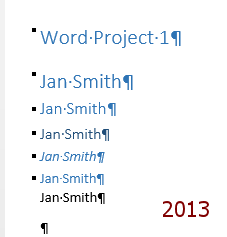
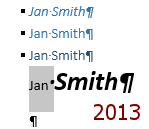
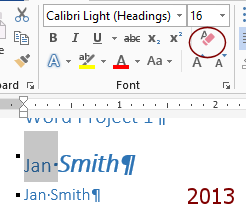
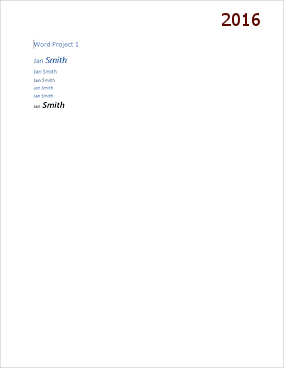
 You will create a document like the one at the right and then you will apply styles.
- If necessary, start a new blank document.
- In your blank document type the words Word Project 1 and then press
ENTER to get a new line.
Don't try to format the text just yet.
- Type your name and press the ENTER key to get a new line.
- Repeat the last step five more times for
a total of 6 lines that contain your name.
- Click in line 1 somewhere, without selecting any letters.
- Click, if necessary, on the Home tab.
-
In the Styles group, hover over but do not click on the style Heading 1.
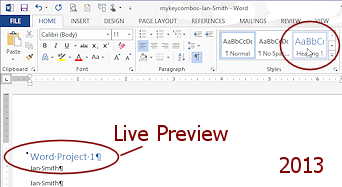
The Live Preview feature changes your document temporarily to show the effect of clicking on that choice.
-
Move the mouse off the Heading 1 item in the Styles gallery.
The text goes back to its original formatting.
- Click on the style Heading 1 to
actually apply it.
The style is applied to the whole paragraph, which in this case is just one line.
The default styles are somewhat different between versions.You don't have to select the whole paragraph. The cursor just needs to be somewhere inside the paragraph.
The little square to the left of a line means that this paragraph is styled with one of the Heading styles. The Heading styles are used to create an outline of your document. Not too helpful for this short document, but really nice for longer ones.
[If you do not see the squares and paragraph marks, you need to Show Marks by clicking
 the Show Marks button which is on the Home tab. You may also need to change Word's Options > Display > check Show all formatting marks.]
- Click in line 2
-
 Apply the style Heading 1 to it, as in the previous step.
- Click in line 3.
- Click on the More button to show the gallery of styles.
- Click on the style Heading 2 to apply it.
-
Continue, apply Heading 3 to line 4, apply Heading 4 style to line 5, apply Heading 5 style to line 6.
These styles were not shown earlier when you showed the full gallery of styles. Some styles are hidden until Word decides that they may be needed.
- Click at the end of line 7. The Style
gallery shows Normal style, which is the default style.
Format Text: Mini-Toolbar
-
 Select line 7 by dragging back across the line to the left. Do not highlight any of the line
above.
Select line 7 by dragging back across the line to the left. Do not highlight any of the line
above.
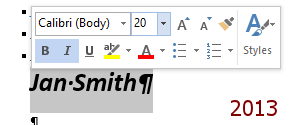
The Mini-Toolbar appears above your selection.
-
Word 2007, 2010: Move your mouse pointer up toward the
Mini-Toolbar to make the toolbar solid and clear.
-
 On
the Mini-Toolbar:
On
the Mini-Toolbar:
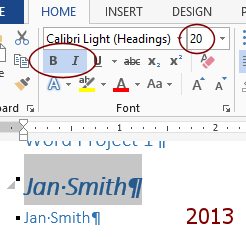
- Click on the

 Bold and Italics buttons
 - Change the size to 20 using
 the
Font Size drop list.
the
Font Size drop list.
- Click on the
- Click in
a blank part of the document to deselect the text.
Remove Formatting
There are several ways to get rid of unfortunate formatting.
Re-click the button that applied the format:
- On line 7, select just your first name by double-clicking it.
(This works for single words.)
- To remove the bold and italics formatting, click on
 (both the Bold button and the Italics button) on the Home ribbon or
on the Mini-Toolbar.
(both the Bold button and the Italics button) on the Home ribbon or
on the Mini-Toolbar.
The buttons are no longer highlighted and the text is not bold and is not italic.
- Click the Undo button
 twice to get the formatting back to being bold and italic.
Apply Normal Style:
 While your first name is selected, select from the
Styles gallery the style Normal, which is the default
style. This special style will return the selected text to the original paragraph style. This is one way to
dump a whole set of changes.
While your first name is selected, select from the
Styles gallery the style Normal, which is the default
style. This special style will return the selected text to the original paragraph style. This is one way to
dump a whole set of changes.
If text is selected, then the style you click on is applied to just that text but any paragraph features in the style, like line spacing, alignment, or Space After, are not applied.
- Undo the change with the Undo button
 or
or
Keyboard method: CTRL + Z.
Clear Formatting:
-
While your first name is still selected and formatted as bold, italics, and 20 pts., view the Home tab, Font group and click on the Clear Formatting button

 .
.The formatting that you applied is removed, leaving your first name back in Normal style as before.
 Clear paragraph formatting: If
you select the whole paragraph and apply Clear formatting, you will clear
the paragraph formatting as well as any separate text formatting. This is another fast way to
get all the way back to the default style.
Clear paragraph formatting: If
you select the whole paragraph and apply Clear formatting, you will clear
the paragraph formatting as well as any separate text formatting. This is another fast way to
get all the way back to the default style.
Underlying Paragraph Style:
If clearing the formatting did not do what you expected, find out what the underlying paragraph style is.
-
 Make the same changes on the second line, which has the style Heading 1-
- Select the line.
- Use the ribbon to set the selection to Bold, Italics, font size 20.
 Select first name
only.
Select first name
only.
- Clear Formatting.
The result looks different from the line you cleared earlier! You have returned the paragraph to its original style.
For line 2 the original style was Heading 1 instead of Normal. You have to pay close attention to the details or your head will start spinning!
Save and Print
 Save this document by clicking the Save button

 on the Quick Access Toolbar.
Since this is a new document, you will see the Save As dialog box.
Folder: word project1 on your Class storage device.
Filename: mystyles-Lastname-Firstname.docx
using your own first and last names, of course.
-
 Print:
[Follow your instructor's directions about whether to print documents or to submit them electronically]
Word 2007: - Click on the Office button, and then the Print command, and then Print Preview.
- Check your document carefully. [ALWAYS preview before you print!!! It will save the world a ton of paper when you catch error before you print.]
-
 Click the Print button at the top of the preview window.
The Print dialog opens. - Check the dialog settings, especially which printer is selected.
- Click on OK to actually print with the selected printer.
-
 Close the Print Preview by clicking the Close Print Preview button .
Word 2010, 2013, 2016: - Click on the Print Preview and
Print button


 on the Quick Access Toolbar.
(If you don't see that button, you should add it to the toolbar.) - Check your document carefully.
- Print by clicking the Print button
 in the Print pane.
The document is sent to the selected printer and the window switches back to the previous view.Do not close a document until you have checked that the printing finished and was correct.
- After your document prints
successfully, use the Close button
 on the Title bar to close Word.
OR, if you want to continue to the next lesson, close the document, but not Word itself using the Close command on the Office menu or File tab.
|
|
| © 1997-2017 Jan Smith All Rights Reserved |
Site Map What's New |
Privacy Policy Terms of Service Copyright Acknowledgements |
~~ 1 Cor. 10:31 ...whatever you do, do it all for the glory of God. ~~
Last updated: March 27, 2017
Ways to insert dummy text
To use the functions below, just type the function as shown below. Then press ENTER. The dummy paragraphs replace the function that you typed.
The number of paragraphs producted is not the same in all versions of Office.
=lorem()
This function inserts paragraphs of Latin text. Starting in the 1500's when printing was new, printers have used for their dummy text parts of a classic Latin essay, "The Extremes of Good and Evil" by Cicero, written in 45 BC (see www.lipsom.com ). The first line
of the most commonly used section starts "Lorem ipsum..."
). The first line
of the most commonly used section starts "Lorem ipsum..."
=rand()
This function inserts paragraphs of English text from Microsoft's directions about using Word.
=rand.old()
This function inserts 3 paragraphs with 2 lines each. The text is the old typing sentence: The quick brown fox jumps over the lazy dog. This sentence uses all of the letters of the alphabet.