
Jan's Working with Words
Report: Tables: Button
 Tables can be very helpful in organizing information and in positioning items on your page. The easiest way to create a table is
the Table button on the Insert ribbon tab. This button creates a default table with equal size columns and rows that stretch all the way across the page. After creating the table, you can adjust the height of rows and the width of columns to suit your needs.
Tables can be very helpful in organizing information and in positioning items on your page. The easiest way to create a table is
the Table button on the Insert ribbon tab. This button creates a default table with equal size columns and rows that stretch all the way across the page. After creating the table, you can adjust the height of rows and the width of columns to suit your needs.
Table: 2 rows x 2 columns
| |
Step-by-Step: Create a Table with Button |
|
| What you will learn: | to create a table with Table
button to resize table to resize column width to sort table rows without header row to insert a new row to sort table rows with hearder row to resize row height to center table on the page to center text vertically in the cell to apply a table style to reapply manual formatting removed by table style |
Start with: ![]()
![]() , blank document
, blank document
Create Table: Table button
- Create a new blank document.
-
 Use
the Table button on the Insert tab to create a table with 2 columns and 8 rows.
Use
the Table button on the Insert tab to create a table with 2 columns and 8 rows.
(Click on button. Drag across 2 columns and down 8 rows.)
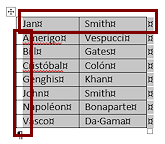
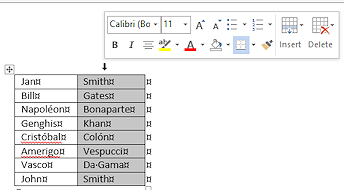
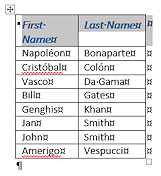
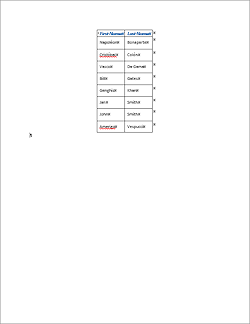
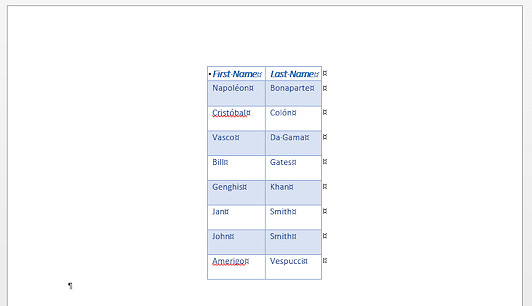
- Enter the text as shown below.
(The author is in the most interesting company!)
To type the letters with accent marks, use the following key combos:
é = ALT + 0233
ó = ALT + 0243
The numbers need to be entered with the numeric key pad instead of the numbers row above the letter keys.
-
 Save as table1-Lastname-Firstname.docx on your Class disk in the folder word project4.
Resize Table: Drag
-
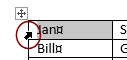
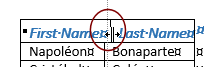
 Move the
pointer over the right-hand vertical edge of the left column until it turns into
Move the
pointer over the right-hand vertical edge of the left column until it turns into  the
resize shape, then drag to the left to make the column just wide enough to hold the names.
the
resize shape, then drag to the left to make the column just wide enough to hold the names. If your mouse pointer is over a horizontal line, you won't see the correct resize shape.
The column resizes. - Repeat for the second
column.
- Save.
[table1-Lastname-Firstname.docx]
 Experiment: Select and Sort with No Header Row
Sometimes you get a table all filled in only to realize that
the data is not sorted alphabetically. Whoops! There is a Sort
button on the Table Tools: Layout tab to help with this problem.
You have to be careful with what is selected when you sort. The whole row stays together when you sort
on a selected column. In older versions of Word, only selected cells got sorted. You could separate data that belonged
together that way!
What you have selected in the table changes the sorting choices in the Sort dialog.
- Cursor in cell but nothing selected:
- Click the Sort button.
The Sort dialog appears. 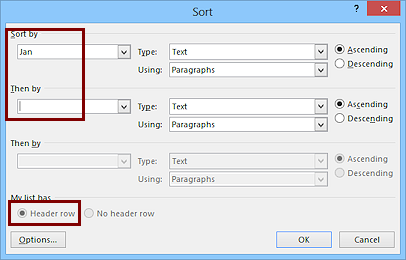 Click the radio button for Header row at the bottom left of
the Sort dialog.
Click the radio button for Header row at the bottom left of
the Sort dialog.
The Sort by box changes to show the text in the header row as column names, Jan and Smith in this case.- Click the arrow to open the first Sort by list.
It shows all columns, just two in this table.
- Select the Jan column this time.
 Click on OK.
The table rows are sorted based on the first column. But the first row stayed put! That's what a header row is supposed to do. You don't really have a header row for this table yet. You will have to make one.
- Undo.
The sorting and header row setting are gone.
- Click the Sort button.
 Cell selected:
 - Select the whole cell, including the end-of-cell mark, by moving the mouse pointer to the left of the cell until it changes to the
 shape. Click to select.
 - Click the Sort button and open the Sort by list.
Only the column for the selected cell is listed. Close the Sort dialog. 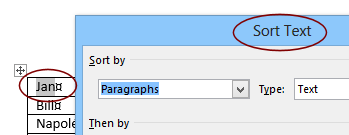 Text selected:
 - Select the text in a cell but NOT the end-of-cell mark.
- Click the Sort button.
The Sort Text dialog appears instead of the Sort dialog. - Close the Sort Text dialog.
This dialog will sort multiple lines of text inside a cell but will not work on multiple cells. - Click in a cell that isn't selected to remove the selection.
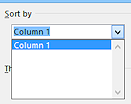
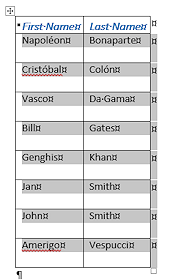
 Column selected:
- Move the mouse pointer to a point just above the top of the second column.
The pointer changes to the Select Column shape, .
. - Click.
Column B is highlighted to show that it is selected. The Mini-Toolbar appears.
 On
the Table Tools: Layout tab, click on the Sort button
On
the Table Tools: Layout tab, click on the Sort button  .
.
The Sort dialog appears.
 There
is also a small Sort button
There
is also a small Sort button  on the Home tab in the Paragraph tab
group.
on the Home tab in the Paragraph tab
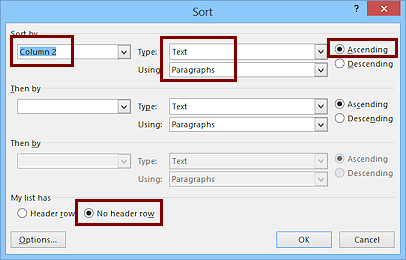
group.You can choose up to three different columns to sort on. If your table has headings in the first row, those labels will be in the Sort by drop list, like Lastname, Firstname, Middlename. If there is no header row, the list shows column numbers.
- Verify the settings:
Sort by = Column 2
Type = Text
Using = Paragraphs
Ascending
No header row -
 Click on OK.
Both columns are now highlighted. The selected column is sorted into alphabetical order, and the matching cells in column 1 moved also. Excellent!Text that is not in a table can be sorted, also,
using the Sort button on the Home tab. The Sort dialog has
different features if you select text paragraphs instead of
being in a table.
- Move the mouse pointer to a point just above the top of the second column.
- Undo
Insert New Row
-
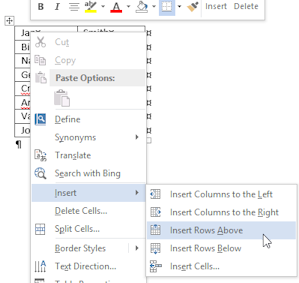 Move the cursor to the top row.
- Right click on the cell and hover over Insert.
A submenu slides out.
 Click on Insert Rows
Above.
Click on Insert Rows
Above.
A blank row appears at the top of the table.
The
number of rows that are inserted matches the number of rows
selected.
-
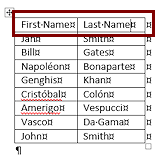 In the new row type First Name in the first cell and Last Name in the second
cell.
In the new row type First Name in the first cell and Last Name in the second
cell.
 Problem: Cell
is too narrow for the text to fit on one line
Problem: Cell
is too narrow for the text to fit on one line
Solution: Widen the column - Move the mouse over the right edge of the cell until the pointer changes to the Resize Width shape.
Double-click. The column widens just enough to hold the widest text in
the column.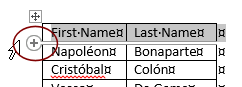

 Word 2013, 2016: Insert Row and Insert Column handles
Starting in Word 2013, the Insert Row or Insert Column handle appears when your mouse pointer drifts past the bottom of a row or the right edge of a column. Clicking the handle puts in a new blank row or column where the circle connects to the table. You cannot use this handle to put a new row at the top of the table or a column to the left of the first column.
 The table's style will automatically reapply to make any row colors alternate correctly. An inserted row will inherit any manually applied formatting from the row above. An inserted column will inherit from the column to the right(!).
Sort with a Header Row
If you tell Word that there is a header row, then the first row of the table will not be sorted with the rest of the table. Handy!
- Open the Sort dialog again.
(It does not matter which cell the cursor is in.) - Click the radio button Header row to select it.
Look at the list in the Sort by and Then by boxes. Both columns should be listed, First Name and Last Name. -
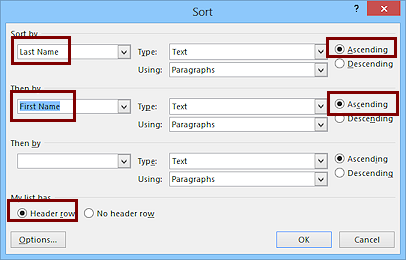 Set Sort by to Last Name, Text,
Ascending and Then by to First Name, Text,
Ascending.
Set Sort by to Last Name, Text,
Ascending and Then by to First Name, Text,
Ascending.
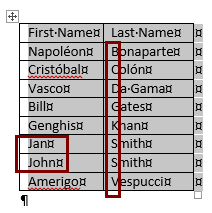
This will sort on Last Name first and then on the First Name, which is the normal way to alphabetize names. The columns do not move.
 Click on OK.
Check the sorting - on Last Name and then on First Name.
There are two Smiths. The second level of sorting should put those two first names in alphabetical order.
- Save.
[table1-Lastname-Firstname.docx]
Format Column Headings
You will learn a new way to apply a style that you know exists but which is not showing in the Styles gallery.
-
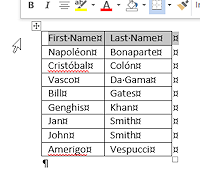 Select the first row by clicking at the left of the row after the pointer
changes to the Select arrow shape.
Select the first row by clicking at the left of the row after the pointer
changes to the Select arrow shape.We want to apply Heading 4. It is not showing in the Styles gallery or in the Styles pane. Go look to see for yourself.
-
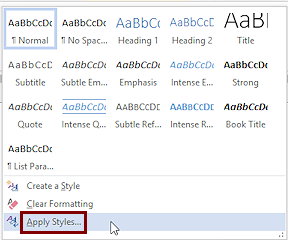 On the Home ribbon tab, click the More button
  on the Styles gallery and then on the command Apply
Styles...
on the Styles gallery and then on the command Apply
Styles...
The dialog Apply Styles opens.
There is a drop list of styles, but Heading 4 is not in it either!
Not to fear, you can type it yourself.
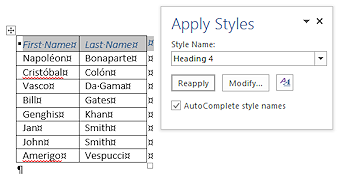 In
the Style Name text box, type Heading 4 and then click on the Apply button.
In
the Style Name text box, type Heading 4 and then click on the Apply button.
The text in the header row changes but the dialog remains open in case you want to apply other styles.- Close the Apply Styles dialog by clicking the X in the top right corner of the dialog.
 Format the heading cells as Bold and Font Size 12 pt.
The text in the first cell wrap at this new size.
-
 Widen the column: Move your mouse over the border between First Name and Last Name until the pointer changes to
  the Resize
shape. Double click.
the Resize
shape. Double click.
The AutoFit feature resizes the cells just wide enough for the widest text.Look carefully at the top of the table. Heading text and border does not line up with the rest of the column any more. Unexpected!
You had the row still selected, so only that row got wider!Drag border: You can
also drag the column border if that gives you a better result.
- Select the whole table by clicking on the Move Table handle
 .
. -
 Move the mouse over the border of the first column in a row other
than the first row until you see the Resize shape, then
double-click.
Move the mouse over the border of the first column in a row other
than the first row until you see the Resize shape, then
double-click. Now the whole column is resized and Column 2 is neatly lined up, too.
- Save.
[table1-Lastname-Firstname.docx]
Row Height: Ribbon
To change the height of a row, you can drag a boundary like you did for column width. But you can also set height and width to exact sizes on the ribbon and in the Table Properties dialog.
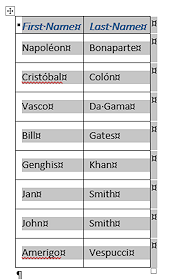
-
 Select all the rows of names in the table (Rows 2 - 9).
-
On the Table Tools: Layout tab in the Cell Size tab group, set the height to 0.4 inches
 .
.The Width box on the ribbon is blank because the selection includes cells with two different widths.
All cells in a row must be the same height.
-
Save.
[table1-Lastname-Firstname.docx]
Center Text and Table
You will make the text float in the middle of the cell vertically.
- Select the entire table.
-
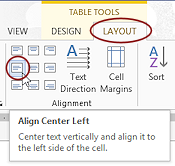 On the Table Tools: Layout tab
in the Alignment tab group, click on
the Center Left button.
On the Table Tools: Layout tab
in the Alignment tab group, click on
the Center Left button.
All text is centered vertically inside each cell and aligned to the left of the cell.
- Switch to the Home tab or right click to see the
Mini-Toolbar and click the Center button.
The whole table is centered on the page. -
Save.
[table1-Lastname-Firstname.docx]
Apply Table Style
Word offers a large number of pre-designed Table Styles. Of course you can edit the results as you wish after applying a table style. These styles include choices for alternating row colors (or not!) and special rows and columns.
The table that you are working on is very simple. It has a Header row but not a Totals row. It does not have a special first or last column to format differently.
- Click in the table but have nothing selected.
-
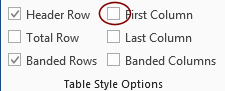
 On the Table Tools: Design tab
in the Table Style Options tab
group, inspect the default check boxes. Header Row, First Column,
Banded Rows are checked and the other choices are not checked.
On the Table Tools: Design tab
in the Table Style Options tab
group, inspect the default check boxes. Header Row, First Column,
Banded Rows are checked and the other choices are not checked.
- Experiment: Table Styles
What you see when Live Preview applies a table style will depend on what Table Style Options are currently in effect. It can make a BIG difference.- Hover over each of the gallery items for Table Styles and observe how the choice affects your table.
-
 Scroll the gallery to show each row. If you click the More button, the
expanded gallery
will cover your table.
Scroll the gallery to show each row. If you click the More button, the
expanded gallery
will cover your table. - Find:
- Table style that makes the text in the first row
vanish.
(Background color matches the text color) - Schemes that combine well with the Heading 4 style that you applied on the first row
- Schemes that make the first column different from the
second column?
Should the First Column check box be checked for this table?
- Table style that makes the text in the first row
vanish.
- Decide which color schemes you like best.
The colors all come from the current color scheme for the document.
When you are ready to continue...
 In
the ribbon, uncheck the box for First Column.
In
the ribbon, uncheck the box for First Column. -
With the cursor in the table but nothing selected, expand the gallery of Table Styles.
-
Hover over various choices and note the name for the style that appears in a screen tip.
The names are different depending on the version of Word but many of the styles appear in all three versions,Word 2007, 2010, and 2013. -
Click on the table style with alternating blue and white rows, borders around all cells, first row has a white background:

 Word 2007, 2010:
Light Grid, Accent 1.
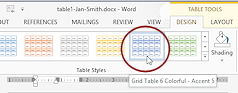 Word 2013, 2016:
Grid Table 6 Colorful - Accent 5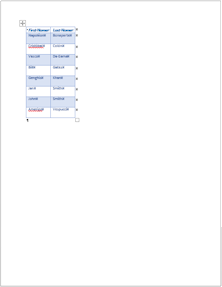 The table loses some of its previous formatting and position.
- Center the table on the page again.
-
Open the Styles pane.
There are no styles showing for tables. This is different from previous versions of Word.If you try out all of the Options for the Styles pane, you still will not see the Table Styles in the pane.
The Table Styles do show up in the Manage Styles dialog, marked with the Table grid icon
 , and also in the Apply Styles dialog.
These dialogs do not show a preview of the style.
, and also in the Apply Styles dialog.
These dialogs do not show a preview of the style.
- Save.
[table1-Lastname-Firstname.docx]
Finish
-
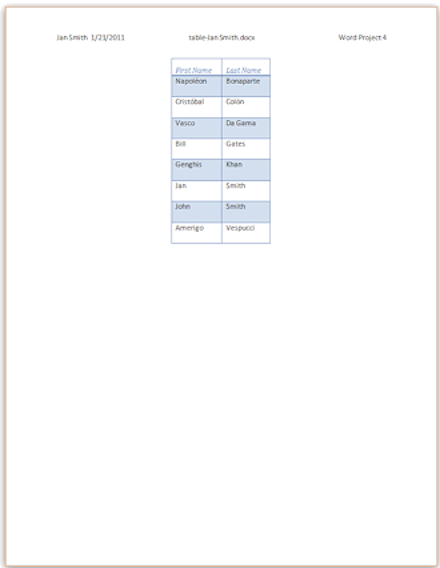 Open the Header and type your name, 2
spaces, the date, TAB.
Open the Header and type your name, 2
spaces, the date, TAB.
- From the ribbon, click on the Quick Parts button and then on Field.
The Field dialog opens.
- Select FileName from the list and click on OK to insert the field in the
header.
- Press the TAB key and then type Word
Project 4 at the right of the header.
- Close the Header and Footer.
- Check Print Preview. Make corrections if needed.
- Save.
[table1-Lastname-Firstname.docx]
-
 Print.
 - Close the document.
|
|
| © 1997-2017 Jan Smith All Rights Reserved |
Site Map What's New |
Privacy Policy Terms of Service Copyright Acknowledgements |
~~ 1 Cor. 10:31 ...whatever you do, do it all for the glory of God. ~~
Last updated: March 22, 2017