Project 2: AutoTools
AutoFormat Document

Title: Jan's Illustrated Computer Literacy 101
Did you want: Working with Words: Word 2007,2010,2013,2016 or españolIcon: Change web


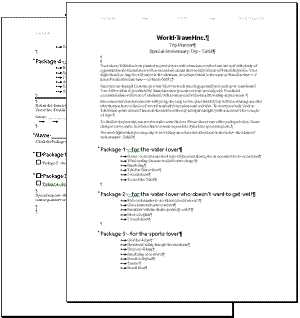
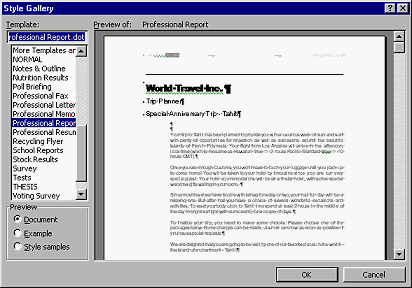
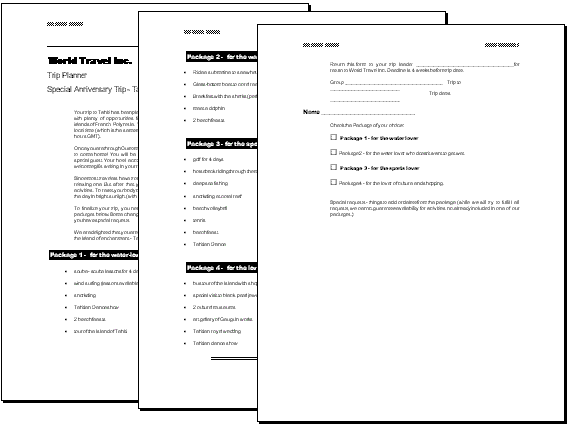
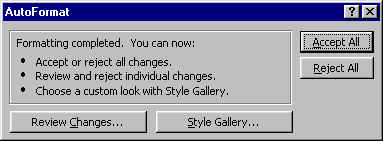
Your document now has enough formatting for AutoFormat to do some good. In the first part of the Step-by-Step below, you will see what the standard paragraph styles can accomplish.

You can also apply format to entire documents, by using templates. A template is a set of paragraph and character styles along with a record of any customizing you have done to toolbars, menu, and macros. We are only interested in the paragraph and character styles at this time.

Of course, you can use templates to create new documents, but you can also format existing documents with templates by using the Style Gallery.
Icon: Word 97 Icon: Word 2000   Format  |  Style Gallery  in Word 95 and 97.
Icon: Word 2002Icon: Word 2003 In Word 2000 and 2002 it's hidden- select  Format...  |  Theme...  |  Style Gallery 

Choosing a style will change all your paragraph styles. If you assigned paragraph styles to start with, your document will now have  a different look.

The templates listed in the Style Gallery are stored in Word's Templates folder. This folder is usually found at-
C:\MS Office\Templates or
C:\Program Files\Microsoft Office\Templates or
C:\Program Files\Microsoft Office\Templates\1033.

If you upgraded from one version of Word to another, you may have templates in more than one location!

Word comes with templates for letters, faxes, memos, and reports with three different approaches - Contemporary, Elegant, and Professional. Each template contains a long list of coordinated paragraph and character styles to help you get a good look for your documents. No one document would use all the styles in one of these templates!

Word 2000 Icon: Word 2002Icon: Word 2003 In Word 2000/2002/2003 your templates may not be installed until you first use them. You will need the installation CD so Word can install the files on the fly (while you are working).

Later you will learn how to create your own templates.


Where you are:
JegsWorks > Lessons > Word97-2003

Before you start...

Project 1: Word BasicsTo subtopics

Project 2: Auto Tools
    Make ChangesTo subtopics
    AutoFormat To subtopics
    icon-footprintAutoFormat whole
    Margins & BreaksTo subtopics
    Wizards/TemplatesTo subtopics
    Summary
    Quiz
     ExercisesTo subtopics

Project 3: BrochureTo subtopics

Project 4: ReportTo subtopics


    Search
    Glossary


Icon Step-by-Step 

Step-by-Step: AutoFormat Document

 Icon Step-by-Step

What you will learn:

to apply AutoFormat to whole document
to autoformat with a template

Start with: Class disk, trip planner3.doc

AutoFormat Document

  1. Dialog: AutoFormatFrom the menu select  Format  |  AutoFormat... 
     
  2. Read the message and click on the Options... Button.

    The Options dialog opens at the AutoFormat tab.

  3. Dialog - AutoCorrect, AutoFormat tab 
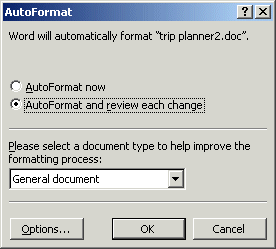
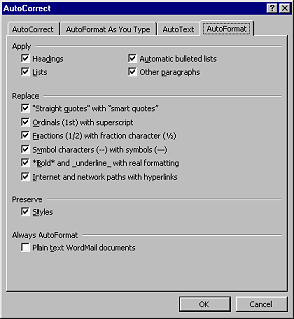
Click on the AutoFormat tab, if necessary.

    [In Word 95 click on the Show Options For: radio button for AutoFormat.]
     

  4. Check all boxes, for this exercise, except the bottom one about WordMail. Now Word will try to format all these parts of your document when you apply AutoFormat.
     
  5. Click on the OK button to return to the dialog box.
     
  6. Select the radio button AutoFormat and review changes.
     
  7. Click on the dialog box's OK button to continue with the AutoFormat.

    Dialog- AutoFormat - Review Changes?A new dialog box appears.

    If you want to check out each proposed change, you can click on Review Changes. You can accept or reject each of Word's changes.
     

  8. Click on the Accept All button. AutoFormat makes its guesses and applies standard paragraph styles.

    Document after AutoFormat
  9. Scroll your document. What has changed? The title, the subtitles, the check list at the end, the Name line... Hmmm. Some of the changes are not right.
     

  10. Click in various sentences to see what styles have been applied.
     

  11. Class disk Save as  trip planner4.doc 

    Full disk How to handle a full disk


AutoFormat with Template

  1. From the menu select  Format  |  AutoFormat...
     
  2. Select the radio button AutoFormat and Review each change and click the OK button.
     
  3. Click on the button Style Gallery...

    Dialog - Style Gallery

    A large dialog box appears listing the templates that you could apply to your document. The pane on the right should show what the document would look like with the selected template.

    Icon: TroubleRight pane does not change: Click on the radio button Style samples while the template is selected. The right pane will show a list of the styles in the template. Then switch back to the Document radio button again. Your document should then display in the right pane as it will look using those styles.

    Icon: TroubleTemplate not installed: If the template is not yet installed, there is a message across the top of the dialog box. In that case, you may need your installation CD when Word prompts you for it.
    Dialog: Style Gallery - template not installed
     

  4. Experiment by clicking on various templates on the left to see in the right pane the effect on your document.
     
  5. Scroll your document to see what using different templates does to the bulleted list and the form on the last page.

    Three templates are particularly useful for the Trip Planner - the three types of Report.
     

  6. Make your final selection the Professional Report and click on the OK button of the Style Gallery dialog.
     
  7. Click on the button Accept All to accept all the changes AutoFormat created.
     
  8. Click in each part of your newly formatted document to see in the Styles box what paragraph style has been assigned to it.

    The form has gotten messed up. You'll fix that later.
     

  9. Open the Styles drop list by clicking the arrow at its right. Wow! What a list! There are many more styles in the Professional Report than you can use in this document. At least you did not have to think these styles up yourself!
     
  10. Class diskSave as  trip planner4.doc 

    Full disk How to handle a full disk

Document after formating with Professional Report template