|
 |
Step-by-Step: Bullets |
|
What you will learn: |
to change the shape for bullets
to change the size for bullets
to change
the indention for bullets
|
Start with: ,
trip planner5.doc ,
trip planner5.doc
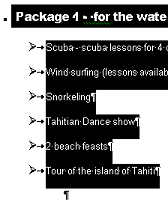
- Select the bulleted lines for Package 1 on page 1.
- While selected, right click on the selection and choose
Bullets and Numbering from the popup menu.
The most recently used bullets are shown on the Bulleted tab. Different
font sizes may look just alike.
- Select one of the schemes and then click on the button
Customize to change it. The Customize Bulleted List
dialog opens, where you can change how your list looks.
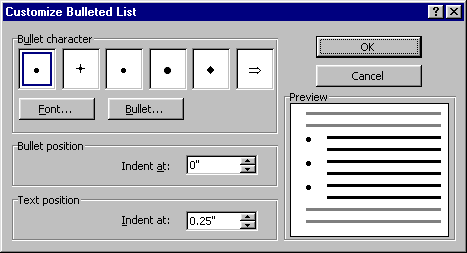
- To change the bullet symbol, click on the Bullet or
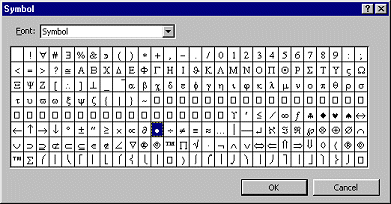
Character button in the middle. The Symbol dialog opens, showing the font containing the
current bullet, which is selected.
- Select the Wingdings font from the drop list.
Only the symbol fonts on your computer are listed in the Font drop
list. Other such fonts include Wingdings 2, Wingdings 3, and Webdings. Some
fancy letter fonts will show up here, too.
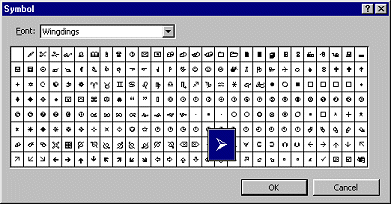
- Click on the right pointing arrow symbol
├ś.
In older versions it is in row 7, twelfth from the right. In newer versions,
the dialog box can be resized, so the location will vary.
- Click on OK to close the Symbol dialog.
This scheme's indents will replace what you had before, so you need to
reset the indent rules.
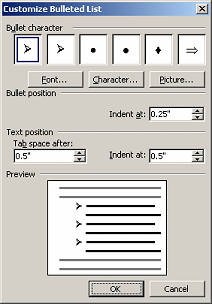
- Back in the Customize Bulleted List dialog, indent the bullet by
setting the Bullet position to 0.25". Indent the text by setting
the Text position to 0.5".
  Also set the
Tab space after to 0.5". Also set the
Tab space after to 0.5".Notice the Preview in the dialog of how your choices will
look.
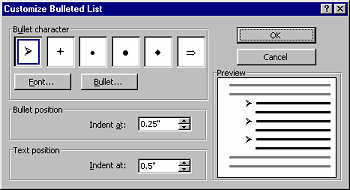
- To format the bullet itself, click on the Font...
button. The Font dialog opens.
- Set the Point Size to 12 in the Font dialog. Any
settings here apply only to the bullet itself, not to the text in the list. You
could change the color and styling here also.
-
 Click on OK. Click on OK.
Your list is reformatted with your new bullet choice. Repeating for the
other three trip packages will be much easier.
- Select the bulleted lines for Package 2. Click
 the
Bullet button. The bullets are removed. Click the button again. The scheme you just created is applied! the
Bullet button. The bullets are removed. Click the button again. The scheme you just created is applied!
 Indention is
not right: Right click on the selected items and
choose Bullets and Numbering again. Do you have two similar
schemes? Open one and customize again and apply. You may need to
use the Decrease Indent button Indention is
not right: Right click on the selected items and
choose Bullets and Numbering again. Do you have two similar
schemes? Open one and customize again and apply. You may need to
use the Decrease Indent button
 to move the list to
the left margin and then click the Increase Indent button to move the list to
the left margin and then click the Increase Indent button
 once. The
arrows should line up neatly under the first "a" in "Package 1". once. The
arrows should line up neatly under the first "a" in "Package 1".
- Repeat for
Packages 3 and 4.
-
Save as trip
planner6.htm
 How to handle a full disk
|