
|
Step-by-Step: Insert
|
 |
|
What you will learn:
|
to insert a column
to insert a row
to insert a cell
to insert a sheet
to reorder sheet tabs
|
Start with:
 trips17.xls - Sheet1 (saved in
previous lesson)
You will now insert a column for the name of the travel agent who arranged
each special offer trip. You will adjust the spacing in the sheet by adding
a row, though it might be more efficient to resize the blank row that is already
there.
A little experimentation will show you that adding a cell or two in the
middle of things is not often a good idea.
You will add several sheets to the workbook, which you will use later to
show information about each special trip separately.
Insert: Columns
You've decided that you want to include the name of the
travel agent in charge of each trip. You need to add a column to the upper
table.
- Click on the tab for Sheet1 to make it the active sheet.
- Select all of Column B.
- From the menu select | .
The new column appears to the
left of the selected column. Notice that the new column inherited
some formatting in Row 4 and Row 25. The titles in the merged cells at
the top have merged across the new column also.
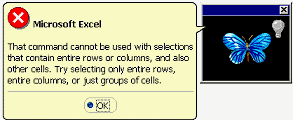

 Excel 97: You get an error message that doesn't make a lot of sense.
The problem is that you selected a column with a merged cell in it.
- Click on OK to close the message.
-
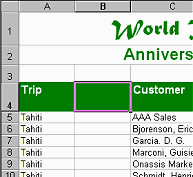 Select
the single
cell B4, instead of the whole column, and then
| . Now it works - a new column appears to the left of the selection. Notice that
it inherited some formatting in Row 4 and Row 25. The titles in the merged
cells at the top have merged across the new column also.
-
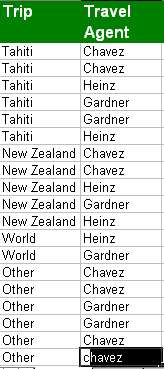 With
cell B4 selected, type Travel Agent
and press ENTER. Your typing is formatted like all the other
labels.
- Type in the names for
the three travel agents responsible for the special offer trips, as
shown in the illustration at the right.
 After
you have entered a name the first time, if you start typing that name in
another cell in the same column, Excel will offer to AutoComplete your typing.
Excel displays its suggestion as highlighted in the cell, like the final
entry in the illustration. Press ENTER or use the down arrow to accept the offer and to move the
selection down a cell. This will save you a lot of typing!
Insert: Row
You decided that you need more space between the upper
and lower tables on Sheet1. You could change the height of Row 24 but you
decide to insert another row.
-
 Select cell C27.
- From the menu select | . A blank row is inserted
above
Row 27.
Insert: Cell
Inserting cells requires that something be moved to make
room. You will again have the choices only of right or down for a direction,
but not both at the same time.
-
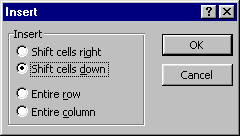 Select
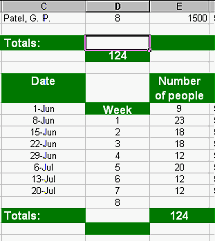
cell D25, the total number of people.
- From the menu select |
The Insert dialog appears.
-
 Select
Shift cells down and click OK. All of the cells below D25 in the column are
shifted down one cell, along with their formats.
This effect could be useful if you find you have entered some data in
the wrong rows or columns. However, it would be easy to scramble a table
by inserting a cell or two without careful thought.
- Since this is not very useful at this point, Undo.
-
 Try again. Select cell D25, |
The whole Row 25 and all cells below it are moved down one row.
- Since this doesn't seem to be too helpful, for this particular sheet,
Undo again.
-
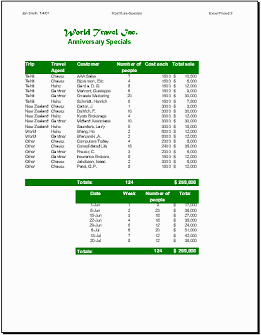
 Save as trips18.xls
 How to handle a full disk
Insert: Sheet
You need to create some new sheets to which you can copy
data in the next lesson.
-
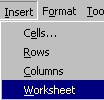 From
the menu select |. Sheet2
appears.
A new sheet always appears to the left of the active sheet.
-
 Repeat
to insert 2 additional sheets, Sheet4 and Sheet5.
-
Rename
Sheet1 (the one that you have been working with) as Specials and
drag it to the far left of the sheets tabs.
-
 Rename
Sheet2 as Tahiti and drag it to the right of Specials.
The small black arrow shows where the sheet will be placed when you drop it.
-
 Rename other sheets as New Zealand, World, and
Other.
-
 Save [trips18.xls]
 How to handle a full disk

![]()