Jan's Working with Presentations
Format: Templates & Themes: Template
A template in PowerPoint creates a new presentation that usually includes
sample slides. These slides may have directions for what should be included or they may be just examples of types of slides.
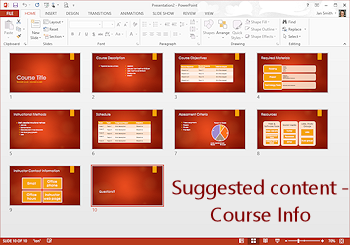
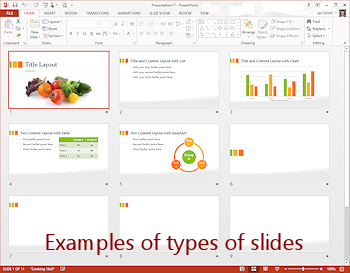
Slide 2 in each of the templates above shows the difference between the two types of templates.

Suggestions for content |
No suggestions for content |
 |
Step-by-Step: Use Template |
|
| What you will learn: |
to create a presentation from a downloaded template
to turn off Protected View
to edit slide
to delete a slide in Slide Sorter view
to delete multiple slides in Slide Sorter view
to replace temporary text
to duplicate slides
|
Start with:  (PowerPoint open to a blank document)
The Story behind this presentation:
World Travel Inc. is a fictional travel agency in Buenos Aires,
Argentina. As part of an anniversary celebration, they offered some of their
best customers some special trips.
What you will create:
An on-screen presentation to summarize the results of the special offer
and to list recommendations for the future.
You will use a presentation template to get you started on a
presentation for World Travel Inc. that is similar to the one you created earlier from blank slides. Two approaches to the
same problem.
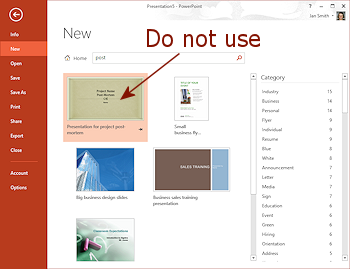
Download a Template
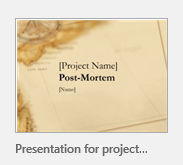
You will search for the template Project Post-Mortem and download it.
This template was created for an earlier version of PowerPoint. This template includes slides that walk you through an analysis of a completed project. You will not need all of these slides for your presentation but they do offer a good guide.
-
 Close any open presentations but have PowerPoint open.
- Start a New presentation:
|
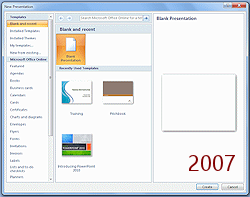
 PowerPoint 2007: PowerPoint 2007:
Click the Office button  and then New. and then New.
The New Presentation dialog opens.
|
 PowerPoint 2010: PowerPoint 2010:
Click the File tab and then New.
The Backstage View shows the New page.

|
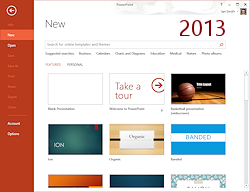
  PowerPoint 2013, 2016: PowerPoint 2013, 2016:
Click the File tab and then New.
The Backstage View shows the New page.
|
In the search box, type post and then press ENTER.
-
 Select the template presentation for project post-mortem, if it is present and click the button Download or Create.
[If this template does not show, use one of the solutions below.]
This presentation analyzes how a project turned out - good, bad,
recommendations for the future.
 A message box appears about the download. You may not see the message box if your connection is really fast.
When the download is finished, PowerPoint opens to Normal view
with a presentation loaded based on the downloaded template.
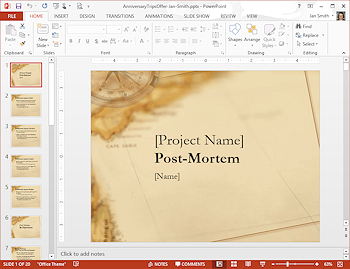
New presentation using Post-Mortem template
 Problem:
Template does not show in the search results
Problem:
Template does not show in the search results
The templates available at
Microsoft.com can change without warning. To use a template you have found somewhere else, you must save the template to a folder where you can find it again. Double-click the saved file in File Explorer to open a new presentation in PowerPoint that uses the template.
Solution 1: Download from resource files
If the template is no longer available at Office.microsoft.com, download the online copy  in the resources files. After the download completes, open the file. (Your browser may offer you a choice during the process. If not, find the file Presentation for project post-mortem.pot on your computer, probably the Download folder, and double-click it.) A new presentation opens and using the template automatically.
Solution 2: Local resource files
If you have a local copy of the lessons, you have a local copy of the resources files. Find the folder resources/presentations resources. The file name is Presentation for project post-mortem.pot. Double-click the file. A new presentation opens and automatically uses the template.
PowerPoint 2007, 2010:  The Status bar shows that the current theme came from a presentation, Presentation for project post-mortem.
 PowerPoint 2013: Status bar incorrectly shows the theme as "Office Theme".
PowerPoint 2016: The Status bar does not show a theme at all.
If necessary, click the Enable Editing button to turn off Protected View.

Protected View is turned on automatically for any document that PowerPoint knows is downloaded as a security measure. It's a good thing!
Problem: You have the yellow Protected View bar but do not have a button Enable Editing
You need to make a change to the Trust Center settings.
Solution: File > Options > Trust Center > button Trust Center Settings... > File Block Settings . Make changes to what is selected and then choose to allow editing for the selected types.
Save
-
 Click the Save button

 on the Quick Access Toolbar.
The Save As dialog appears since this presentation has not been saved
before.
This template uses an old file format. You need to save to
the new format.
-
In the Save As dialog, change:
File type = PowerPoint Presentation (*.pptx).
File name = AnniversaryTripsOffer-Lastname-Firstname.pptx
Folder = powerpoint project2 where you save your Class documents.
(Create this folder if it
does not exist.)
Edit Slides
-
 On Slide 1, type Anniversary Trips
Offer to replace [Project Name].
On Slide 1, type Anniversary Trips
Offer to replace [Project Name].
-
If necessary, drag the right edge of the title text box to the right so allow the whole title to show on one line.
-
Type your own name to
replace [Name].
Wow! This presentation is a lot prettier than your previous plain-text
one. Later you will learn how to use templates and themes to
add formatting to your existing presentations.
-
Read all 20 slides.
Each contains suggestions about
what should go on the slide.
The formatting for the text on
these slides is not particularly good for showing this presentation on a screen. The font (Garamond ) uses thin
strokes and the font sizes are on the small side. You will fix these issues in a later lesson! Right now you need to get the text itself
onto the slides.
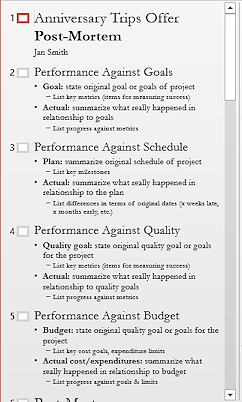 Show the outline:
PowerPoint 2007, 2010: Click the
Outline tab in the Navigation pane.
PowerPoint 2013, 2016: On the View tab,
click the
Outline View button.
-
Right click the outline.
Check the command Show Text Formatting. If the icon has a background or border, then the outline will use the formatting on the slides. If not, click the command to turn out this feature.
-
Scroll the outline.
Having the formatting showing in the outline is a quick way to spot many possible inconsistencies in
your slides. Sometimes this makes the actual text hard to read in the outline.
-
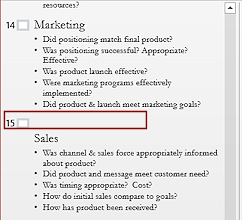 Find slide 15, Sales in the outline. There is a blank line above the title.
You will not be using this slide, so there is no need to fix this inconsistent formatting.
- Switch back to showing the slide thumbnails in the Navigation pane.
- Save.
[AnniversaryTripsOffer-Lastname-Firstname.pptx]
Delete Slide
You don't need all of the topics that were in the template. You will delete many of the
suggested slides. The Slide Sorter view is great for this, if you can read the
titles.
-
 Click
Click 

 the Slide Sorter button in the Views bar on the Status bar.
The view switches from Normal view to Slide Sorter view.
 If the Slide
Sorter thumbnails are too small to read, increase the Zoom percentage with the
Zoom control at the bottom right of the window.
If the Slide
Sorter thumbnails are too small to read, increase the Zoom percentage with the
Zoom control at the bottom right of the window.
-
Scroll the thumbnails. There are 20 slides. Far too
many for your purpose.
-
Click on Slide #3: Performance against Schedule to select it.
The thumbnail
of a selected slide has a colored border.
-
 Press the Delete key on your keyboard.
TaDa!
The slide is removed and the remaining slides are re-numbered.
-
Save.
[AnniversaryTripsOffer-Lastname-Firstname.pptx]
Delete Multiple Slides
You can drag to select slides in Slide Sorter View and you can also use the same key combos to
select slides that you
use to select files.
-
 To select neighboring slides: Click on the first slide. Hold the SHIFT key down
and click on the last slide. All in between are also selected.
To select neighboring slides: Click on the first slide. Hold the SHIFT key down
and click on the last slide. All in between are also selected.
-
To select non-adjacent slides: Click the first slide. Hold the CTRL
key down and click on each of the other slides that you want to select.
Once you have multiple slides selected, you can move,
delete, or copy them all at once.
-
 Experiment with selecting
slides
Experiment with selecting
slides
-
In Slide Sorter Views, drag to select various combinations of
slides.
-
Use the methods above to select neighboring slides (SHIFT key)
and non-adjacent slides (CTRL key) until you are comfortable with
these methods.
-
While still in Slide Sorter view, click on what is now Slide #3, Performance against
Quality.
-
Hold the SHIFT key down and click on Slide #14: Sales.
(You may need to scroll
to see Slide #14. A good time to use a key combo instead of dragging to
select!).
All of the slides between the two you clicked are selected.
-
Press the DELETE key.
All of the selected
cells vanish. No confirmation box!
-
Save.
[AnniversaryTripsOffer-Lastname-Firstname.pptx]
Change Temporary Text
The template included temporary text on the slides. You don't want to show
that to your
audience! You must replace it all.
-
 Double-click on Slide #2: Performance against Goals to open it in
Normal view so you can edit the slide.
Double-click on Slide #2: Performance against Goals to open it in
Normal view so you can edit the slide.
The suggestion is to state the goal for the project and how you planned to
measure success. That's what 'metrics' means. Then write down what the actual
results were, as measured by those metrics.
 Edit the slide to read:
Goal:
- Offer to 200 frequent/high volume customers
Actual:
- Sent offers to 150 previous customers
You need three more slides about Goals. You can duplicate this one and then
edit the text. Super!
-
Save.
[AnniversaryTripsOffer-Lastname-Firstname.pptx]
Duplicate Slide: Performance Against Goals
You will need duplicates of the Performance Against Goals slide so you can
put one goal and result on each slide.
This action will work
in Slide Sorter view and also in the Outline and in Slide thumbnails.
-
 Switch back to Slide Sorter
View.
Switch back to Slide Sorter
View.
The current slide has a gold border.
- If necessary, click on the thumbnail of the Performance Against Goals slide.
- Copy with key combo: On the keyboard, hold the CTRL key down and press the C key. Then release both
keys.
The selected slide
is copied to the Windows Clipboard.
- Paste with key combo: On the keyboard, hold the CTRL key down again and press the V key. Release both
keys.
A copy of
the selected slide appears beside the selected slide. The copy is now
the current slide.
- Repeat twice.
You now have 4 identical slides titled Performance Against Goals.
-
Save.
[AnniversaryTripsOffer-Lastname-Firstname.pptx]
Edit Text: Performance Against Goals
- Switch to Normal View.
- Experiment with Bullets
It is easy to lose a bullet or the level indentions as you edit
- Click in the Goal line on one of your duplicate slides.
- Click the Bullets button on the Home tab to turn the bulleting on
and off
- Click the Increase List Level button and observe the changes.
- Click the Decrease List Level button to return the line to the
original level.
- Press the TAB key and observe what happens.
- Return the bullets to the original levels.
(If you do not
have enough Undo steps to get back, close the presentation WITHOUT
SAVING CHANGES and open it up again. You just saved it in the previous
section.)
- Edit the text on the duplicate slides as follows:
| Slide #3: |
•
Goal:
-Schedule 100 people on trips
• Actual:
-Scheduled 124 people |
| Slide #4: |
•
Goal:
-Schedule 40 other trips as a direct result
of offer
•
Actual:
-Scheduled 6 other trips |
| Slide #5: |
•
Goal:
-Total sales of $250,000
•
Actual:
-Total sales were $269,000 |
-
Save.
[AnniversaryTripsOffer-Lastname-Firstname.pptx]
Problem: Lost bullets and indentions while editing
It is easy to delete or overtype too much and lose the
bulleting.
Solution: Use
buttons on the Home tab to recreate your list. The Bullet button 
 adds or removes a bullet. The Increase and Decrease List Level buttons
 change the indention and bullet symbol for different levels.
Duplicate Slide
You need two slides about what went right with the project. It's a good thing
that slides are so easy to copy!
- Select the thumbnail of Slide #7: What Went
Right.
- Copy and paste it without changing the selection.
Slide #8 is now
selected and is a duplicate of slide 7.
- Save.
[AnniversaryTripsOffer-Lastname-Firstname.pptx]
Edit Text
- Click on the thumbnail of Slide #7: What Went Right to select it.
 Edit the body text on Slide #7: What Went Right to read:
• Good response to personal contact
- 25% of phone follow-ups resulted
in bookings
- 15% more are in planning stage for a future trip
 Select Slide #8: What Went Right (that
still has the temporary text).
Select Slide #8: What Went Right (that
still has the temporary text). - Edit the text to read:
• Organized client lists
-Database can now sort on multiple criteria
-Future benefits
 Select Slide #9: What Went Wrong
- Edit the text to read:
• Ship construction delayed
- Forced rebooking on another line
• Lost focus
- Difficult to work on two contests at the same time
- Bonuses for Anniversary contest were vague
- Select Slide #10: Recommendations.
 Edit the text to read:
• Clear criteria for clearly explained bonuses to travel agents
• Add older client bookings to database
• Create list of potential convention customers
• Develop full service convention planning
- Save.
[AnniversaryTripsOffer-Lastname-Firstname.pptx]
The text looks like it might be hard to read on a large screen. You
will work on that later.