 |
Step-by-Step:Print Dialog |
 |
What you will learn: |
to open the Print dialog
to select a printer
to select slides to print
to select a print layout from the dialog
to configure printer with the printer's Document Properties dialog
to print only selected slides
|
Start with:  ,
, issues.ppt from previous lesson
The Print Dialog is packed with choices! It's great to
have such flexibility, but it can be confusing, too.
-
From your Class disk, open
issues.ppt. This is the presentation you modified while learning
about all the views in PowerPoint. As promised,
you will now get to print part of this presentation.
This file may be showing still in the Recent Files list at the bottom of
your File menu, in the
 New Presentation task pane, or in the
 Getting Started task pane. If it is not, click the Open button and
navigate to where you saved this presentation earlier.
Dialog:
Header and Footer
- From the menu select |
The Header and Footer dialog appears with the Slides tab showing.
- Click the Notes and Handouts tab.
- Type in your name in the Header text box.
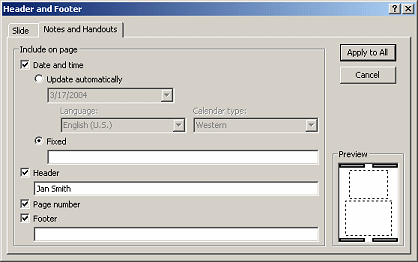
- Click on OK.
Print Dialog: Printer
You may have only one printer or you may have several to
choose from.
-
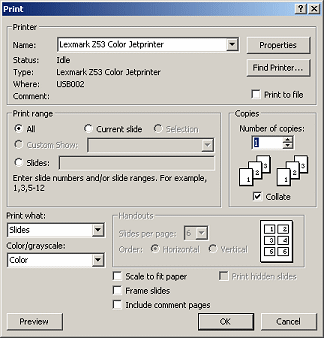 From the menu select |
The Print dialog appears
with the default printer selected.
-
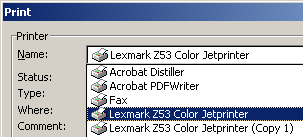 Click on the arrow at the right of the Printer
list. A list of all installed "printers" appears.
Don't change the printer. Just view your choices.
For the curious - In the illustration the list shows two copies of the
same printer. The (Copy 1) was created when I changed which USB port that
the printer was plugged into. Who knew!?
Print Dialog: Range & Copies
In the middle section of the dialog you choose what parts of the presentation to
print and how many copies.
Range: The default is All.
- All
- Current slide only
- Selection - only selected slides. (You cannot print part of a slide.)
- Custom Show - a show based on just part of the presentation
- Slides - only the slides listed by number or range, for example
1-3, 7, 10-12 would print slides 1,2,3,7,10,11,12.
Copies: default is 1
Collate: Important when you want several copies and the presentation
will take several pages to print. Collating will print out one whole copy
before starting over with page 1 again.
- Click on the radio button for Slides to select it.
- In the Slides: box, type 1, 3-5.
This will print slides 1, 3, 4, and 5.
- Leave the number of copies at 1. For this print job the Collate choice
won't matter. You are only going to have 1 page to print.

Print Dialog: Bottom section
The choices in the bottom section of the Print dialog
will be familiar if you are using PowerPoint 2002/03. They were on the Print Preview toolbar in the
Print what: control box and the Options menu.
-
Select Handouts in the
Print what: box.
-
In the Handouts section, set Slides per page to 4 and
Order to Horizontal.
-
Click on the Frame slides checkbox to check it.
-
If you have a color printer, choose Color. If your
printer won't do color, choose Grayscale.
The other choices are not important for this print-out.
You did not write any comments!

Print Dialog: Printer Document Properties
Your printer's Document Properties dialog may have more or fewer
choices than the illustrations. These vary with manufacturer and model for
the printer.
You may need to consult with your instructor or network administrator
about which printer to use and what choices to make. For example, are you
allowed to print in color on a classroom printer?
 Changes
made in the Document Properties dialog are remembered by the printer. The next
document you create or open with the same program will use these same
Properties settings.
-
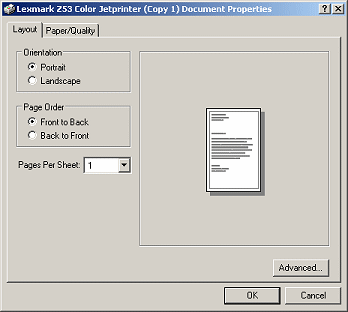 Click on the Properties button
 to open the dialog of Document Properties for your default printer.
Different printers will show different tabs and have different choices.
-
View all of the choices on all of the tabs. Use
the Dialog Help tool  to find out about choices you are not familiar with.
[Click the  Dialog Help button. The mouse pointer changes shape
 to an arrow with a question mark. Click on the dialog item that you want
to know about]
-
Make the following choices, if they exist for your
printer:
-
Orientation: Portrait
-
Page Order (depending on your printer type):
Why the difference? It's because of the way the pages come out of the
printer. In a laser printer the pages come out face down. So the pages in
a document with multiple pages are stacked correctly.
An ink jet
printer sends the pages out face up. The pages will be stacked in reverse
order. Not what you want! By changing the order in which the pages are printed,
you can avoid the reshuffle. However, it may slow your printer down on a large
document.
You are only printing 1 page, so your choice won't really matter this
time.
-
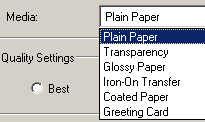 Media:
Plain Paper
 It
is important to choose the correct Media. You choice changes how much
ink or toner is used. Too much or too little makes for a bad result.
 Photos print much better on
photo paper. Photo paper
produced by your printer's manufacturer will usually give you better
results. Really. It does make a difference!
- Quality settings: Normal
Draft quality is good for the first printing of a document that you expect to
edit. Don't use Best quality until you are sure you are finished
editing. It will be much slower, especially if there are graphics or
photos in the document. For some purposes you will not notice a
difference between Normal and Best, but for photos you will.
- Color: Color, if you are allowed. Otherwise, Black and White
- Click on OK to close the Document Properties dialog. Your
choices are saved and you are back to the Print dialog.
Print Preview again!
It is usually a good idea to preview your work again after you have
changed printer settings. The mouse may have gotten away from you without
your noticing!
-
Click on the
Preview button
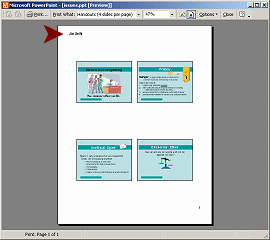
 at the bottom of the Print dialog. The Print dialog vanishes and the
Print Preview window appears. There is only one page because you are not
printing all of the slides.
-
Check to be sure that you are printing the right things and that
your header is there.
-
Check the spelling and style.
Print Selected Slides
-
 Click the Print button
  on the toolbar to open the Print dialog again.
-
Click on OK to start printing and close the Print dialog. At last!!
-
 Click
the Save button
 to save your changes. [issues.ppt]
 How to handle a full Class disk
-
Close the presentation.
Until you get some experience in printing presentations, it would be nice
to have a checklist of all these things that you might want to change. Got one!
Pre-Print Checklist
~~ 1 Cor. 10:31 ...whatever you do, do it all for the
glory of God. ~~

