
Jan's Working with Words
Brochure: Flap
It is very common for you to need to use text or graphics from one document in a different document. In fact, many people compose the simple text separately before they get involved in complex layouts like brochures and newsletters. You will learn how to navigate between multiple open documents and how to move text from one document to another.
|
|
Step-by-Step: Brochure Flap - Add Text |
|
| What you will learn: | to switch between two open documents with
- |
Start with: ![]()
![]() ,
brochure-tahiti3-Lastname-Firstname.docx
from
previous lesson, tahiti.doc from resource files
,
brochure-tahiti3-Lastname-Firstname.docx
from
previous lesson, tahiti.doc from resource files
For the inside flap of your Tahiti brochure, you will use text from an existing document. In ye olden days you had to open and copy and close and open and paste to copy text between two documents. Awkward! You won't have to do that. Hurrah!
Open Two Documents
When you have more than one document open, you need to know how to switch between them.
- If necessary, open your latest version of the brochure, brochure-tahiti3-Lastname-Firstname.docx on your
Class disk.
 Save
as brochure-tahiti4-Lastname-Firstname.docx in the word project3
folder of your Class disk.
Save
as brochure-tahiti4-Lastname-Firstname.docx in the word project3
folder of your Class disk.-
From the resource files, in the tahiti folder open tahiti.doc .
This document contains the text for the brochure. You have already entered some of it.
The full path is c:\My Documents\complit101\words\tahiti\tahiti.docOr, download the file, save it, and open it.
What you see
It depends a bit on exactly how you opened the document.
-
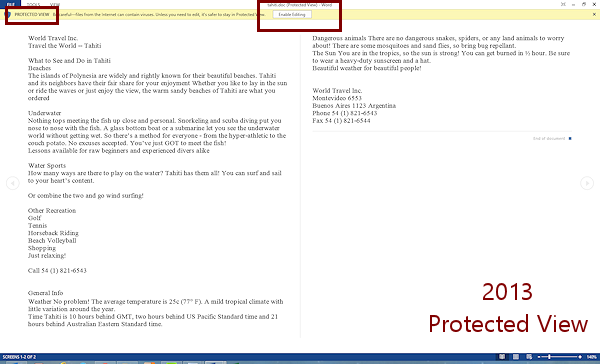
If you chose to download from the Internet, the document will open in Protected View. This is a safety feature. The title bar will have "(Protected View)" after the document's title and a gold bar appears below the ribbon tabs.
Click on the button in the gold bar, Enable Editing. The document reloads without the gold bar and you can now edit it.

-
After you Enable Editing, the Title bar shows (Read Only) [ Compatibility Mode] or just [Compatibility Mode]. Which shows depends on exactly how you downloaded and opened the document.


Read-Only means you cannot save the file back to the Internet location that it came from.
Compatibility Mode means that the document is in an older Word file format. Newer features are not available. This enables people using different versions of Word to exchange and edit documents. That won't be important for this lesson. -
If you opened a local copy of tahiti.doc, the Title bar shows Compatibility Mode since the document is in an older format.

You now have two documents open, each in its own window.
-
Switch Between Documents
There are several methods you can use to switch between different documents. Try out each one that your version of Windows and Word support.
 Ribbon
Method:
Ribbon
Method:
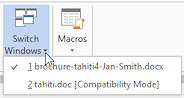
- On the View tab,
click the button Switch Windows.
A list of open documents appears. - Click on a name in the menu.
That document is now shows on top in Word.
- On the View tab,
click the button Switch Windows.
-
Keyboard
Method 1- Pick a tab and a command
 Press the ALT key.
ScreenTips show which key to use to open each ribbon tab and Quick Access Toolbar item. Press W to open the
View tab.
Press W to open the
View tab.
Now you see ScreenTips for what key to press for each button on the tab.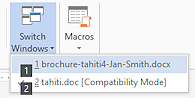 Press W to open the Switch Windows list.
 - Press the number key for the document, which is the underlined number in the list.
Even if the tab you want is already the current tab, you must use the key combo to pick the tab first, then a key combo for the button you want.
- Keyboard Method 2 - Function key
Use the key combo CTRL + F6 to switch to the next document in the list.
In fact, you can hold the CTRL key down and repeatedly press F6 to quickly rotate through all the open Word documents. This combo is great when you need to look at the document to pick out the version you want to see. The drawback to this method is that it takes two hands on the keyboard for most people and you rotate through the list in one direction. No backing up.
- Keyboard Method 3 - ALT + TAB
Hold the ALT key down and press the TAB key once to toggle back and forth between your current window and the previous window. This works for all open windows, not just Word documents.
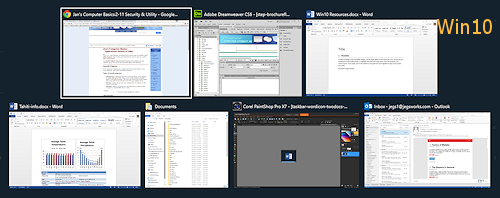
Keep holding ALT down and press TAB repeatedly to rotate through a list of icons for all the open windows.What you see with ALT + TAB depends on the version of Windows


 Vista, Win7, Win8/8.1, Win10: The ALT+TAB list has a thumbnail with a program logo for
each open application, including the Desktop. This makes it quick
and easy to pick out which window you want.
Vista, Win7, Win8/8.1, Win10: The ALT+TAB list has a thumbnail with a program logo for
each open application, including the Desktop. This makes it quick
and easy to pick out which window you want.

The applications in the illustrations are:
Vista: Word (blank document),
Word (tahiti.doc), PaintShopPro X3 (graphics program), Word
(brochure), Internet Explorer, Windows Explorer, Desktop Win8: PaintShopPro X5 (graphics program), Chrome (browser), Word 2013 (tahiti.doc), Word 2013 (brochure-tahiti4), Desktop (custom wallpaper) Win10: Chrome, Dreamweaver, Word 2013 (Win10 Resources.docx), Word 2013 (Tahiti info.docx), File Explorer, Corel PaintShopPro X7, Outlook
-
Task View:
Win10
The Task View button on the Taskbar is new with Windows 10. Clicking the button shows a large thumbnail for each open window in the current Desktop. (You can create more than one desktop.) Unlike the ALT + TAB thumbnails, these thumbnails stay open until you click on one or on something else.
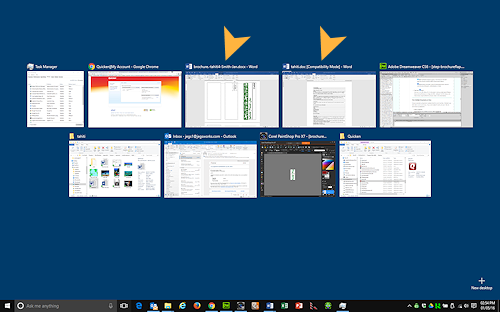
Task View (Win10) with two Word windows open
 Experiment: View Multiple Documents at Once
If you are comparing two documents or copying material from one to the other, it is helpful to see both windows on the screen at once. If your screen is small, it is hard to see much. There are several ways to accomplish this.
- Word - Arrange All:
On the View tab in the Window tab group, click on Arrange All.
All open Word documents are tiled horizontally, except documents that are minimized.
The illustration below is from Windows 8 and Word 2013.
 Moving/Copying text: If your
screen is large enough, you can use this arrangement to
copy and paste between documents. You can even drag from one document and drop in the other.
Moving/Copying text: If your
screen is large enough, you can use this arrangement to
copy and paste between documents. You can even drag from one document and drop in the other. 
 Dragging moves: A simple drag will move the text rather than copy. A
right drag will popup a menu where you can choose between copy, move, and create a shortcut. More viewing space:
If you need to see more of the documents, you can minimize the ribbon in each
window. (Right click on the ribbon and click on Minimize
ribbon. )No undo for windows sizes: Unhappily, Undo will not return the window to your previous viewing size. You will have to resize each window, either by maximizing it or by dragging the window edges.
Dragging moves: A simple drag will move the text rather than copy. A
right drag will popup a menu where you can choose between copy, move, and create a shortcut. More viewing space:
If you need to see more of the documents, you can minimize the ribbon in each
window. (Right click on the ribbon and click on Minimize
ribbon. )No undo for windows sizes: Unhappily, Undo will not return the window to your previous viewing size. You will have to resize each window, either by maximizing it or by dragging the window edges.
 Keyboard combos for
  Windows 7, 8, 8.1, 10:
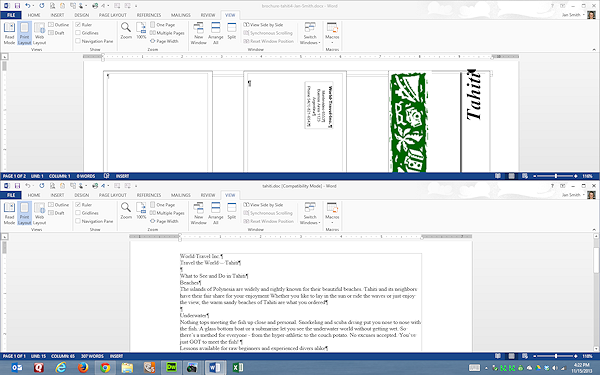
New key combos make it easier to tile windows vertically. They all use the Windows key on your keyboard .
.
Not all keyboards have a Windows key. The exact logo on the key will vary with the version of Windows that was current when the keyboard was made.
Try out these key combos:
 + right arrow key: The
current window resizes to take up the right half of the screen.
+ right arrow key: The
current window resizes to take up the right half of the screen.
+ left arrow key: The current window
resize to take up the left half of the screen.
+ up
arrow key: Maximizes the current window to full
screen.
+ down arrow key: Returns the current window to the
previous size and location or minimizes it.
Documents tiled vertically using Windows key combos
Copy and Paste Between Documents
- Maximize the window for tahiti.doc .
- Select lines 34 to 43, starting with General Info and continuing through Beautiful weather for beautiful people!
- Copy the
selected text.
- Switch to brochure-tahiti4-Lastname-Firstname.docx and maximize it.
- Place cursor in Text Box 1 and paste.
- If necessary, scroll the window containing brochure-tahiti4-Lastname-Firstname.docx back
to the top to see the newly pasted text.
- Save.
[brochure-tahiti4-Lastname-Firstname.docx]
- Close tahiti.doc .
Before continuing to work on your brochure, you will do some practicing with character spacing and styles. Then you can use those new skills on your brochure.
|
|
| © 1997-2017 Jan Smith All Rights Reserved |
Site Map What's New |
Privacy Policy Terms of Service Copyright Acknowledgements |
~~ 1 Cor. 10:31 ...whatever you do, do it all for the glory of God. ~~
Last updated: March 22, 2017
Taskbar Icons for Documents
In Vista and WinXP, each window shows as a separate icon on the Taskbar unless there are so many open programs that the icons must be grouped.
There is a blue bar across the bottom with a slight offset for the stacked icon and a barely visible (if you have excellent eyes!) extra edge for the 'underneath' icon.