
Jan's Working with Words
Report: Tables: Format
Making your table easy to read and interesting to look at is what formatting is all about. You can color the table background. You can color the table's lines and set the line style and width. Of course, you can format the text in the table in all the normal ways, too.
The steps below will give you some practice in applying formatting. More importantly the steps will show you the consequences of formatting too soon.
When creating your own tables, take care that your formatting choices do not make your table's content too hard to read. The choices used below are not particularly good for reading! They were chosen to make it clear what happens when you move things around in a table, not for beauty or readability.
Getting your table to work well often means combining cells together, called merging. The steps below will re-emphasize that splitting cells is not the same as reversing a merge.
|
|
Step-by-Step: Format and Rearrange a Table |
|
| What you will learn: | to format table text to center table and table text to format cell background and font color to move rows and columns to merge cells to split cells to see what happens to formatting as rows and columns are moved |
Start with: ![]()
![]() ,
table2-Lastname-Firstname.docx from
preceding lesson
,
table2-Lastname-Firstname.docx from
preceding lesson
Table styles are great for formatting data tables and they will automatically reapply when you move, add, or delete rows and columns. But you will often run into situations where you want to do some manual formatting. Manual formatting of tables should be done only AFTER the table structure is finished! This lesson will show you what happens when you format manually and then change the table.
Format Table Text
-
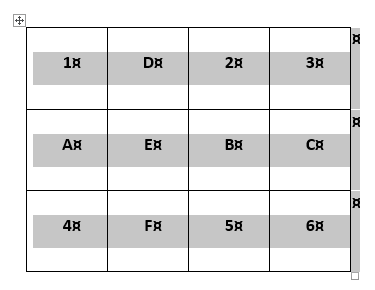 Select the whole table
by clicking the Move Table handle.
Select the whole table
by clicking the Move Table handle. - Change the font to Size = 16 pt.
and Bold.
-
 Save
as table3-Lastname-Firstname.docx on your
Class disk in the word project4 folder disk .
Save
as table3-Lastname-Firstname.docx on your
Class disk in the word project4 folder disk .
Center Table and Text
You want to center the table horizontally on the page and also to center the text in each cell both horizontally and vertically inside the cell. That's three different kinds of centering!
- Center table on page:
If necessary, while the whole table is selected, click the Center button on the Home tab or

 Mini-Toolbar.
The whole table is centered horizontally on the page.
-
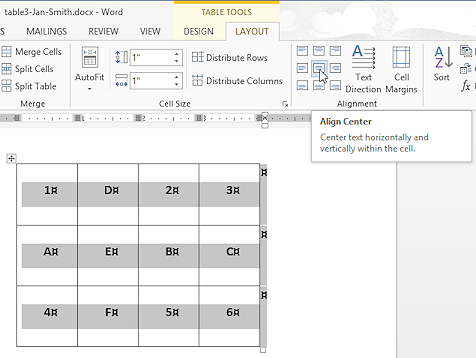 Center text in
cell:
Center text in
cell:
On the Table Tools: Layout tab in the Alignment tab group, click the Align Center button.
The cell text is centered both horizontally and vertically inside each cell.
-
Save.
[table3-Lastname-Firstname.docx]
Format Cells
You will now format the table cells with background color and you will change the color of the text. When you start moving rows and columns around later, you will be able to tell better what is going on because of the colors. We aren't after beauty here!
-
While
all cells are selected, format
using Standard Colors:
Shading = Red
Font Color = Yellow.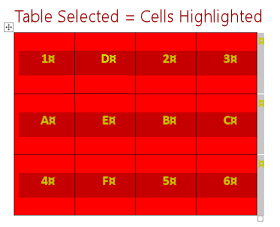
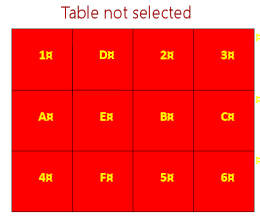
While the table is selected, the text is highlighted and may not look yellow to you.
-
 Format all the cells that have letters as text with:
Shading = Blue
Font Color = Black.
(You can't select all the lettered cells at once.)Once you have made a color choice on the Home tab, the button remembers that color and even shows it on the button itself. You can just click it to apply the previous color.
-
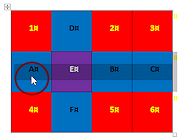
 Select the second cell in the middle row,
which contain the letter E. Be
careful to select the whole cell and not just the letter E.
The blue selection highlight does not show well against the blue background.
Select the second cell in the middle row,
which contain the letter E. Be
careful to select the whole cell and not just the letter E.
The blue selection highlight does not show well against the blue background.
- Reformat cell E with:
Shading = Purple
Font Color = White.
-
Save.
[table3-Lastname-Firstname.docx]
Move Row
It is better to do any moving before you start changing the formatting. Sometimes the formatting will go along with the cell, but sometimes it doesn't. You can make a lot of work for yourself by doing things in the wrong order.
-
 Select the middle row. (Be sure to
catch the end of row mark, too.)
Select the middle row. (Be sure to
catch the end of row mark, too.)
-
Move the
pointer over the first cell in the selected row, which contains the letter A, until the pointer changes to
 . Yes, the direction of the arrow
changes!
. Yes, the direction of the arrow
changes!
-
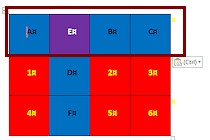 Drag up until
the cursor shows in the first cell in the table (which contains a 1), then drop.
Drag up until
the cursor shows in the first cell in the table (which contains a 1), then drop.
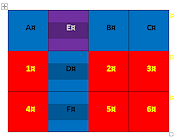
The middle row (blue and purple backgrounds) moves up and becomes the first row. The formatting stayed with all the cells this time.
 Word 2010, 2013, 2016: Paste Options
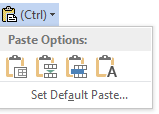
When you dropped the row, a smart tag appeared. It offers choices about the formatting of what you just 'pasted' into place. The choices are different from the choices you see when you paste text.
Nest table; Merge table; Insert as New Row(s); Keep Text Only
To hide the Paste Options button, press the ESC key.
-
Save.
[table3-Lastname-Firstname.docx]
Move Column
-
 Select the second column, which now has E in the top cell.
The highlighting for the selected cells fades into the background color for the cells holding D and F. This certainly makes it hard to see if they are selected! -
Move the pointer over the cell containing an E until it changes to
the selection shape.
-
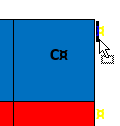
 Drag to the right until the cursor shows beside the
end-of-row mark for the first row and drop.
Drag to the right until the cursor shows beside the
end-of-row mark for the first row and drop.
(The mark is hard to see in Word 2013 because it is yellow like the text color.)
The whole column moves to the right edge of the table.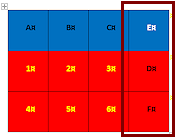 The shading in the column changed to
match the row but the font color did not. Did you expect the
change? Did you expect the difference??
The shading in the column changed to
match the row but the font color did not. Did you expect the
change? Did you expect the difference??
This is an example of why you should wait to format a table until all the rows and columns are set. Unexpected things can happen!
-
Save.
[table3-Lastname-Firstname.docx]
Merge Cells
-
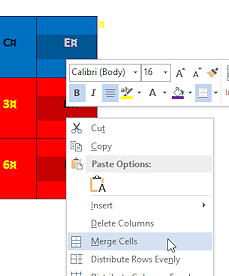 Select the last column.
This is the one you just moved. - Right click on the selection.
The context menu for tables appears. The commands listed vary, depending on what is selected.
- Click on
the command Merge Cells.
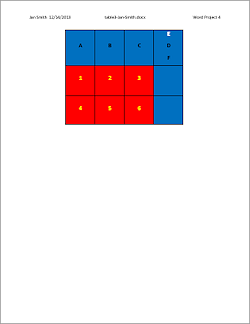
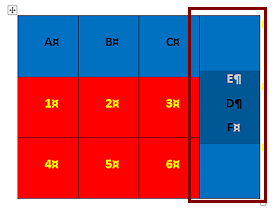 The contents of all three cells become
separate paragraphs in the combined cell. The cell background is
the same as the top cell in the column, but the paragraphs kept their own text formatting. Is this getting complicated??
The contents of all three cells become
separate paragraphs in the combined cell. The cell background is
the same as the top cell in the column, but the paragraphs kept their own text formatting. Is this getting complicated?? - Save.
[table3-Lastname-Firstname.docx]
Split Cells
-
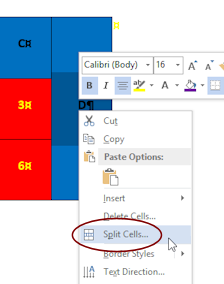 While the column is still
selected, right click on
the selection.
While the column is still
selected, right click on
the selection.
The context menu appears again, with different choices.
- Click
the command Split Cells.
The Split Cells dialog appears. You must choose how many rows and columns you want to split the cell.
-
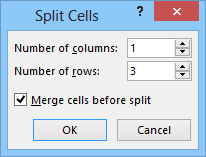 In the Cells Split dialog, set:
columns = 1
rows = 3
Merge cells before split: checked
-
Click on OK to close the dialog.
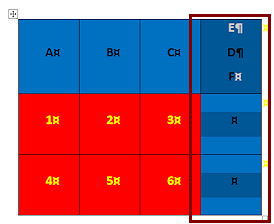 You are back to three
cells in the last column.
You are back to three
cells in the last column.
But, the previously merged text stayed in the top cell and the row height for the first row increased to hold the three paragraphs.So, Split Cells is not at all the same as undoing the merge.
-
Save.
[table3-Lastname-Firstname.docx]
Final Edit
-
 Open the Header and type
your name, 2 spaces, insert the date, TAB, insert the field for Filename (Header & Footer Tools: Design > Document Info > File Name), TAB,
type Word
Project 4.
Open the Header and type
your name, 2 spaces, insert the date, TAB, insert the field for Filename (Header & Footer Tools: Design > Document Info > File Name), TAB,
type Word
Project 4.
- Check Print Preview. Make corrections if needed.
-
Save.
[table3-Lastname-Firstname.docx]
 Print
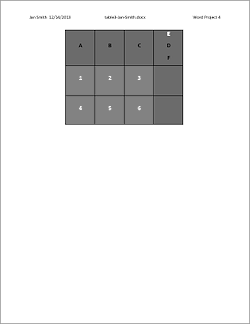
without color.
Print
without color.
How to accomplish that depends on your printer. If your printer doesn't do color, you are set to go! If the printer does do color, you can change that temporarily. Each printer has its own dialogs for changing the printer's Properties. Change the Properties of the printer from inside the Print dialog. Choose to print in gray scale if that is available or else in black and white. Then after you print, change it back.
How did your red and blue come out? How about the text? This illustrates the problem of colored parts printed in black and white.
|
|
| © 1997-2017 Jan Smith All Rights Reserved |
Site Map What's New |
Privacy Policy Terms of Service Copyright Acknowledgements |
~~ 1 Cor. 10:31 ...whatever you do, do it all for the glory of God. ~~
Last updated: March 22, 2017