|
Step-by-Step: Insert Image in FPX
|
 |
| What you will learn: |
to insert an image
to resize an image by dragging |
Start with:  ,
,
 hector6.htm,
resource files
You will use FrontPage Express to put some images on
Hector's page. You must know the path to the image files in order to use
them on an HTML page.
Copy Image Files
To keep things simple, you will first copy the images
for Hector's page into the web folder on
your Class disk, where you are saving the different versions of the page.
 How to handle a full disk
You may need to remove some files from your floppy disk to have enough
room for the images. If you want to start using a new floppy disk, copy
hector6.htm from the floppy disk to the hard
drive. Put a new blank floppy disk in the drive and move
hector6.htm to the new floppy.
- Download the resource
files for HTML Basics. Extract the files to a folder on your hard
drive. This will create a folder HTML
with two subfolders.
- Save the files in the web/HTML
folder to your floppy disk.
Save as
-
 With
FrontPage Express showing hector6.htm, from
the menu select |
.
- Use the name hector7.htm to
save the page to the web folder on your
Class disk. Now your changes will not overwrite the previous version and
your images will use relative paths instead of full paths.
- Check the estimated load time on the Status bar. Remember
this number.
Insert Image: Other Location
You will insert a photo of Hector and his wife Carla.
-
 Move
your cursor to the end of the paragraph in the section My Family
and press ENTER to create a new line.
- Click
 the
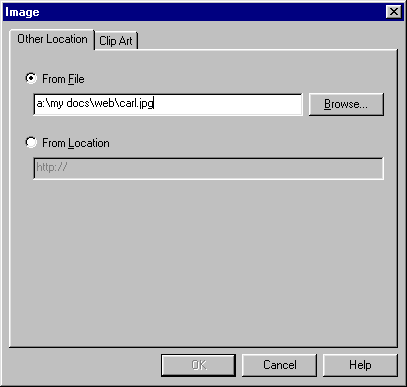
Insert image button. A dialog opens with the tab Other location
showing.
- Type the path a:\my docs\web\carl.jpg
(Type exactly as shown, please.)
This image will be of Hector and his wife Carla.
- Click the button OK. Whoops. The button is grayed out
so you cannot click! This means the path must be wrong. There is no file
of that name at that location. It is the filename that is not right.
-
 Edit
the path so that the filename is carla.jpg.
Now OK button is available. Spelling is so important!
-
 Click
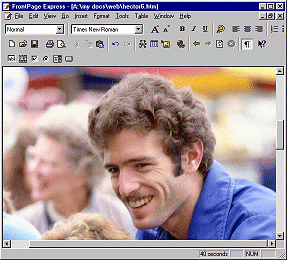
on OK. After a short wait while the computer accesses the floppy
disk, the image appears in the page.
It is much too large for this page!
 Progressive JPEG images
(which reveal themselves in stages) may not display correctly in FPX.
But the saved page will display the image correctly in a browser.
- Check the estimated load time on the Status bar. It
now says 40 sec.
 Quite a change for just adding one image!
Resize with Mouse
After a picture has been inserted in FrontPage Express,
you can change its display size. You may need to resize more than once,
especially if the image is bigger than the window.
Of course, dragging in FPX to resize an image does not
actually change the image's file size. Once you decide on what size works
well on your page, you should use a graphics program to create an image
that is that size.
-
 Click
in the image somewhere to select it.
Handles (small black squares) appear at the
corners and halfway along each edge.
-
 Drag
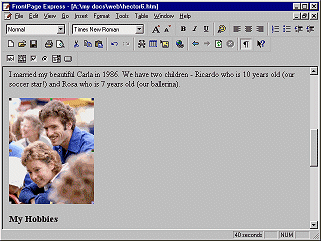
the handle at the upper right down and left until the image is a
more reasonable size. The pointer should have the shape
 .
.
 When
you release the mouse button, there may be a short wait while the
computer calculates. Then the image will be shown in its new size.
You can only drag the handle as far as the edge of the window. You
will probably need to drag at least twice since so much of the image is
not visible in the window.
 If you drag
with a handle that is not at a corner, the image will be distorted since
only one dimension will change.
 Save the page with the same name [hector7.htm]
by clicking the Save button.
 Insert Image
![]()
![]()