
|
Step-by-Step:Insert Image in FrontPage
|
 |
| What you will learn: |
to insert an image
to resize an image by dragging |
Start with:  ,
hector6.htm, resource files
You will use FrontPage to put some images on Hector's
page. You must know the path to the image files in order to use them on an
HTML page.
-
Download the
resource files for HTML Basics and extract the files to your hard
drive. This will create a folder HTML
with two subfolders. The total size is 880 KB. You will be copying some
of these files to the web hector. If you have put the web on your Class disk, you may
run short of space at some point since a floppy disk can only hold 1.44
MB. You will need only the web
 hector from now on for HTML Basics, so you may move or delete the
previous pages.
 How to handle a full disk
Open Existing Web
To keep things simple, you will first copy the images
you will be using on Hector's page into the web
hector on your Class disk.
-
 Open
FrontPage.
- Click the arrow beside the Open button. Select Open
Web...
- In the Open dialog, navigate to the web hector
or type the full path to the web,
a:\my docs\web\hector for the floppy disk
or http://localhost/hector

 Error:
If your Class disk is not in the floppy drive and you type a path to
it, you will get an error message.
-
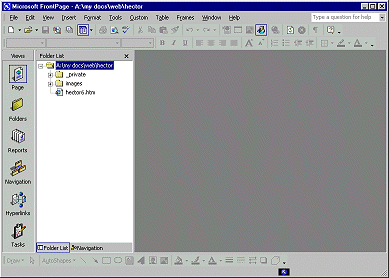 Click
on OK. FrontPage loads the selected web.
Import Files: Copy & Paste
In a previous lesson you learned how to import files into a web with a
dialog. This time you will copy and paste. It can be easier to find the
files you want in a large Explorer window instead of the small space in a
dialog.
-
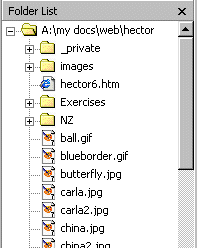 Open
an Explorer window to the the folder HTML
on your hard drive to which you extracted the resource files.
- Select all the files and copy.
- Switch to FrontPage and click on the web name
hector at the top of the Folder List.
- Paste. The files are copied to the web
hector.
On your floppy disk this may take several minutes since writing to a
floppy is rather slow.
Save As
Students often find that they need to back up and start a lesson over.
To make this easier to do, you will be saving your web page under a
different name in each lesson. This is not the way most people work in the
real world! However, it is a good idea to keep separate copies of your
work at different stages of the creation process. This can save you if
your file gets corrupted along the way.
-
 In
FrontPage open hector6.htm by double-clicking
it in the Folder List.
- From the menu select |
.
- Use the name hector7.htm to
save the page to the web hector. Now your
changes will not overwrite the previous version. Your images will use
relative paths instead of full paths.
- Check the estimated load time on the Status bar. Write this
number down.
Insert Image: Dialog
You will insert a photo of Hector and his wife Carla.
- Move your cursor to the end of the paragraph in the section
My Family and press ENTER to create a new line.
-
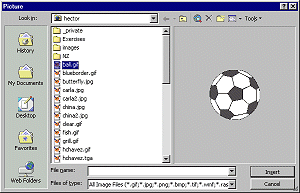 Click
Click
 the Picture
button. The Picture dialog appears and show the last folder used.
- Type the path a:\my docs\web\carl.jpg
(Type exactly as shown, please.)
We want an image of Hector and his wife Carla.
- Click the button Insert. Whoops. A message appears.
It's not all that helpful. The actual problem is that no file of that
name is at that location. The filename is the part that is wrong.

- Click on OK in the message box.
-
 Edit
the path so that the filename is carla.jpg.
Spelling is so important!
-
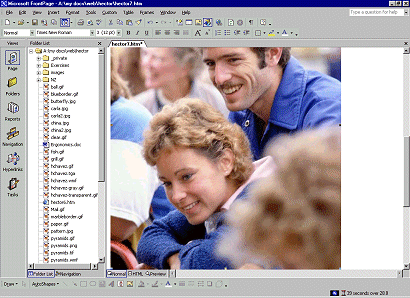 Click
on Insert. After a short wait while the computer accesses the
floppy disk, the image appears in the page.
It is much too large for this page!
- Check the estimated load time on the Status bar. It
now says 39 sec.
 Quite a change for just adding one image!
Resize with Mouse
After a picture has been inserted in FrontPage, you can
change its display size. You may need to resize more than once, especially
if the image is bigger than the window.
-
 Click
in the image somewhere to select it.
Handles (small black squares) appear at the
corners and halfway along each edge.
-
 Drag
the handle at the upper right down and left until the image is a
more reasonable size. The pointer should have the shape
 .
.
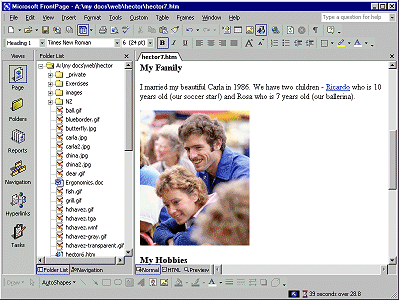 When
you release the mouse button, there may be a short wait while the
computer calculates. Then the image will be shown in its new size.
You can only drag the handle as far as the edge of the window. You
will probably need to drag at least twice since so much of the image is
not visible in the window.
 If you drag
with a handle that is not at a corner, the image will be distorted since
only one dimension will change.
 Save the page with the same name [hector7.htm]
by clicking the Save button.
 File size:
Dragging in FrontPage to resize an image did not actually change the
image's file size. You have just changed the way the image is displayed.
 Insert Image
![]()
![]()