 |
Step-by-Step: Add Table |
 |
What you will learn: |
to insert a table in an existing
document
to use Table AutoFormat
to change formatting
to
use AutoSum
to
view formula
|
Start with:

 ,
report-WorldTravel4.doc
Draw Table
-
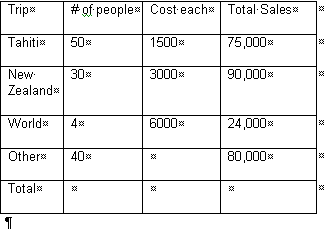 Go to page 3 of the report. Place cursor on blank line after
The table below summarizes...
- Draw a
table here that is about 3.5" wide and 2" high.
- Draw lines to create 6 rows and 4 columns.
- Enter text as shown in the illustration at right.
- Resize, if necessary, to make the column
headings fit on one line. Table width should be about 3.5" and the total height
should be about 2". Look at your rulers.
AutoFormat
-
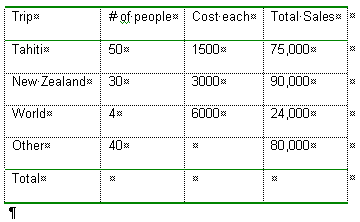 With the cursor in the table, click on
 the Table AutoFormat button.
- Apply format Simple 1 with all boxes checked. What changed?
Format
-
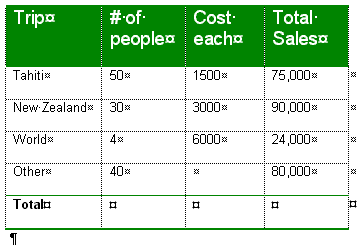 Select row 1 and format with:
Font =
Arial
Size = 14 pts.
Shading =
Green
Color = White
- Select the last row and make it Bold.
- Click in
the second cell
on the top row (# of people) and click the
 button Align Left.
Justifying such a short phrase did not look
right.

If you format and
then apply an AutoFormat scheme, you will replace your manual formatting
with that of the AutoFormat scheme.
AutoSum
- In the bottom row,
click in the cell to the right of Total and click on
 the AutoSum button. This inserts a field which totals the lines above.
- Repeat for the last cell on the last row.

- Right click on each field and choose to
see the formula being used.

Notice that the row height increases to show the formula.
- Right
click again on each field and Toggle field codes to make
both fields show the sum again instead of the formula. The row returns
to the previous height.
Alignments
Numbers usually look better and are easier to read
when either aligned to the right or justified on
a decimal tab. The table will look better if centered on the
page.
-
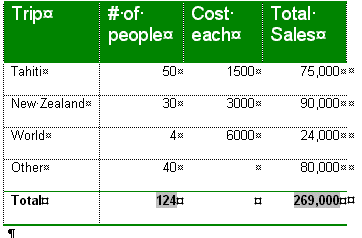 Drag from the second cell in the second row,
which has the number 50 in it, down to the bottom right cell.
This selects all the cells with numbers.
- Click on
 the Align Right button on the Formatting bar.
- Select the entire
table.
 |
|

 || or click on the
 Move Table handle.
- Click on
 the Center
button. The whole table is centered horizontally on the page.
If, instead, the cell contents are centered, then you did
not have the whole table selected. Undo and try again.
-
 Save
as report-worldtravel5.doc on your Class disk.
 How to handle a full disk
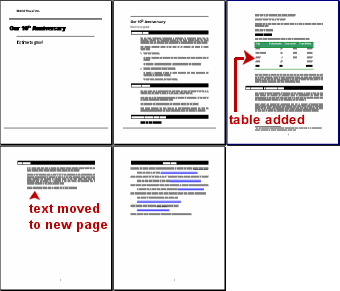
Your table is now complete! Inserting the table made
text wrap over to a new page.
