 |
Step-by-Step: Format Form |
 |
|
What you will learn: |
to apply an AutoFormat style
to change formatting
to adjust spacing
to add a rectangle
to save new formatting as an AutoFormat style
to apply custom AutoFormat style
to view Form Header/Footer
to copy controls from another form |
Start with:
 ,
resource files,
worldtravel.mdb from the previous lesson
AutoFormat
Now that you have all of your fields on the form, you can consider
changing the AutoFormat style. Currently you are using the default
style, Standard. An AutoFormat style can be applied just to selected
controls or to the whole form at once.
 You Cannot Undo
AutoFormat: Choosing an AutoFormat style is not an action on the Undo list!
Instead of being able to reverse your choice, you must select a different AutoFormat,
such as the Standard style, or else manually re-format the controls
that received the AutoFormat style. This can be a very sad situation if
you lose a lot of formatting when you applied an AutoFormat style.

-
 If
necessary, open the Clients form in Form Design View.
- Select all controls.
(CTRL + A)
 Problem:
CTRL + A did not select all of the controls
Why:
Either you were in Edit mode inside a control or the form did not
have
the focus.
Solution: Click on a blank area of the background or click on the
Details bar to
put the focus in the form and try again.
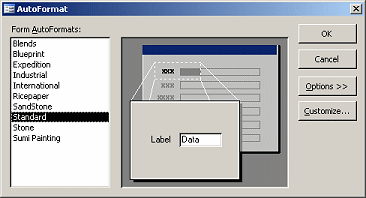
- From the menu select |.
 Experiment: Try out each of the pre-designed AutoFormat styles.
You must click on OK in the dialog to actually apply the style to your
form. There is no "preview" feature here.
Observe carefully what changes - spacing, font, font size, effects, etc. Do you find one of these styles more
attractive than the others? Most observers are not impressed with any of
them! But they do get you started.
 Problem:
Only some controls formatted:
AutoFormat styles are applied to whatever is selected.
Be sure that you have selected all controls when you want the AutoFormat
to apply to the whole form.
-
Select
the style International as your final choice.
- Click on OK to close the AutoFormat dialog.
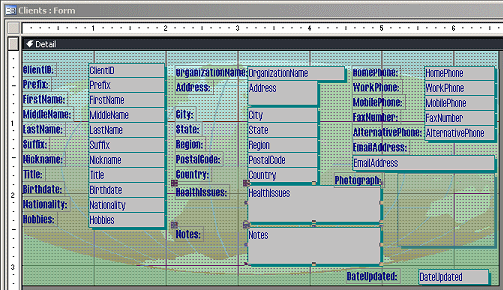
Notice that most of the controls are too close together for the shadow
to show.
 Problem:
Size of control(s) changed
Your form may not look quite like the illustration. The
fields that you enlarged may have switched back to the default sizes. It
depends on exactly what AutoFormats you tried out and on exactly how your controls were aligned with
each other.
Solution: Resize and/or move any fields that lost their size or
position.
Change Formatting
The default font for the International AutoFormat style is a bit hard
to read and we need to get some more spacing between the controls.
-
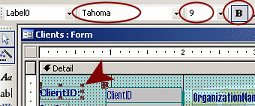 Select
the ClientID label and format
it as
Font: Tahoma
Font size: 9
Bold
 The name of the
label, Label0, is on the toolbar at the left.
What you see in the label is not necessary its name.
-
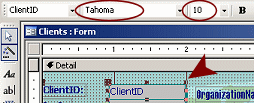 Select
the ClientID control and format
it as:
Font: Tahoma
Font size: 10
 The name of the
control is ClientID, which is the name of the
field behind the control.
-
With the ClientID control still
selected, double-click the Format Painter button
 .
.
-
Click on each of the controls to copy the formatting.
The font, font size, and alignment of label with control are changed.
This is great for most controls but not for a couple. Some labels are
too narrow to show their text in this larger font. You will fix that shortly.
-
After formatting all the controls,
click the Format Painter button again to turn it off.
-
Select all of the controls and labels (CTRL + A) and then size to
fit. (Format | Size | To Fit)
The labels all enlarge to show all of their text. The data controls do
not change size.
-
Inspect the changes.
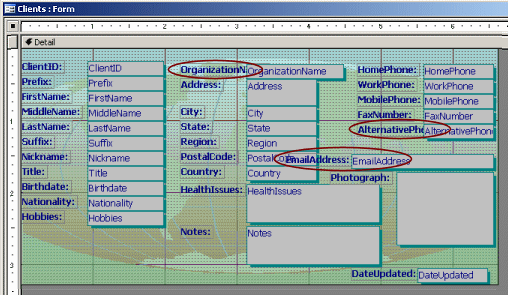
The label for EmailAddress moved to the left
of the control, even though you had moved the control below it. Two labels are
partially hidden underneath their
controls, OrganizationName and
AlternativePhone.
-
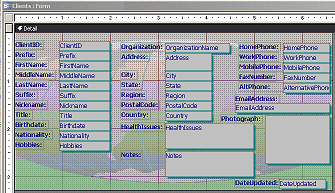 Edit the labels to read Organization
and AltPhone.
(Click to select, click again to change to Edit mode, type, click out)
-
Move the label EmailAddress back to
its previous position, above the control, using the Move handle.
Change Spacing
Access lets you control the spacing between controls easily. Besides
dragging things around, you can set all the spaces to be the same =
evenly. Or you can increase or decrease horizontal or vertical spacing
until you are satisfied.
- Select
all controls with the key combo CTRL + A.
-
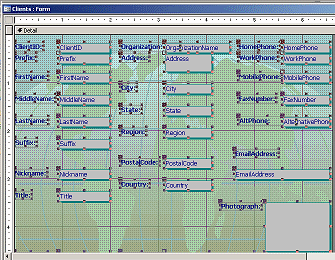 From
the menu select || .
Whoops. Access has gone crazy!
It has stretched some spaces out much too far and messed up the
alignments across columns. Some controls may not have gotten any
increase in spacing at all. <sigh>
Note: Your form may look different, depending on exactly how your
columns lined up on the grid.
Let's try a
smaller set of controls to help Access not get so confused.
- Undo.
-
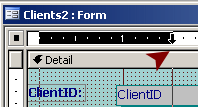 Click
in the horizontal ruler at the first mark at the left and drag
across to the 1.5" mark. The labels and
the controls in the first column are selected. (This is easier
than dragging on the form itself!)
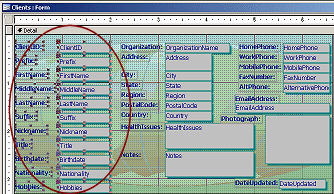
- Again, from the menu select ||
- Repeat to increase spacing again.
Now the controls in the first column are separated by enough space to
show the shadow and a gap. Looks better!
- Similarly, select the controls in the second column and
increase spacing twice.
- Repeat for the third column.
(You may only need to increase spacing once for the third column of
controls.)
-
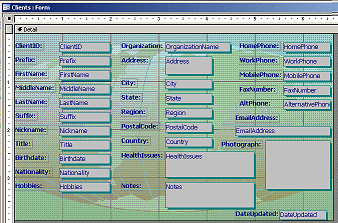 If
the DateUpdated label now overlaps the
Notes control, drag the control down and
drop it below the Notes control. The form will automatically resize.
-
 Save
the form. (Clients)
-
Switch to Form View and navigate
through the records. Does the data show in the controls with the new
font and font size? Everything but a couple of international phone
numbers should be showing nicely. Perhaps you should make some
changes now to the phone number controls.
Edit Phone Controls
You need to
edit the labels and enlarge the controls for phone numbers without making
the form any wider.
-
Switch to Form Design View.
-
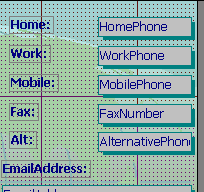 Edit
the labels to remove "Phone" and "Number" from the text.
-
Select the labels and size to
fit.
-
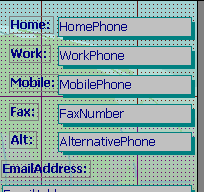 Select
the controls for the phone numbers.
-
Drag them as wide to the left toward
the labels without overlapping the Mobile label.
-
Switch to Form View and verify that
those long phone numbers are showing completely.
Draw Rectangle
The Toolbox has buttons for drawing lines and
rectangles. These are used to divide or group areas on the form, or
just for decorative effects.
-
 Switch
to
Form Design View.
-
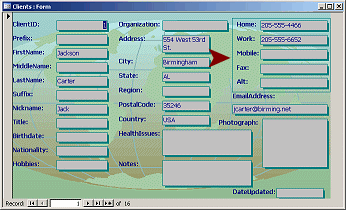 On
the Toolbox, click on the Rectangle button
 .
.
The mouse pointer changes to the Draw Rectangle shape .
.
-
Drag on the form to draw a rectangle around
all of the phone numbers.
-
Switch to Form View to see the effect
of your rectangle. (It is hard to even see it in Design View!)
-
 Save
the form. (Clients)
Save As AutoFormat Style
Now that you have adjusted the spacing and changed
the fonts, it would be nice to be able to apply this style to other
forms.
-
 Switch to
Form Design View.
-
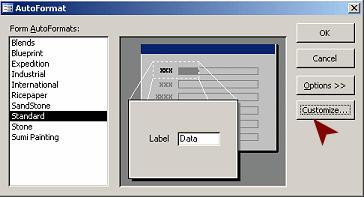
From the menu select |
The AutoFormat dialog opens.
-
Click on the Customize button.
The dialog Customize AutoFormat appears.
-
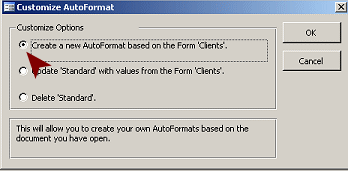 Click
on the first choice, Create a new AutoFormat based on the Form
'Clients'
-
Click on OK.
A new dialog appears for you to name the new AutoFormat.
-
 Add
your initials to the suggested name, like
International-xxx.
-
Click on OK.
Your new style is listed in the AutoFormat dialog. You will use it
later.
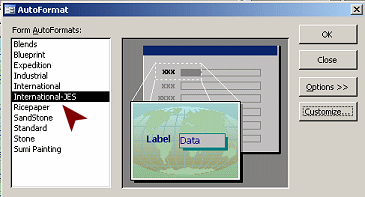
 If you are sharing your
computer with other students who are doing these lessons, you may see
the styles that they created.
-
Click on Close to close the dialog.
Apply Custom AutoFormat
Now that you have a customized AutoFormat style, you can apply it to
other forms. That's one way to find out what formatting choices were
actually saved.
- Open the previously created form named
Staff-format single.
You created this form with the Form Wizard and then formatted some
controls yourself.

-
 Switch
to
Form Design View, if necessary.
Be sure not to select any of the controls. You want to apply an
AutoFormat to the whole form this time.
- From the menu select |
- Select your new style, International-xxx, where the
xxx stands for your own initials.
- Click on OK to apply the style.
You see a message box telling you that there is no information about how
to format the Form Header section. You did not have a form header in the
form that you used as the pattern for the AutoFormat style.

- Click on OK to close the message.
You get another message saying the same thing about the Form Footer.
- Click on OK.
Finally the formatting is applied to your form.
-
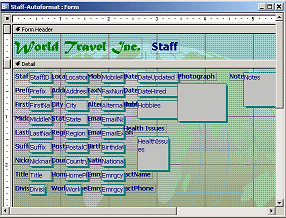 Inspect the form. What changed?
Humph! This did not work quite as well as you may have hoped.
The fonts
and font sizes were applied, but the spacing was not changed and the
controls and labels did not change size. This looks like it will take a
good deal of work to straighten out. Not now.
-
 Save
the form as Staff-Autoformat.
We won't take the time right now to straighten out the layout.
- Leave the form open.
Form Header/Footer
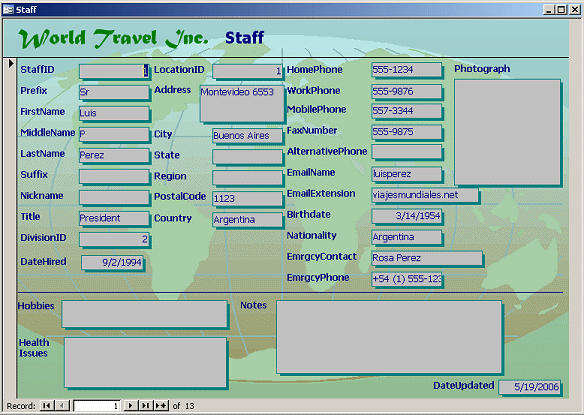
You can copy the form header from the Staff-Autoformat form
and then edit it.
-
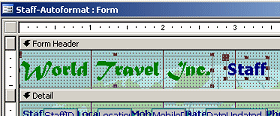 In
the Form Design View of the Staff-Autoformat
form, click on the unbound control World Travel
Inc.
In
the Form Design View of the Staff-Autoformat
form, click on the unbound control World Travel
Inc.
-
Hold the SHIFT key down and click on the
unbound control Staff.
Both controls are now selected.
- Copy.
- Switch back to the Clients
form in Form Design View.
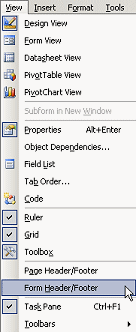 From
the menu select |
Two new blank sections appear, at the top and bottom of the form.
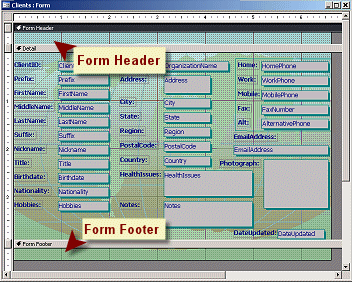
- Click on the Form Header bar to select the section.
The Form Header bar turns black.
- Paste.
The two controls that you copied appear in the Header section.
The section automatically enlarged to hold the controls.
- Click on the Staff control and click again to go to Edit
mode.
- Edit the text to read Clients.
-
 Save
the form as Clients-header.
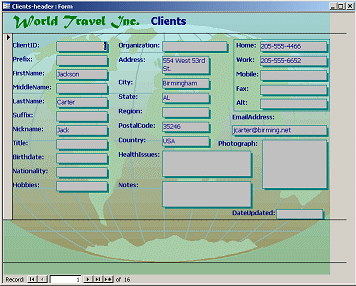
- Switch to Form View to see how your changes look.
The form looks a lot better! If your Design window was sized like mine,
to show the whole form, then in Form View there is a lot of extra space
at the bottom. In the next lesson we will investigate why.
Apply Your Skills: Revise the Staff Form
You have a nice layout for the Clients form but the Staff form is still
squeezed together. It's time for you to apply the formatting skills you
have learned.
-
 Switch
to the Staff-Autoformat form in Form
Design View.
- Resize and move the controls in the Detail section to
approximate the illustration below:
- Most text controls should be 1" wide.
- Enlarge and rename as needed to match illustration.
- Resize the Photo control to be 1.5" x 1.5".
- Move the controls to positions shown in illustration
- Draw a line above Hobbies and Notes using the Line tool in the
Toolbox bar.
- Resize the form to be just large enough for the controls.
-
 Save
the revised form as Staff-formatted.
