Project 2: AutoTools
Templates

Did you want: Working with Words: Word 2007,2010,2013,2016 or español
Project 2: AutoTools |
Did you want: Working with Words: Word 2007,2010,2013,2016 or español | |||||
|
| ||||||
|
The most direct way is to open the saved letter and rewrite the parts that don't apply to the new letter. That method runs the risk of over-writing a letter that you meant to save. You can do better by creating your own template. Word protects templates so that you have to make an effort to mess one up. There are only two important things to do to create a template:
|
Project 2: Auto Tools Search Glossary |
Saving a Template
You must save your template to the right location for Word to find it. The default location varies with the version of Word and if your computer is set up to allow multiple users. Location 1: Templates folder When you choose Save As and pick the dot file type, the dialog display switches to the Templates folder, probably C:\Documents and Settings\[username]\Application Data\Microsoft\Templates. Your new template will be listed in the General category of templates. This is not the same Templates folder that contains the templates that come with Word. The default path for the folder with Word's own templates is C:\Program Files\Microsoft Office\Templates. If you save your file as a template to this folder or one of its subfolders, Letters & Faxes, for example, then, when you choose | on the menu, the dialog box will list your template on the tab for that subfolder, along with the ones Word installed. Cool! It will even appear in a drop list of page designs in a wizard that looks at that folder for designs. If you create your own subfolder inside the Templates folder, it will have its own tab. Better and better! Location 2: Your own location You don't have to use the Templates folder. You can set your own location with | | . Click on the Workgroup templates line and then the Modify button. Enter the path to the location you've chosen. Now, when the New dialog box appears, templates from this location will appear on the General tab. If you are on a network, your network administrator may be using this setting for sharing templates for the workgroup. You will have to find out if you have permission to save your own templates separately. To keep others from being able to change your templates requires that the administrator set up a folder for you with permissions set that allow only you to make changes. To Edit a Template
Start
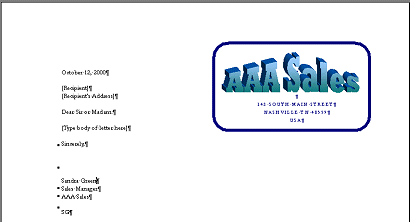
with: You will create a template using the document letter-AAA4.doc. To do this, you will remove text from the letter and substitute some temporary text. You will also need to change the Date to a field so it will update automatically whenever you use the template. Delete HeaderThe header was put in so you could turn in your print-out to your instructor. You probably don't want that in your template!
Insert Date FieldYou can easily insert a field that will automatically put the current date on your letter. If your computer does not keep time well, this might write the wrong date. On the other hand, if your computer is that far off, you've got a more important problem than this template!
Replace PartsNext you need to replace the letter's actual text with some temporary text that will remind you what information is needed in each spot.
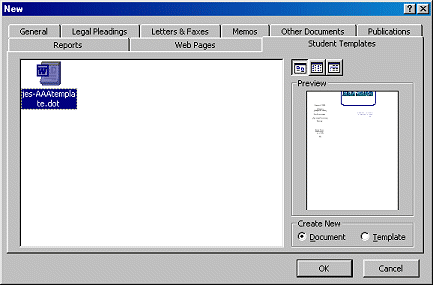
Save as TemplateTo see this document as a template in the New dialog, you must save it with the template file format and to a location that Word will look at.
Create new document from your template
| ||||||||||
|
~~ 1 Cor. 10:31 ...whatever you do, do it all for the glory of God. ~~ |
 Y
Y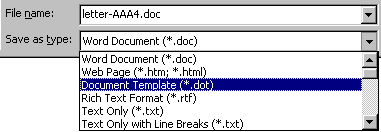 To save your template, choose
 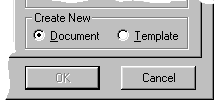 You can edit a template, even the ones that Word installs, or you can
use one as the basis for a new template. To change a template you must open it
as a document itself rather than use it to create a new document. Click
the Open button, switch the displayed folder to the Templates folder, select the
template you want, and click on OK to open it. Or use
You can edit a template, even the ones that Word installs, or you can
use one as the basis for a new template. To change a template you must open it
as a document itself rather than use it to create a new document. Click
the Open button, switch the displayed folder to the Templates folder, select the
template you want, and click on OK to open it. Or use