|
Features of Text Boxes
Link: One major advantage of putting text into text boxes is
that you can link text boxes together
to flow text from one part of a document to another. This what a
newspaper article does when it finishes several pages away from where it started.
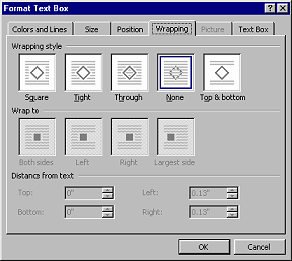
Wrap: Text boxes were formerly used in complex ways
to wrap text around graphics. But starting with Word 97, it's a lot
easier. The Format Text Box dialog lets you control wrapping in many
ways.
Format: Drawing bar tools can be used to format a text
box. You can rotate or flip text or add 3-D effects, shadows, borders,
colors, and fills.

Spell Check: Spell Check
normally will still see the text in a text box. When the text box is grouped with other drawing objects, Word may get
confused. Check your spelling and grammar early.
 |
Step-by-Step: Text Boxes |
|
|
What you will learn: |
to create a text box
to change the shape
of a text box
to edit a text box
to group a text box with an
image |
Start
with:  ,
letter-AAA3.doc ,
letter-AAA3.doc
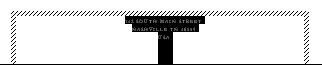
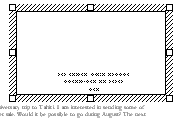
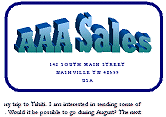
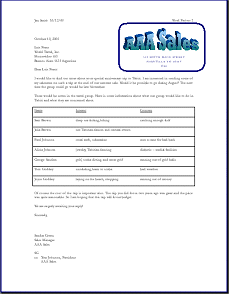
The AAA Sales logo looks a bit lonely. It needs an address to
keep it company. You will take the address that is at the bottom of the
letter and put it into a text box underneath the AAA Sales
logo.
Create Text Box
- On the Drawing toolbar click on
 the Text Box button. Your pointer changes to the Text Box button. Your pointer changes to
 the Precision Select shape. the Precision Select shape.
-
 Drag to create a text box around the WordArt logo that is
large enough to hold the logo and the address below it. Drag to create a text box around the WordArt logo that is
large enough to hold the logo and the address below it.
Your logo vanishes!! Not to worry. It is hidden by the opaque text box. You
will fix this shortly.
Add Text
-
 Select the address lines at the bottom of the page and cut
them. Select the address lines at the bottom of the page and cut
them.
-
 Paste
the text you cut into the text box you created. Paste
the text you cut into the text box you created.
-
Click in front of the first line of the address and press the ENTER key repeatedly to move the address down to the bottom of the text box.
Change Stacking Order
You need to put the text box behind the WordArt logo. You must change
the order of these drawing objects.
- If necessary, select the text box.
(Its borders can be wide diagonal lines or dots.)
- If necessary, open the Drawing toolbar by clicking the
 button.
-
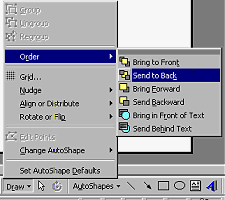 On the Drawing toolbar, select | | . This moves the
text box to the bottom of
the stack of objects underneath it. In this case the AAA logo is the only
object. On the Drawing toolbar, select | | . This moves the
text box to the bottom of
the stack of objects underneath it. In this case the AAA logo is the only
object.
 If you
positioned your text box correctly, you can now see both the address and the logo. If you
positioned your text box correctly, you can now see both the address and the logo.
-
Make adjustments if the address and logo don't seem in quite the right positions. Drag the
logo or the text box until you are satisfied. Be sure the pointer has changed to
the  Move shape or you will be resizing
instead of moving! Move shape or you will be resizing
instead of moving!
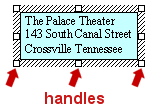
If the text box is not large enough, click on
its border to get handles and resize the box.
 To move WordArt, you must move
the pointer over one of the letters. To move WordArt, you must move
the pointer over one of the letters.
To move a text box, the pointer must
be over its border.
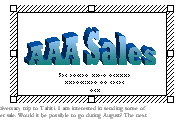
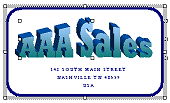
Format Text Box
- Click in the text box, but not on the logo, to select the text box.
-
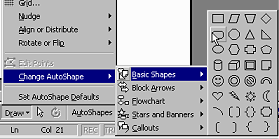 On the Drawing bar, select | | and choose the rounded rectangle shape. On the Drawing bar, select | | and choose the rounded rectangle shape.
-
 On the Drawing bar, change: On the Drawing bar, change:
 line color to Dark Blue line color to Dark Blue
 text color to Dark Blue
 line style to 4½ single
solid line line style to 4½ single
solid linePart of the address is now hidden
because of the wider line and the rounded shape around the text box. You can fix this by
deleting one or more of those blank lines you put in above the address.
Its a tiny bit trickier than it looks at first. Your mouse cannot get to
the lines underneath the logo so that you can delete one or
two. You could change the stacking order, but then you
couldn't see where the logo was to know when things were lining up right. There is an easier way to get underneath object.
-
If necessary, show marks by clicking the
 Show/Hide Marks
button. Show/Hide Marks
button.
-
Click
in the first line of the address. Use
the up arrow to move the cursor up to a line
underneath the AAA Sales logo.
-
 Press the DELETE key to remove the paragraph. Repeat if
necessary to move the full address into view. Press the DELETE key to remove the paragraph. Repeat if
necessary to move the full address into view.
-
Adjust the placement or size of text box if needed.
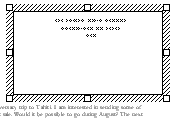
Group Objects
As a safety precaution, it is wise to group objects that should stay to together. That way you won't
accidentally mess up the arrangement you worked so hard to get just right.
-
 Select both the logo by clicking on one of its letters. Select both the logo by clicking on one of its letters.
Handles appear around the logo.
-
 Hold
down the SHIFT key and click on the border
of the
text box. Both the logo and
the text box are now selected. Handles show for both objects. Hold
down the SHIFT key and click on the border
of the
text box. Both the logo and
the text box are now selected. Handles show for both objects.
-
 From the Drawing bar, select | From the Drawing bar, select |
This merges the two objects. Now they are treated
as one object and can be moved together without changing their
relationship to each other.
Handles appear only for the combined object. The
heavy selection border for the text box does not appear for the new
group.
Later you can ungroup a
group with
| . If
you have ungrouped, you can get your group back without having to click
on each object again. (A great idea!) Use |
.
- Save as letter-AAA4.doc in the word project2 folder of your Class disk.
 How to handle a full disk
Header vs. Drawing object
- Add a header (Double-click in the header! This only
works after a header has been created, but the Letter Wizard did that
for you unless you erased it.)
-
Type your name, 2 spaces, the date, tab twice, and
Word Project 2 .
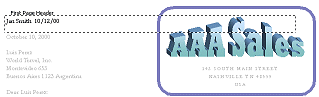
Notice that the AAA logo is very close to or is overlapping the header area and blocks the text you typed on the right.
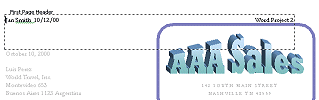
-
 Enlarge
the margin by dragging the
boundary between the white and gray
parts of the vertical ruler down just a little. The letter text and the logo move down as you enlarge the margin. Keep dragging until the header text is entirely visible. Enlarge
the margin by dragging the
boundary between the white and gray
parts of the vertical ruler down just a little. The letter text and the logo move down as you enlarge the margin. Keep dragging until the header text is entirely visible.
- Close the Header/Footer bar.
Preview & Print
The whole signature block will
move to a second page together if there is not room for it.
-
 View your letter in Print Preview. It should be one page long. View your letter in Print Preview. It should be one page long.
 Letter is longer than one page: Letter is longer than one page:
Delete any blank lines at the end of the letter. If necessary, make changes to the margin widths in Page Setup to fit the letter onto one
page. Perhaps you got the top margin TOO tall.
- Save. [ letter-AAA4.doc]
How to handle a full disk
 If all is correct, print. If all is correct, print.
- When your printout is done and you have verified that it is
correct, close the
document window.
Congratulations on using a wizard and
making
a logo!
|

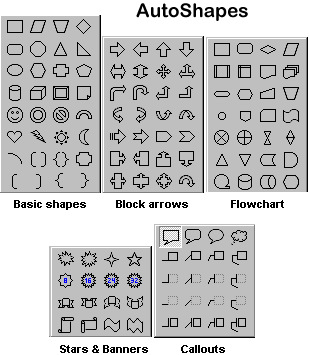
 Text boxes come in a large number of shapes called