Project 1: Word Basics
Formatting Bar

Did you want: Working with Words: Word 2007,2010,2013,2016 or español
Project 1: Word Basics
|
Did you want: Working with Words: Word 2007,2010,2013,2016 or español | |||||
|
|
||||||
|
One of the greatest advantages of computer word processing is the ability to change the format of your text and document at any time. The Formatting Bar contains buttons and drop lists for the things people change the most about the look of their text, like its color, size, and font. There are so many choices!
Formatting Bar- floating Word gives you some more help with styles and templates . It is much easier to keep the look of a long document or a set of documents the same if you use the same styles or template. You can also change the look easily by changing the underlying style or template. |
Project 1: Word Basics Search Glossary |
||||||
|

| |
|
|
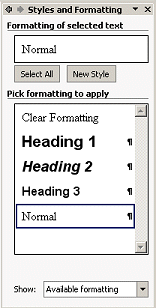
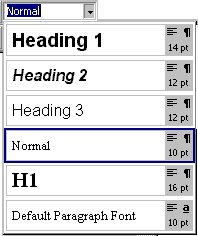
Displays the styles available in the current template. (See the illustration above under topic Style of the list of default styles.) A style is applied by first selecting the text, or being in the particular paragraph, and then selecting the style desired from the drop list. You can also create your own styles. The longer the document, the more useful styles become. Change a style's definition and everything in the document that used that style changes also. Super cool! |
|
To apply a font to text, you select the text and then select the font you want from the list. The default font is Times New Roman. The symbol
|
|
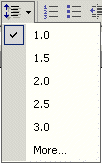
Displays a list of font sizes from 8 to 72 points. You can type in the box for other sizes. The default size is 10 pt. Maximum size is 1637 pt. (Think you'll need to get bigger than that?!) To change the font size of text you
select the text and then select, or type in, the desired font size. (If
you type, press enter to apply the size.) If you change the size or font
first and then type, only new text is affected.
|
|
|
Set font styles. (Yes, there are lots of different "styles" involved in word processing, and, yes, it would be nice to have different words for some of them!) These buttons toggle their styles on and off. You can even have all of them on at the same time.
|
|
Sets the way your paragraphs line up on the page, that is, the way they are justified. Your choices are Align Left, Center, Align Right, and Justify . The lines on each button shows what the effect of that button is. For Justify, spacing between words must change to get both the left and right margins even. This can be unattractive unless you have long paragraphs.
|
|
|
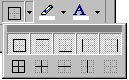
Create lists that are automatically numbered or bulleted. These buttons apply the default styles, as shown on the buttons themselves, only until you have used a different style of numbering or of bullets. Then they apply the most recently used style. To use a style besides the default, use the menu | . Several standard formats are available from the dialog box, or you can create one of your own.
|
|
Decrease or increase the indention of the selected paragraph(s) by one tab stop per click. (Tab stops are explained under Ruler.)
These buttons use the default tab stops as well as the ones you create. A
bit confusing when you don't expect this behavior. |
|
[In Word 95 a similar button opened a Borders
toolbar.]
|
|
[In Word 95 a similar button requires that you drag to see all the color choices.]
|
|
|
|
Removing All Formatting
|
~~ 1 Cor. 10:31 ...whatever you do, do it all for the glory of God. ~~ |

 Style
Style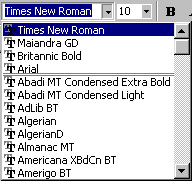 Displays a list of all the fonts installed on your computer. (A font is installed when it is in the Fonts folder inside the Windows folder). At the top of the list are the
most recently used fonts.
Displays a list of all the fonts installed on your computer. (A font is installed when it is in the Fonts folder inside the Windows folder). At the top of the list are the
most recently used fonts. 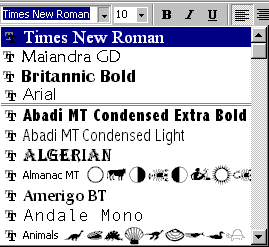
 Toggles the displayed border
type on and off for the selected item. The arrow opens a drop list of edges to choose from.
Toggles the displayed border
type on and off for the selected item. The arrow opens a drop list of edges to choose from.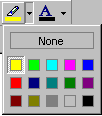 Does what any good highlighter does. It applies a color over your text. This is often used when marking up documents for others to review or to show where you made changes. Dark colors are good only if the text is a light color. The arrow drops a palette of colors to choose from, including None. A tool tip for each colored square shows the color's name.
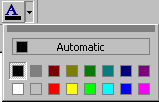 Sets the
color of the selected text to the color of the bar under the A. The arrow drops a palette of colors to choose from. This palette can be dragged to float. A tool tip for each colored square shows the color's name.
Sets the
color of the selected text to the color of the bar under the A. The arrow drops a palette of colors to choose from. This palette can be dragged to float. A tool tip for each colored square shows the color's name.