PowerPoint Basics:
Master View

Did you want: Working with Presentations: PowerPoint 2007,2010,2013,2016 or español
PowerPoint Basics:
|

|
|||||
|
Did you want: Working with Presentations: PowerPoint 2007,2010,2013,2016 or español |
||||||
|
The way your slides and print-outs look is largely based on your Masters. A Master controls the default look of slides and print-outs. A Master slide can also define default transitions between slides and text animations. Changing the formatting on the Master, changes all the slides or pages that use that Master. Cool trick! The Masters perform the same function as using styles in Word and Excel.
Example: Slide Master |
Project 1: PowerPoint Basics Project 2: PowerPoint Formatting Project 3: Advanced PowerPoint |
|||||||||||||||||
Available MastersThere are 4 different Masters:
Why use a Master?Consistency! By using a Master, you can easily keep important features of your slides and handouts the same - logo always in the same spot, titles and text line up neatly, same background, same fonts, same animations and transitions. Of course, you can change an individual slide when the defaults don't work well for that slide.
What can you control with a Master?
What is a placeholder?A placeholder is a text box that PowerPoint uses when creating the outline for the presentation. PowerPoint has a set of default placeholders. You cannot add to the list. You cannot change a normal text box into a placeholder.
|
||||||||||||||||||
|
|
Step-by-Step:Master View |
|
What you will learn: |
to switch to Master view to view Slide Master and Title Master to view Handout Master to view Notes Master |
Start with:![]() ,
issues.ppt
from your Class disk
,
issues.ppt
from your Class disk
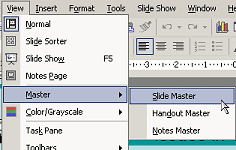 From the menu select
||
.
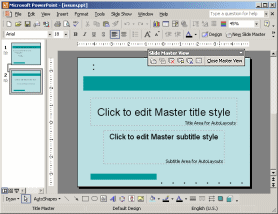 The Title Master shows in the Slide Pane and thumbnails show at the left
for the Title and Slide masters. A new toolbar for Masters floats over the
window.
![]()
PowerPoint 2002 and 2003 use the Navigation pane to show thumbnails of the various Slide and Title masters used in the presentation. Earlier versions don't allow multiple masters, so would be nothing much to show.
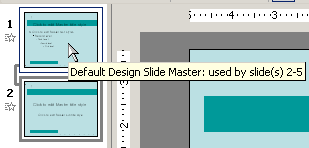 Move your mouse over the first thumbnail at the left
and let it hover a moment. A popup tip
tells you which Master this is and what slides actually use it. Cool!
 ![]() When
you make changes to a Master, check the slides listed in the popup
tip to be sure your changes are happy ones.
When
you make changes to a Master, check the slides listed in the popup
tip to be sure your changes are happy ones.
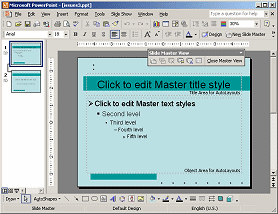 Click on the first
thumbnail. The Slide Master appears.
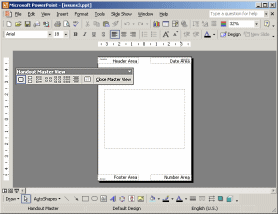 From
the menu select | |. The Handout Master appears with
a new floating toolbar.
![]()
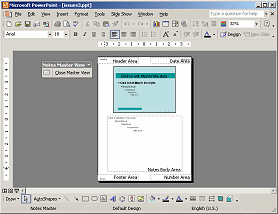 From
the menu select | |. The
Notes Master appears with yet another new floating toolbar. At least this
one is short!
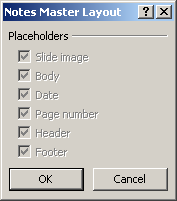 A dialog
appears listing the placeholders that can appear on this Master. All are
gray! What's with that??
A dialog
appears listing the placeholders that can appear on this Master. All are
gray! What's with that??Other Masters also have a Master Layout button with a list of placeholders
available for that Master.
|
Teachers: Request permission to use this site with your class Copyright © 1997-2012 Jan Smith <jegs1@jegsworks.com>All Rights Reserved |
~~ 1 Cor. 10:31 ...whatever you do, do it all for the glory of God. ~~
Last updated: 30 Apr 2012